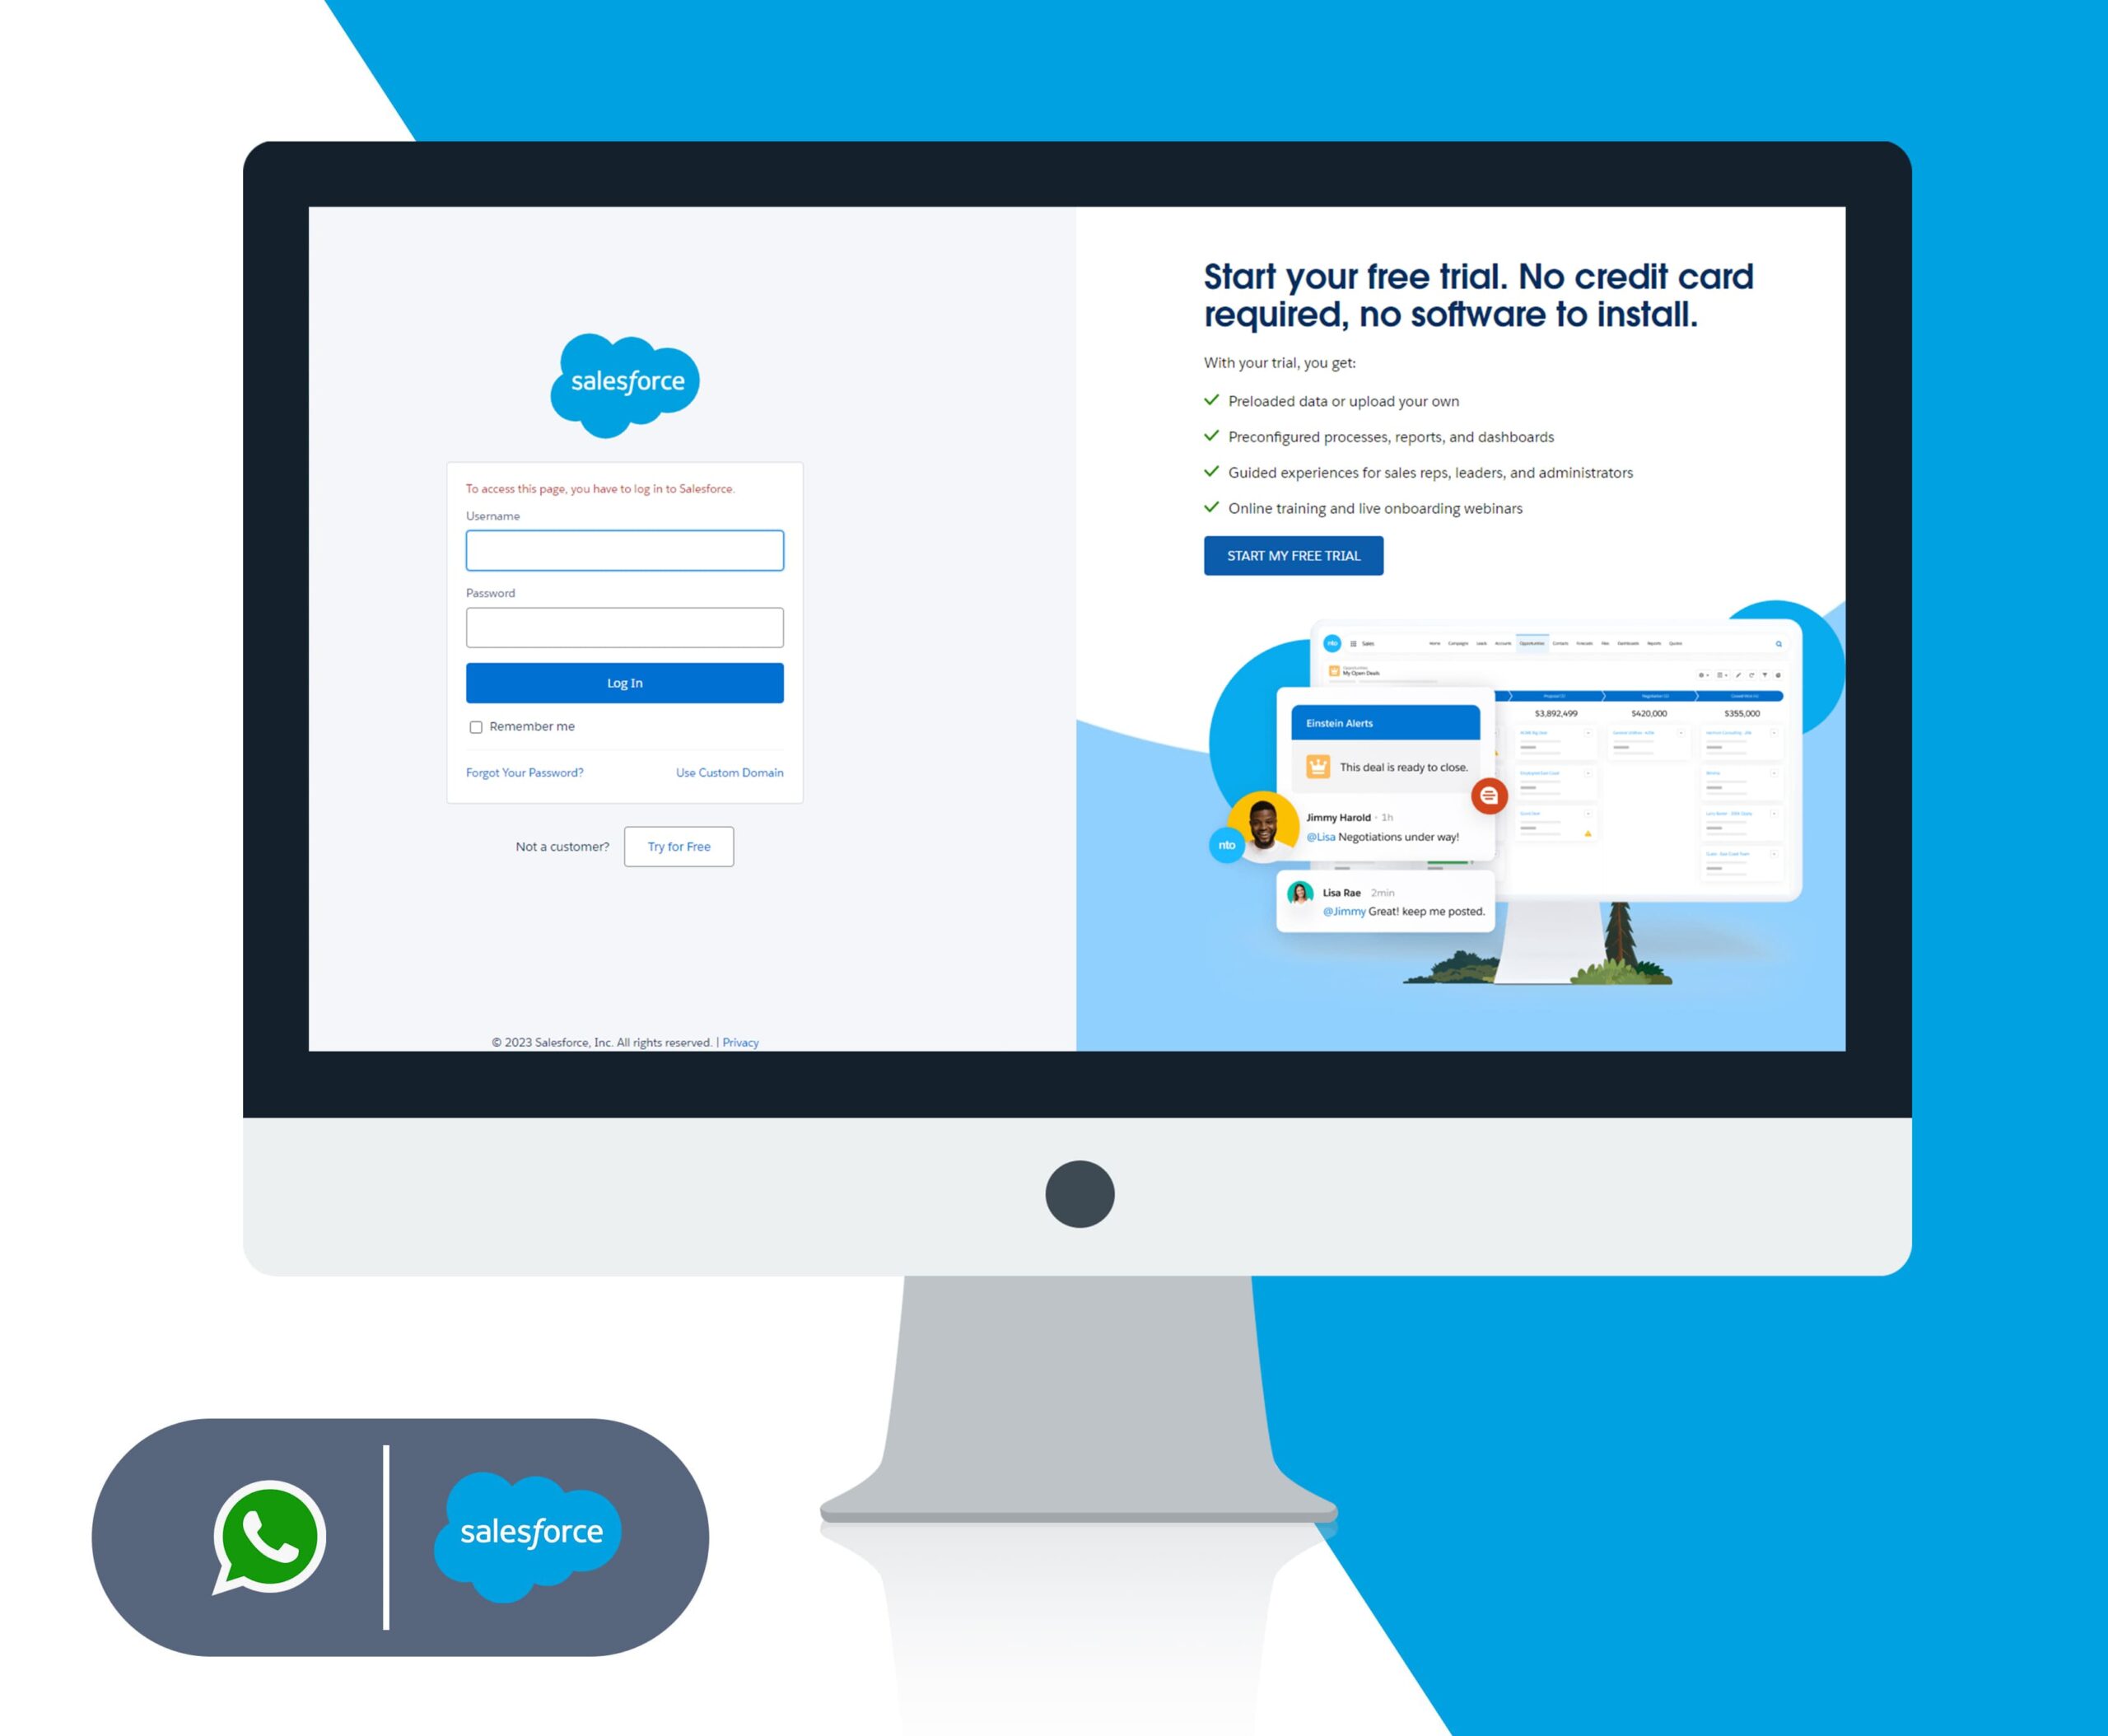
Enter the org details in which the application is to be installed with the given link
Whatsapp Business Advanced - Help Guide
Installation :
App Link :
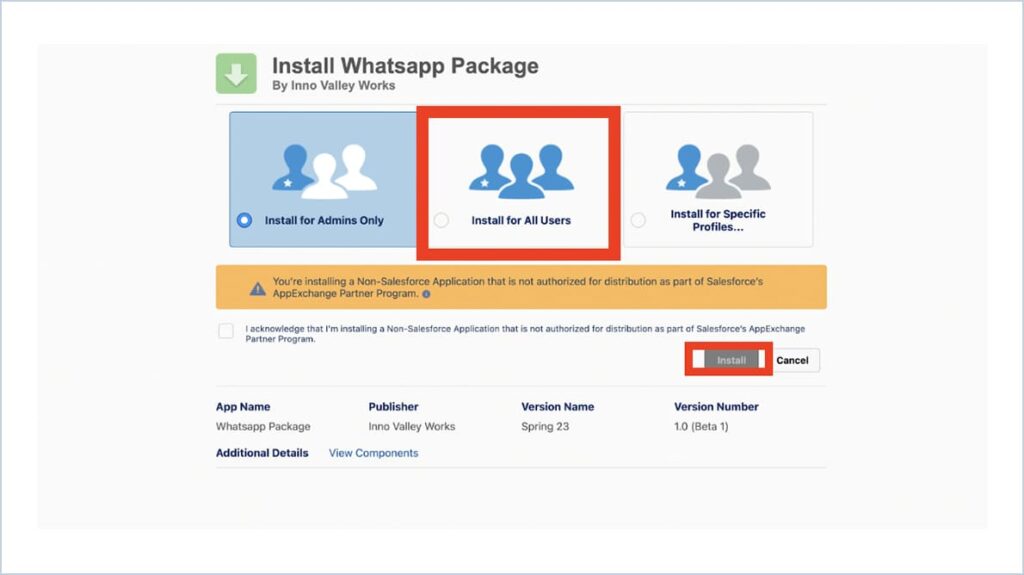
Choose Install for All Users and acknowledge by checking the checkbox
click Install Button
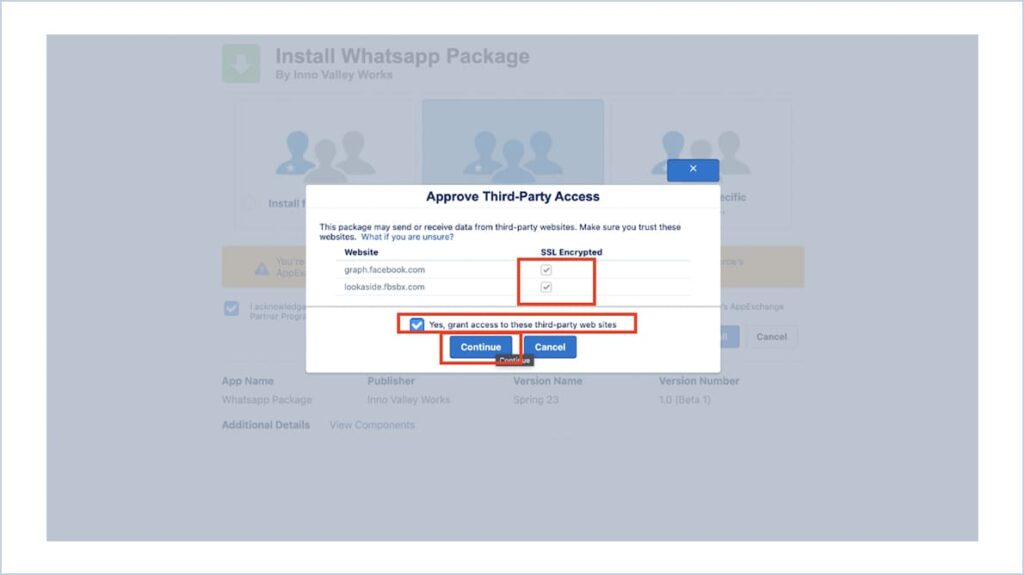
Check the check boxes below SSL Encrypted.
Check the access checkbox and click Continue
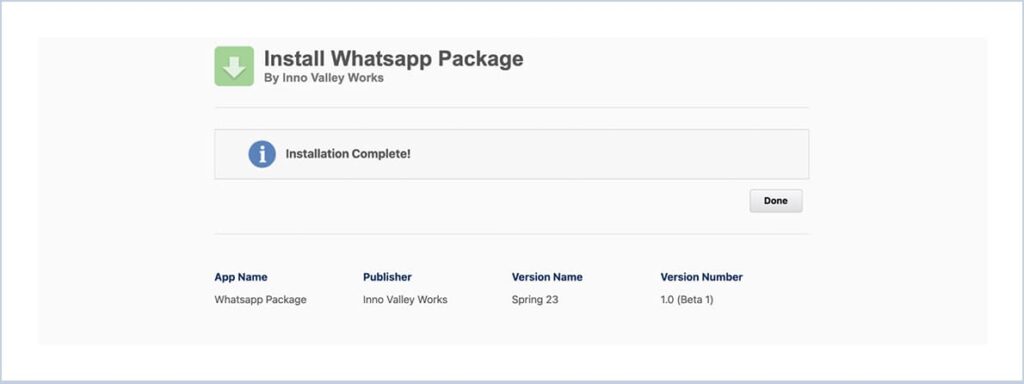
Once the installation is complete Click Done
1. Create Phone Code Prefix field and Whatsapp Opt out field in Respective custom object (Create Only for Pure Custom Object)
2. If Customer is using phone field with special characters Create a new Formula field like WA Formatted Phone
{ Formula :
| SUBSTITUTE(SUBSTITUTE(SUBSTITUTE(SUBSTITUTE(SUBSTITUTE(Phone, ‘(‘, ”), ‘)’, ”), ‘-‘, ”), ‘+’, ”), ‘ ‘, ”) } |
Click on Manage Records near WhatsApp Business URL
Creating Records in Custom Meta Data :
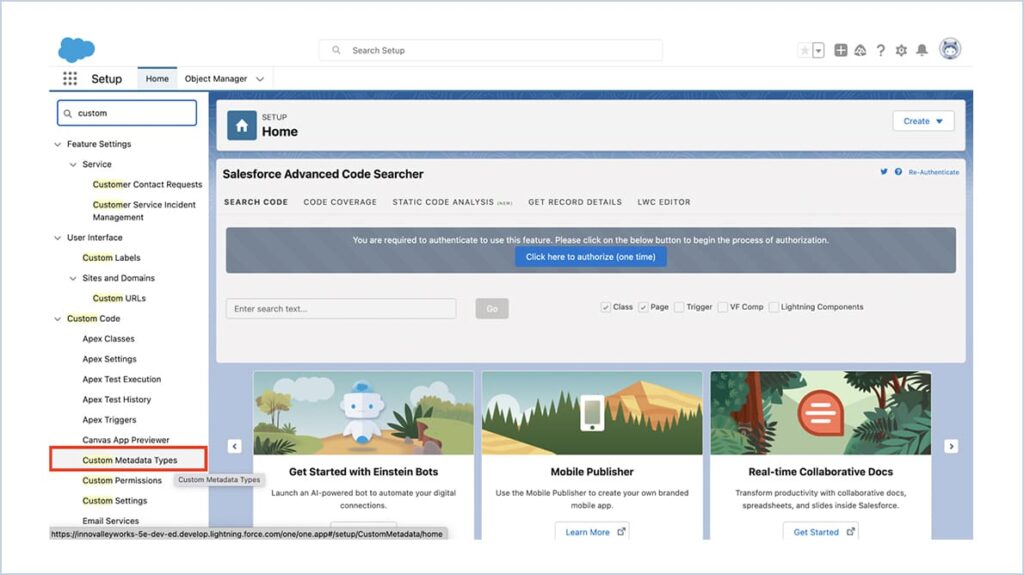
Go to Setup. Search Custom Metadata Types in Quick Find Box and click on that
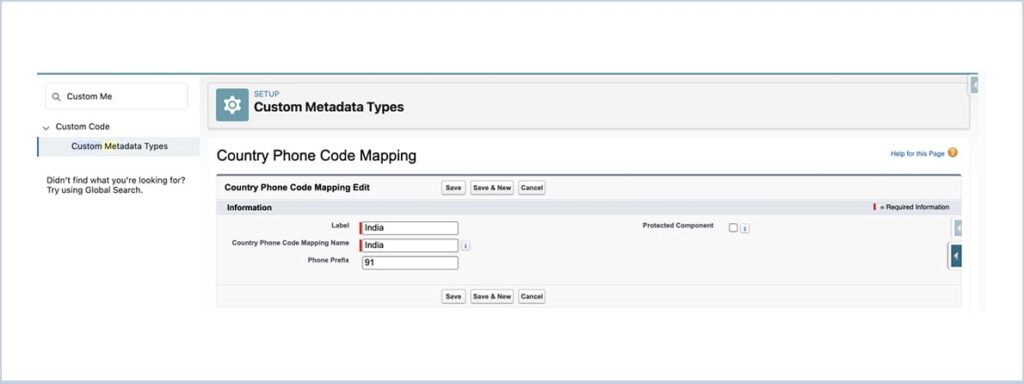
Click on Manage Records near Country Phone Code Mapping
Click New Button
Label – Enter the Country Name
Phone Prefix – Phone code prefix of respective country
Click Save
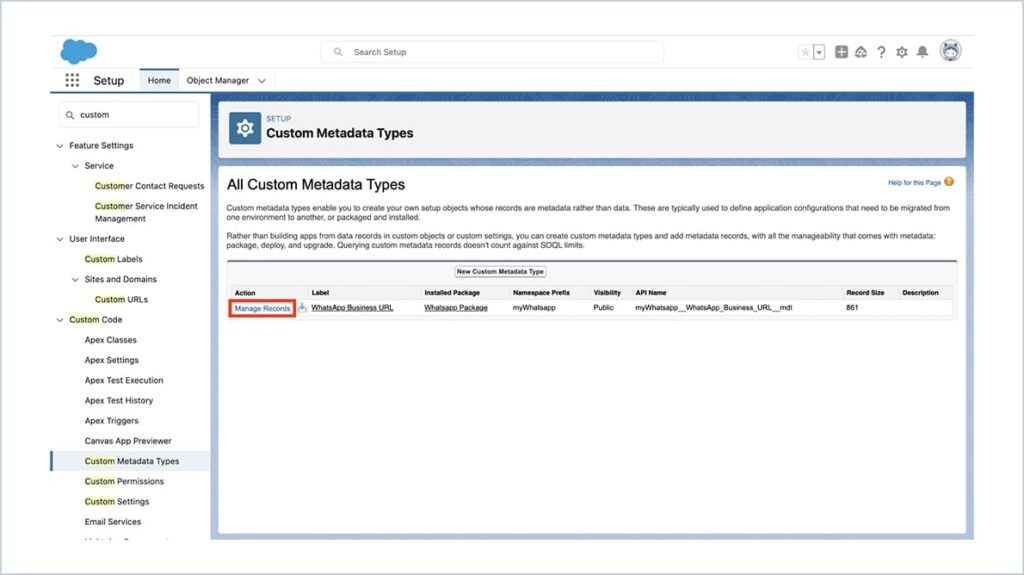
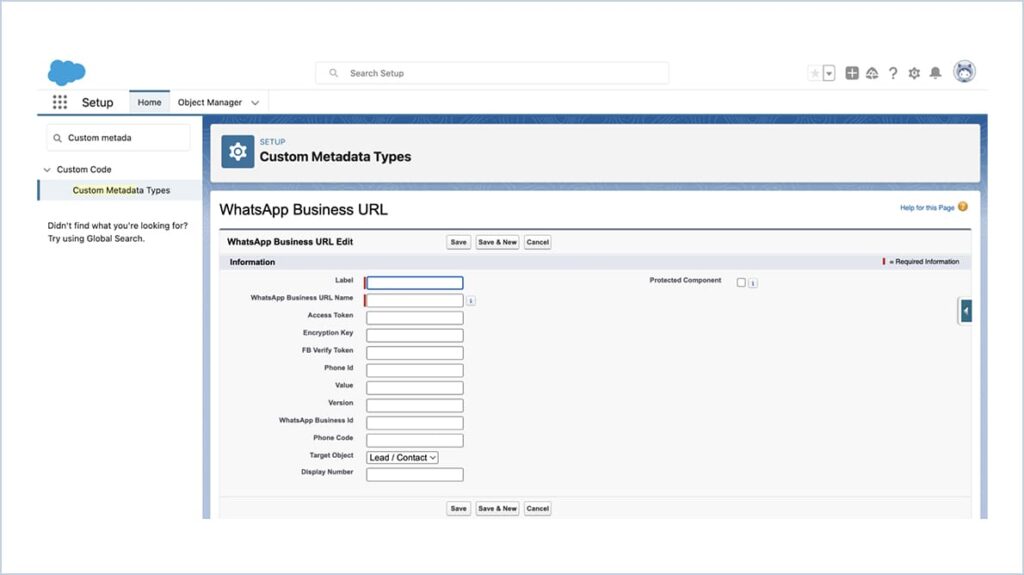
Click on Manage Records near WhatsApp Business URL
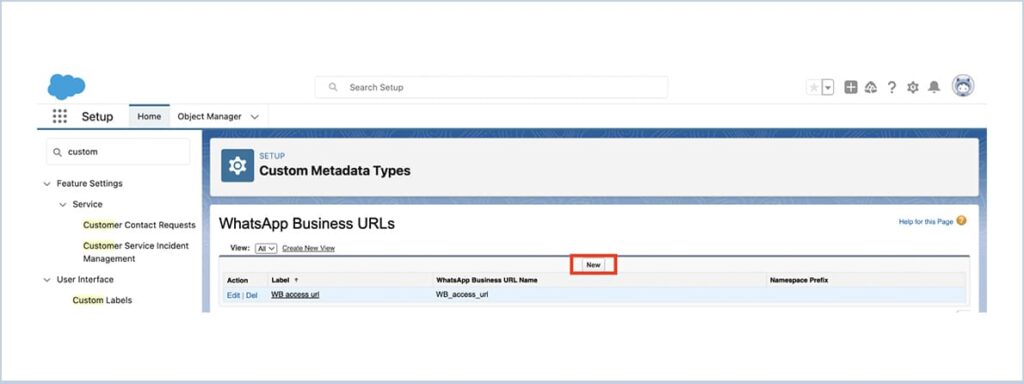
Click New button
- Label – Lead / Contact
- WhatsApp Business URL Name – Gets pre populated automatically
- Access Token – Permanent access token generated from Meta
- Encryption Key – ****************
- FB Verify Token – Token used while verifying Webhook
- Phone Id – Phone Number Id From Meta
- Value – graph.facebook.com
- Version – v15.0
- WhatsApp Business Id – WhatsApp Business Account Id from Meta
- Phone Code – +1(For US Phone Numbers)
- Target Object – Choose the Target Object as Lead / Contact
- Display Number – From Number in Meta
- Formatted Phone Field – If Customer is using phone field with special characters then enter the API Name of Created Formatted Phone Field or use Phone field API
Click Save & New button
- Label – Case
- WhatsApp Business URL Name – Gets pre populated automatically
- Access Token – Permanent access token generated from Meta
- Encryption Key – ****************
- FB Verify Token – Token used while verifying Webhook
- Phone Id – Phone Number Id From Meta
- Value – graph.facebook.com
- Version – v15.0
- WhatsApp Business Id – WhatsApp Business Account Id from Meta
- Phone Code – +1(For US Phone Numbers)
- Target Object – Choose the Target Object as Case
- Display Number – From Number in Meta
- Formatted Phone Field – If Customer is using phone field with special characters then enter the API Name of Created Formatted Phone Field or use Phone field API
Click Save Button
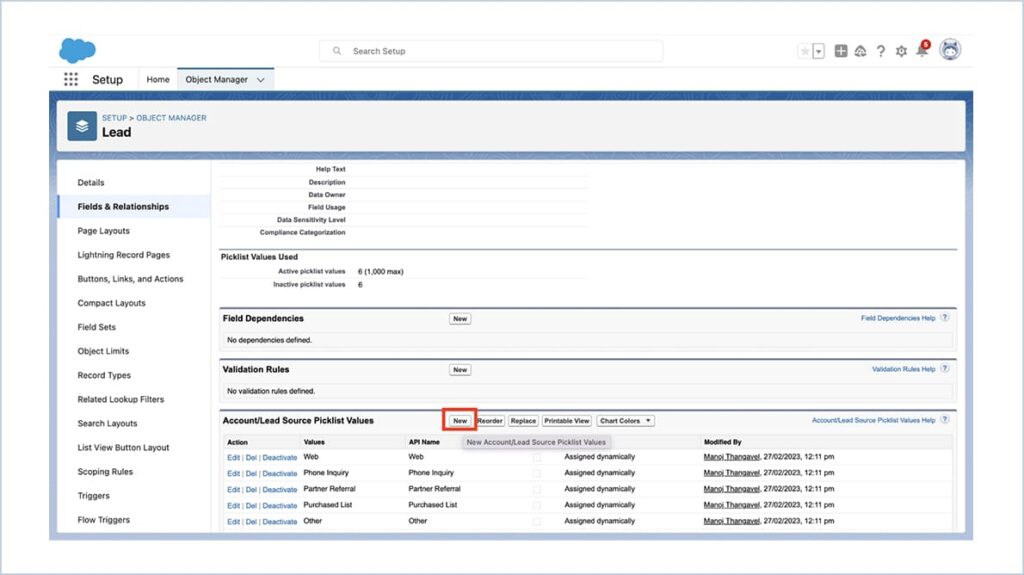
Picklist Values for Lead & Case :
Go to setup → Object Manager → Lead → Fields & Relationships → Lead source
Under Account/Lead Source Picklist Values Section, Click the New Button
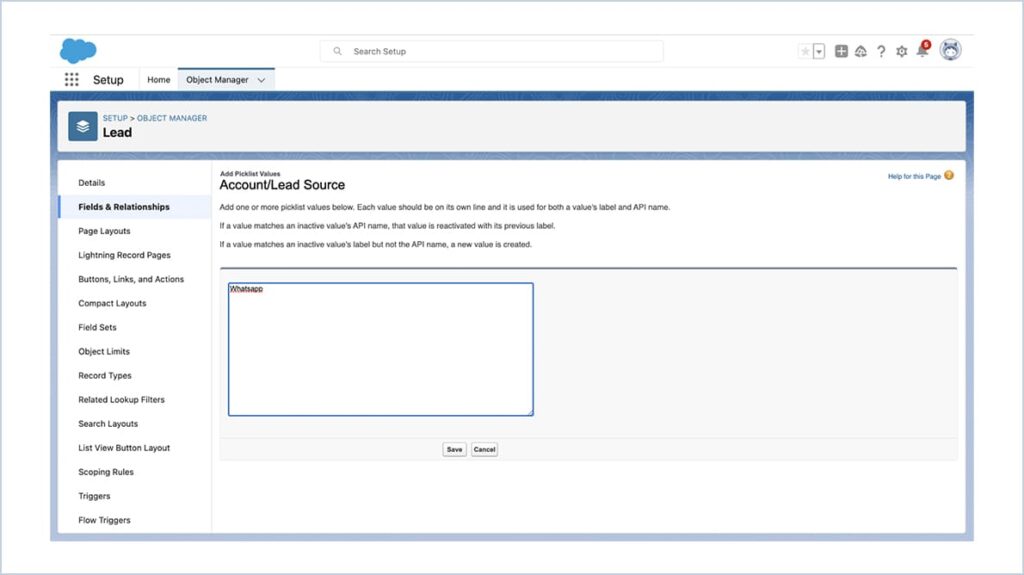
Enter Value as Whatsapp and Click Save
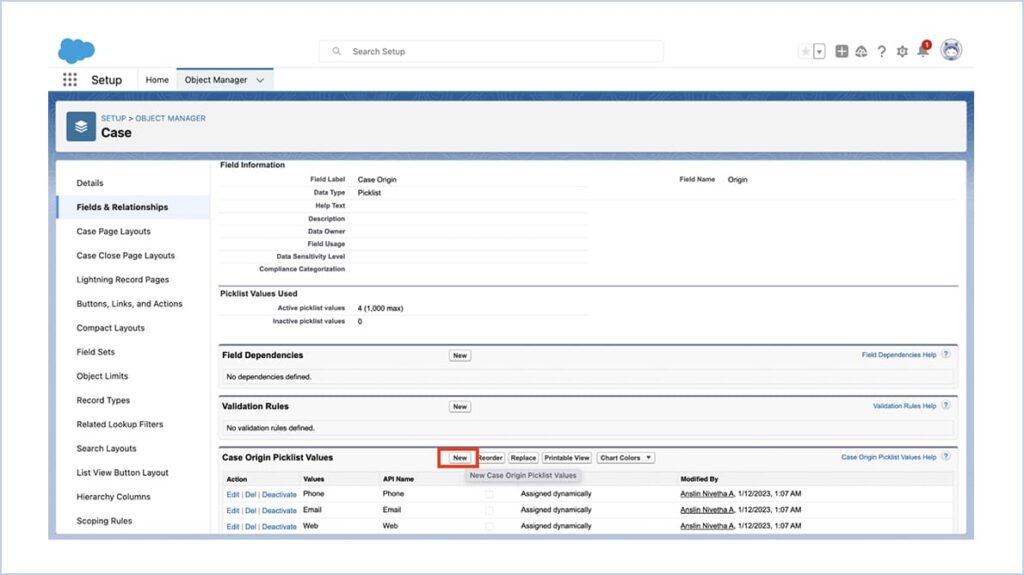
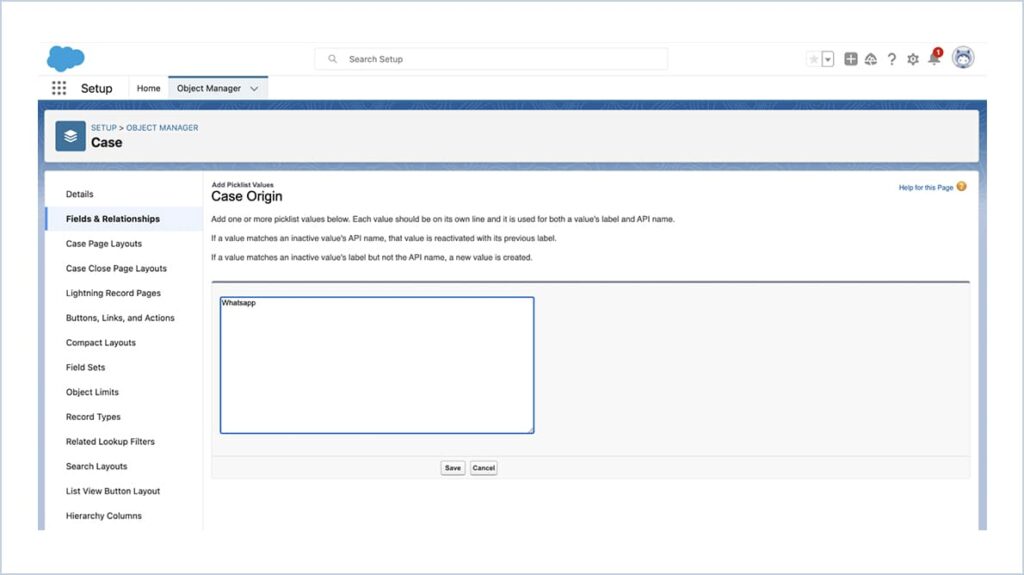
Go to setup → Object Manager → Case → Fields & Relationships → Origin
Under Case Origin Picklist Values section Click the New Button
Enter Value as Whatsapp and Click Save
Component Placement :
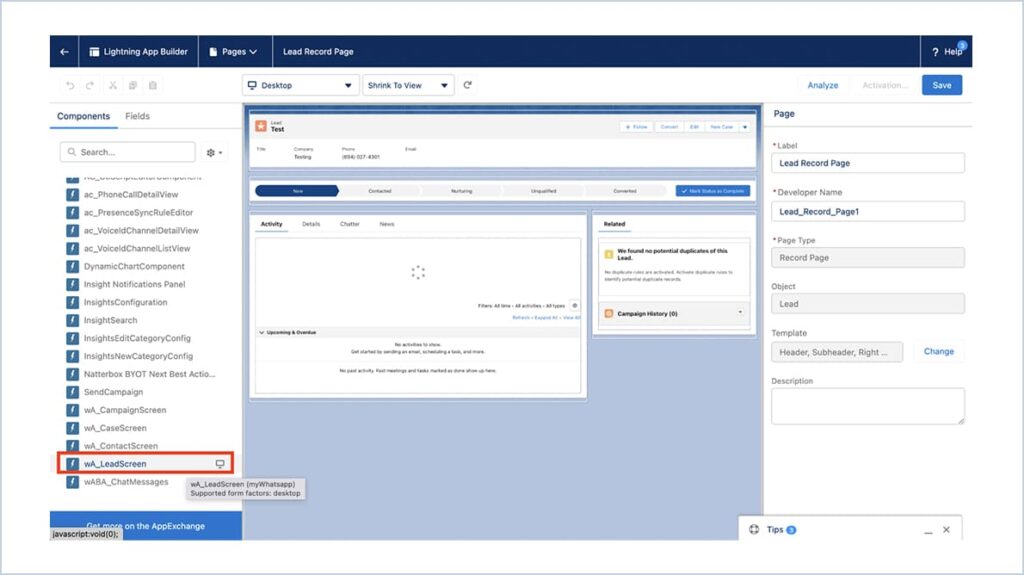
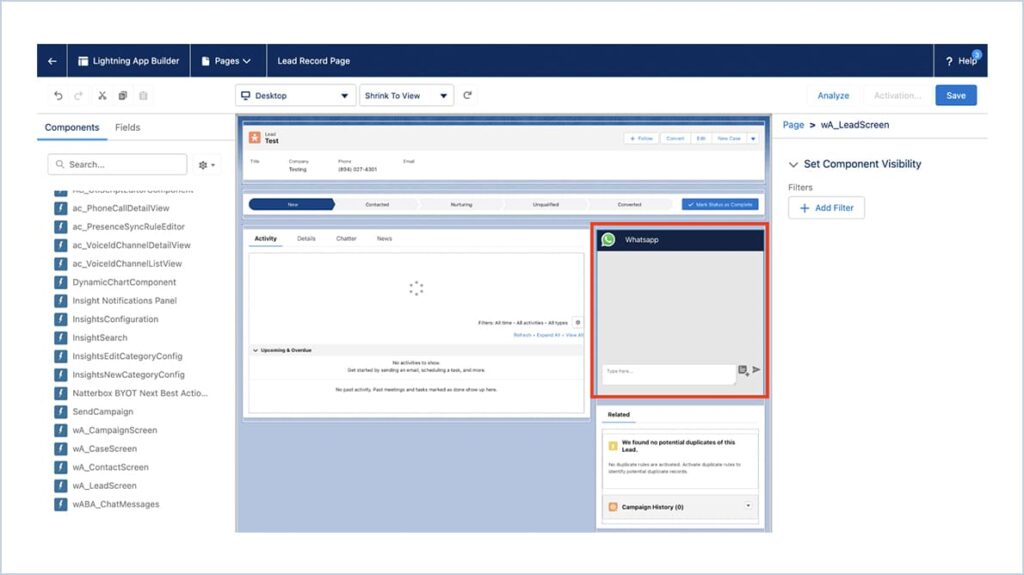
Lead Page :
Go to Leads tab
Select a Lead Record and give edit page
Drag & drop the wA_LeadScreen from components to the page and click Save
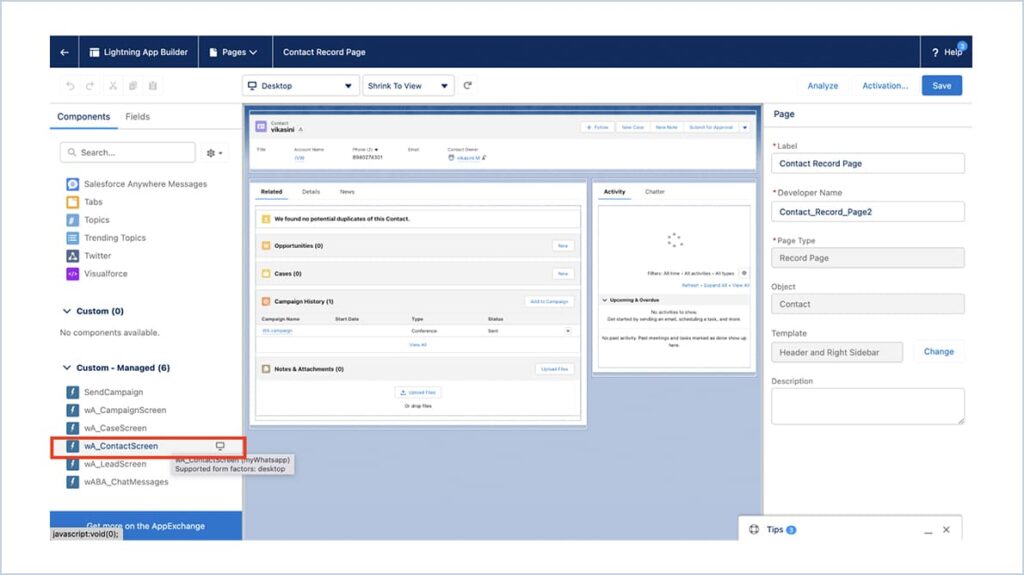
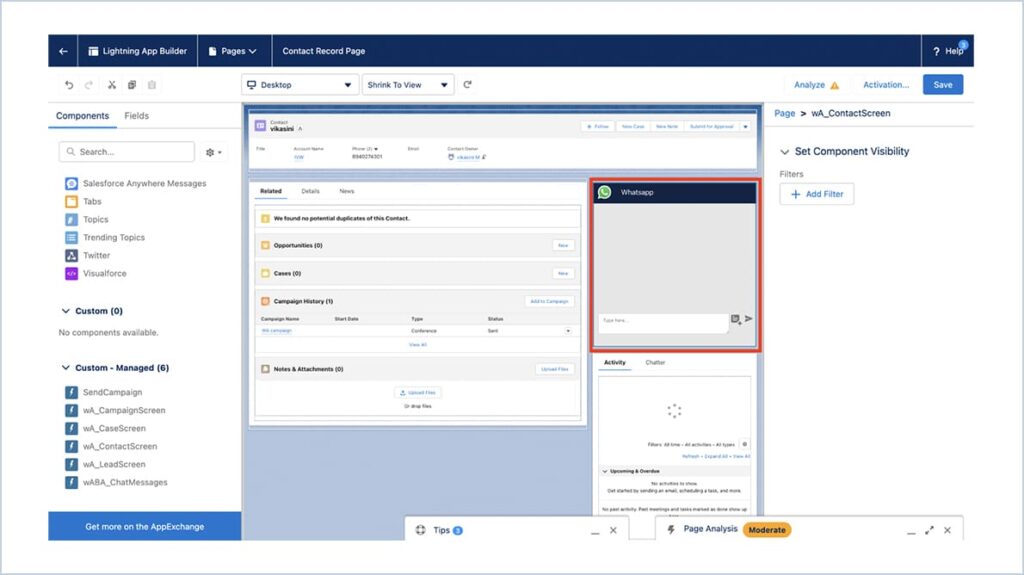
Contact Page :
Go to Contacts tab
Select a contact Record and give edit page
Drag & drop the wA_ContactScreen from components to the page and click Save
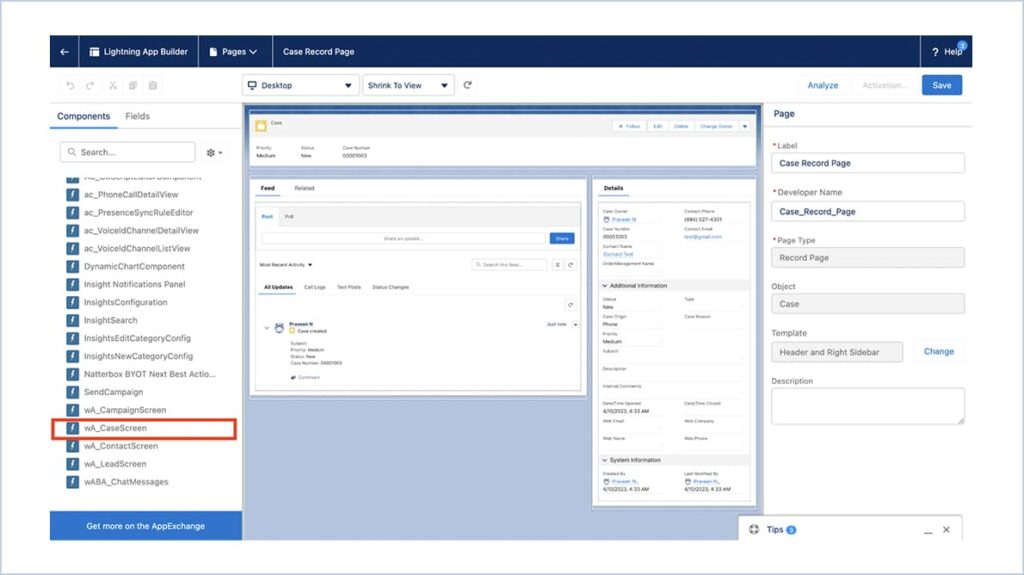
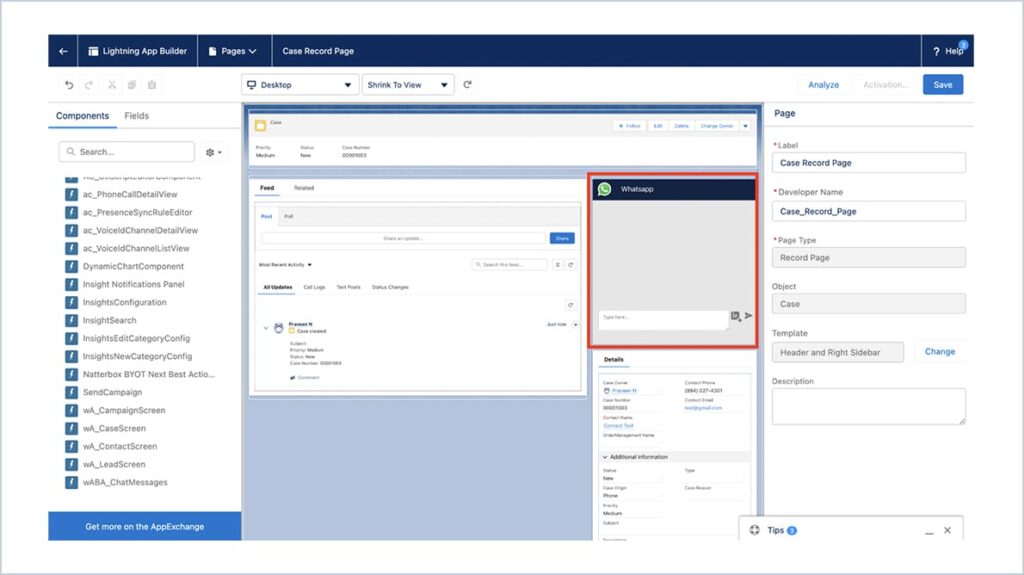
Case Page :
Go to Cases tab
Select a case Record and give edit page
Drag & drop the wA_CaseScreen from components to the page and click Save
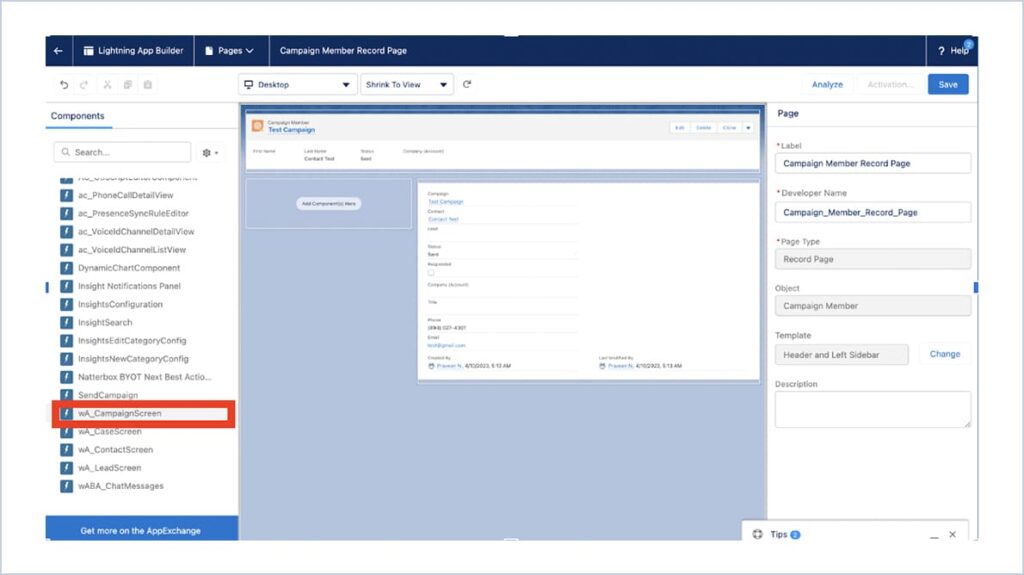
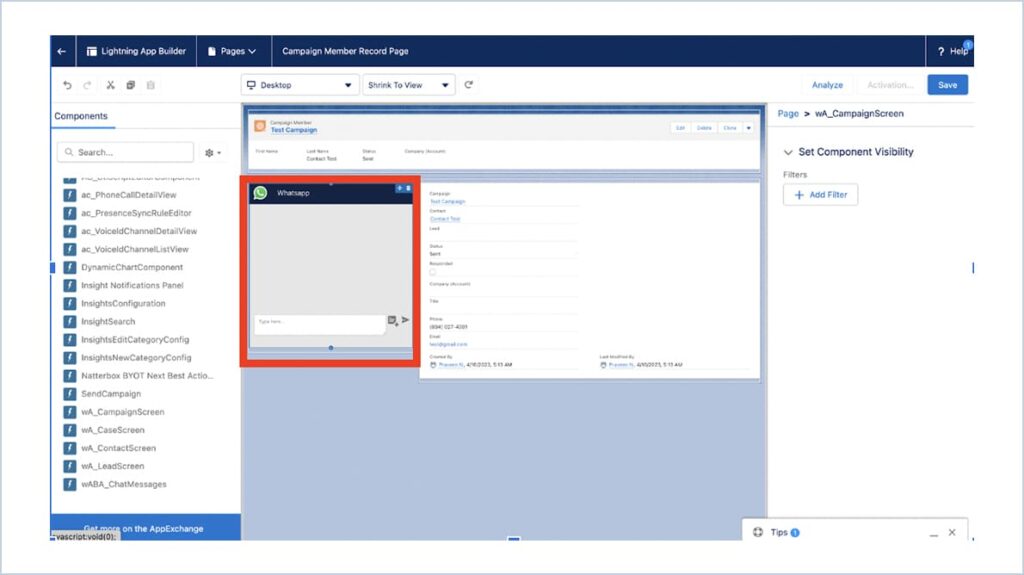
Campaign Member Page :
Go to Campaigns tab
Select a campaign Member Record and give edit page
Drag & drop the wA_CampaignScreen from components to the page and click Save
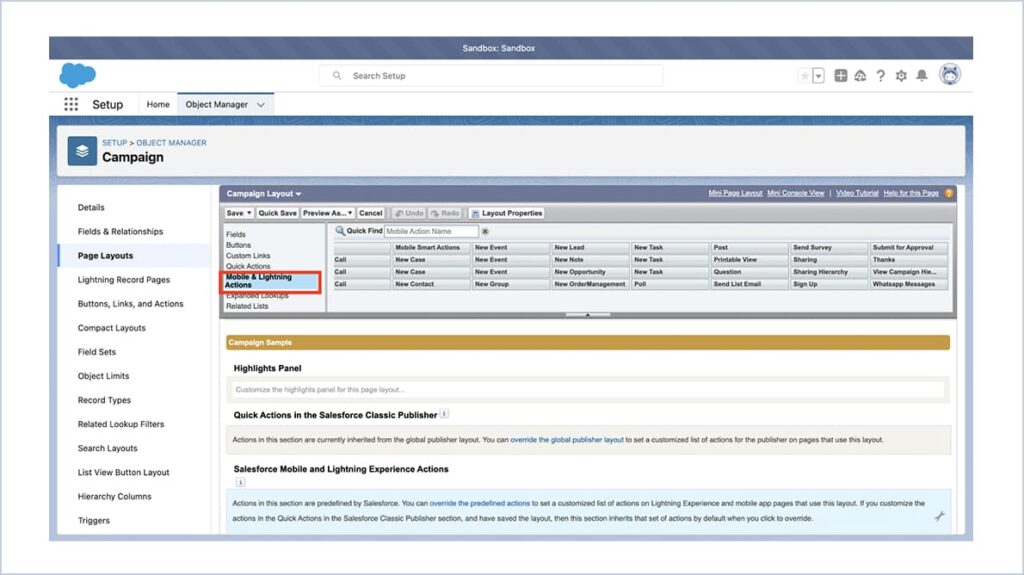
Object Manager → Campaign → Page Layouts
Click Campaign Layout → Mobile & Lightning Actions
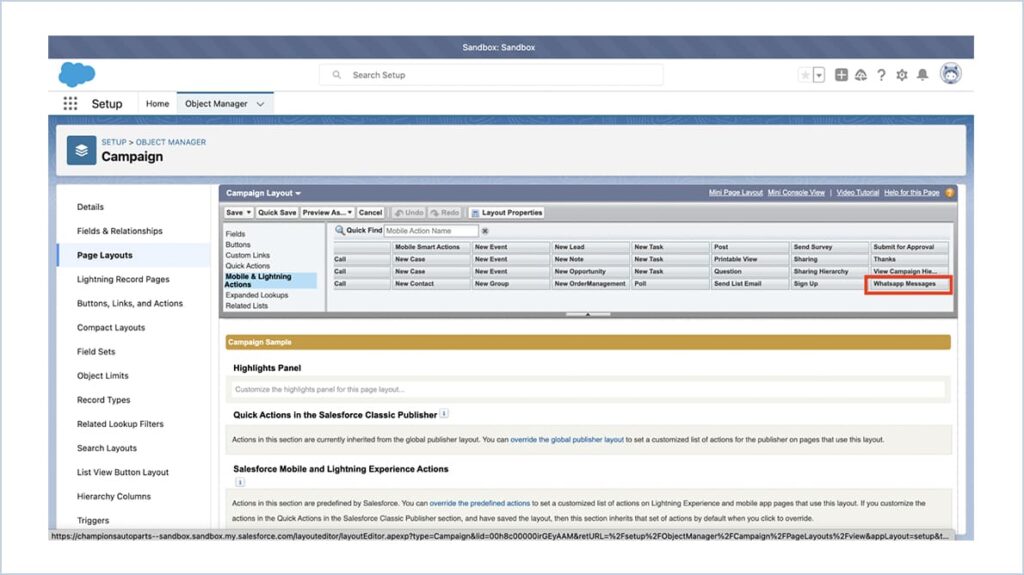
Drag and drop the Whatsapp Messages button under Salesforce Mobile & Lightning Experience Actions
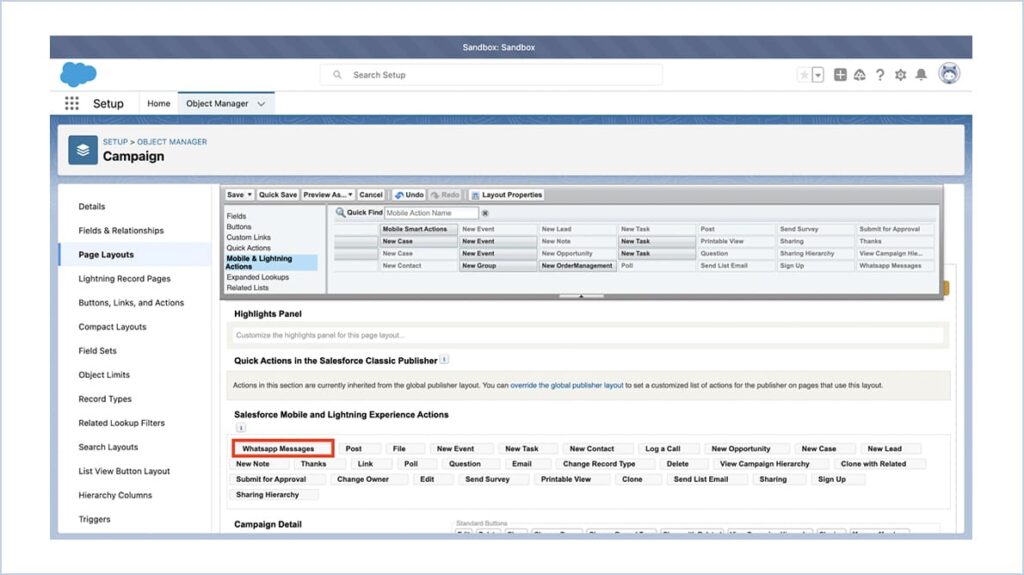
Click Fields
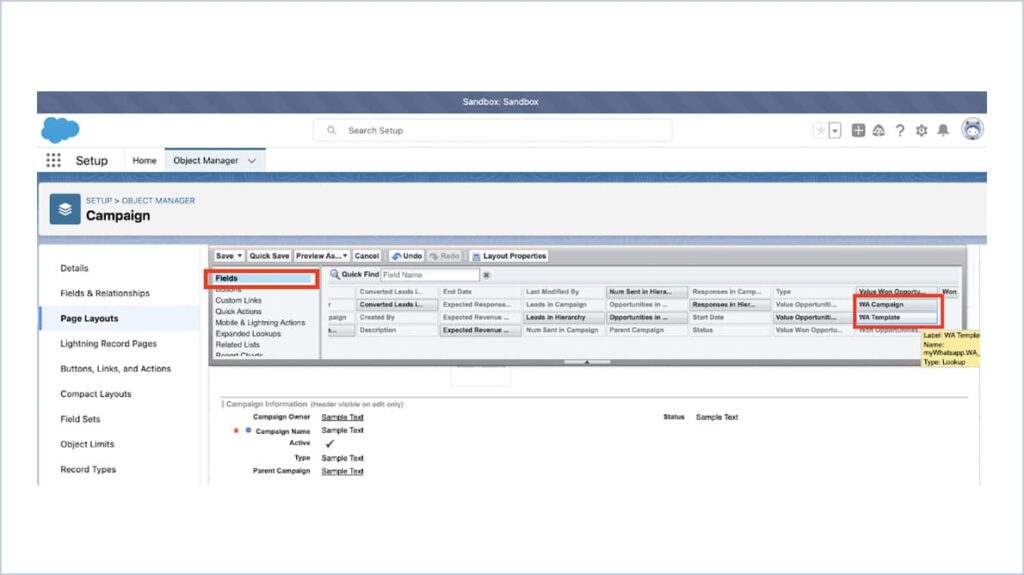
Drag & drop the WA Campaign and WA Template button in page layout
Click Save
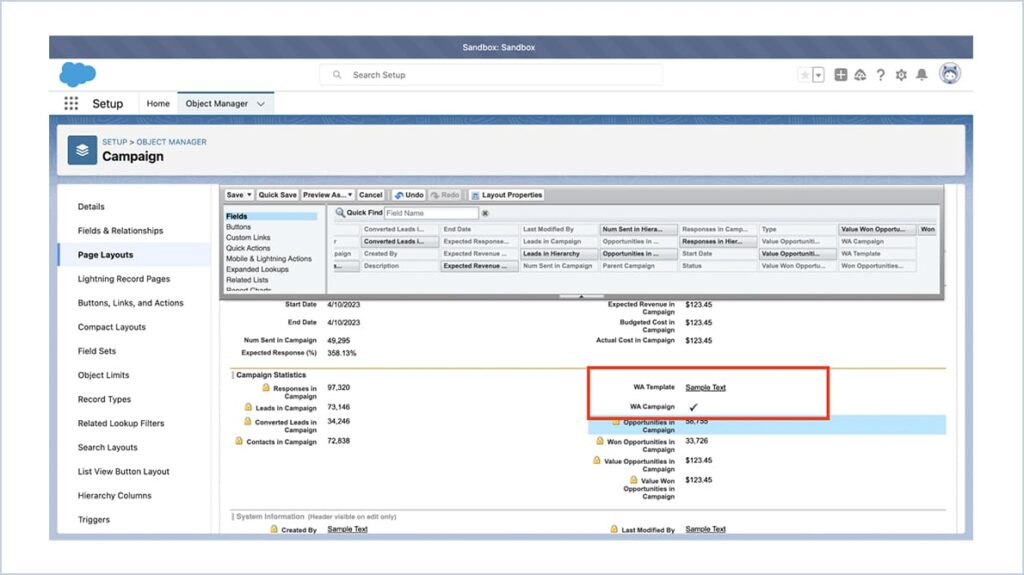
Mobile Notification :
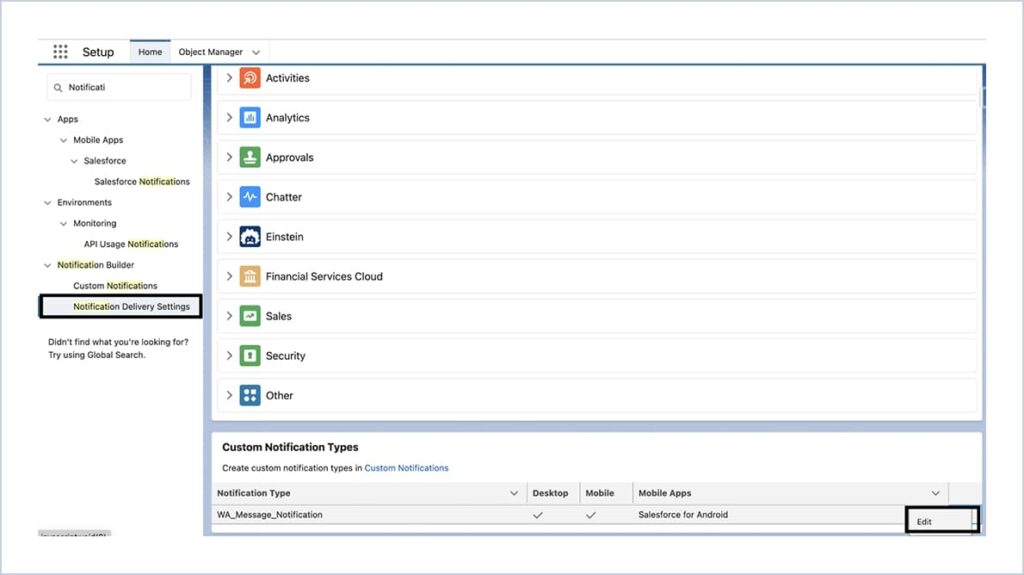
To Get Notification for inbound messages. Goto setup → Notification Delivery Settings
Click the down arrow and choose Edit button
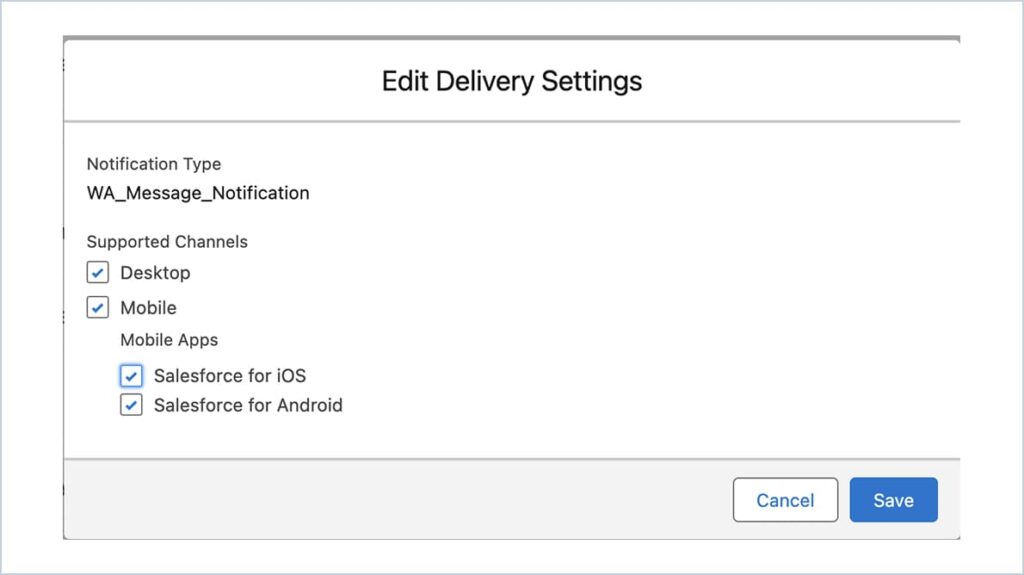
Choose Salesforce for iOS and Salesforce for Android Checkbox and Click Save


 .
.