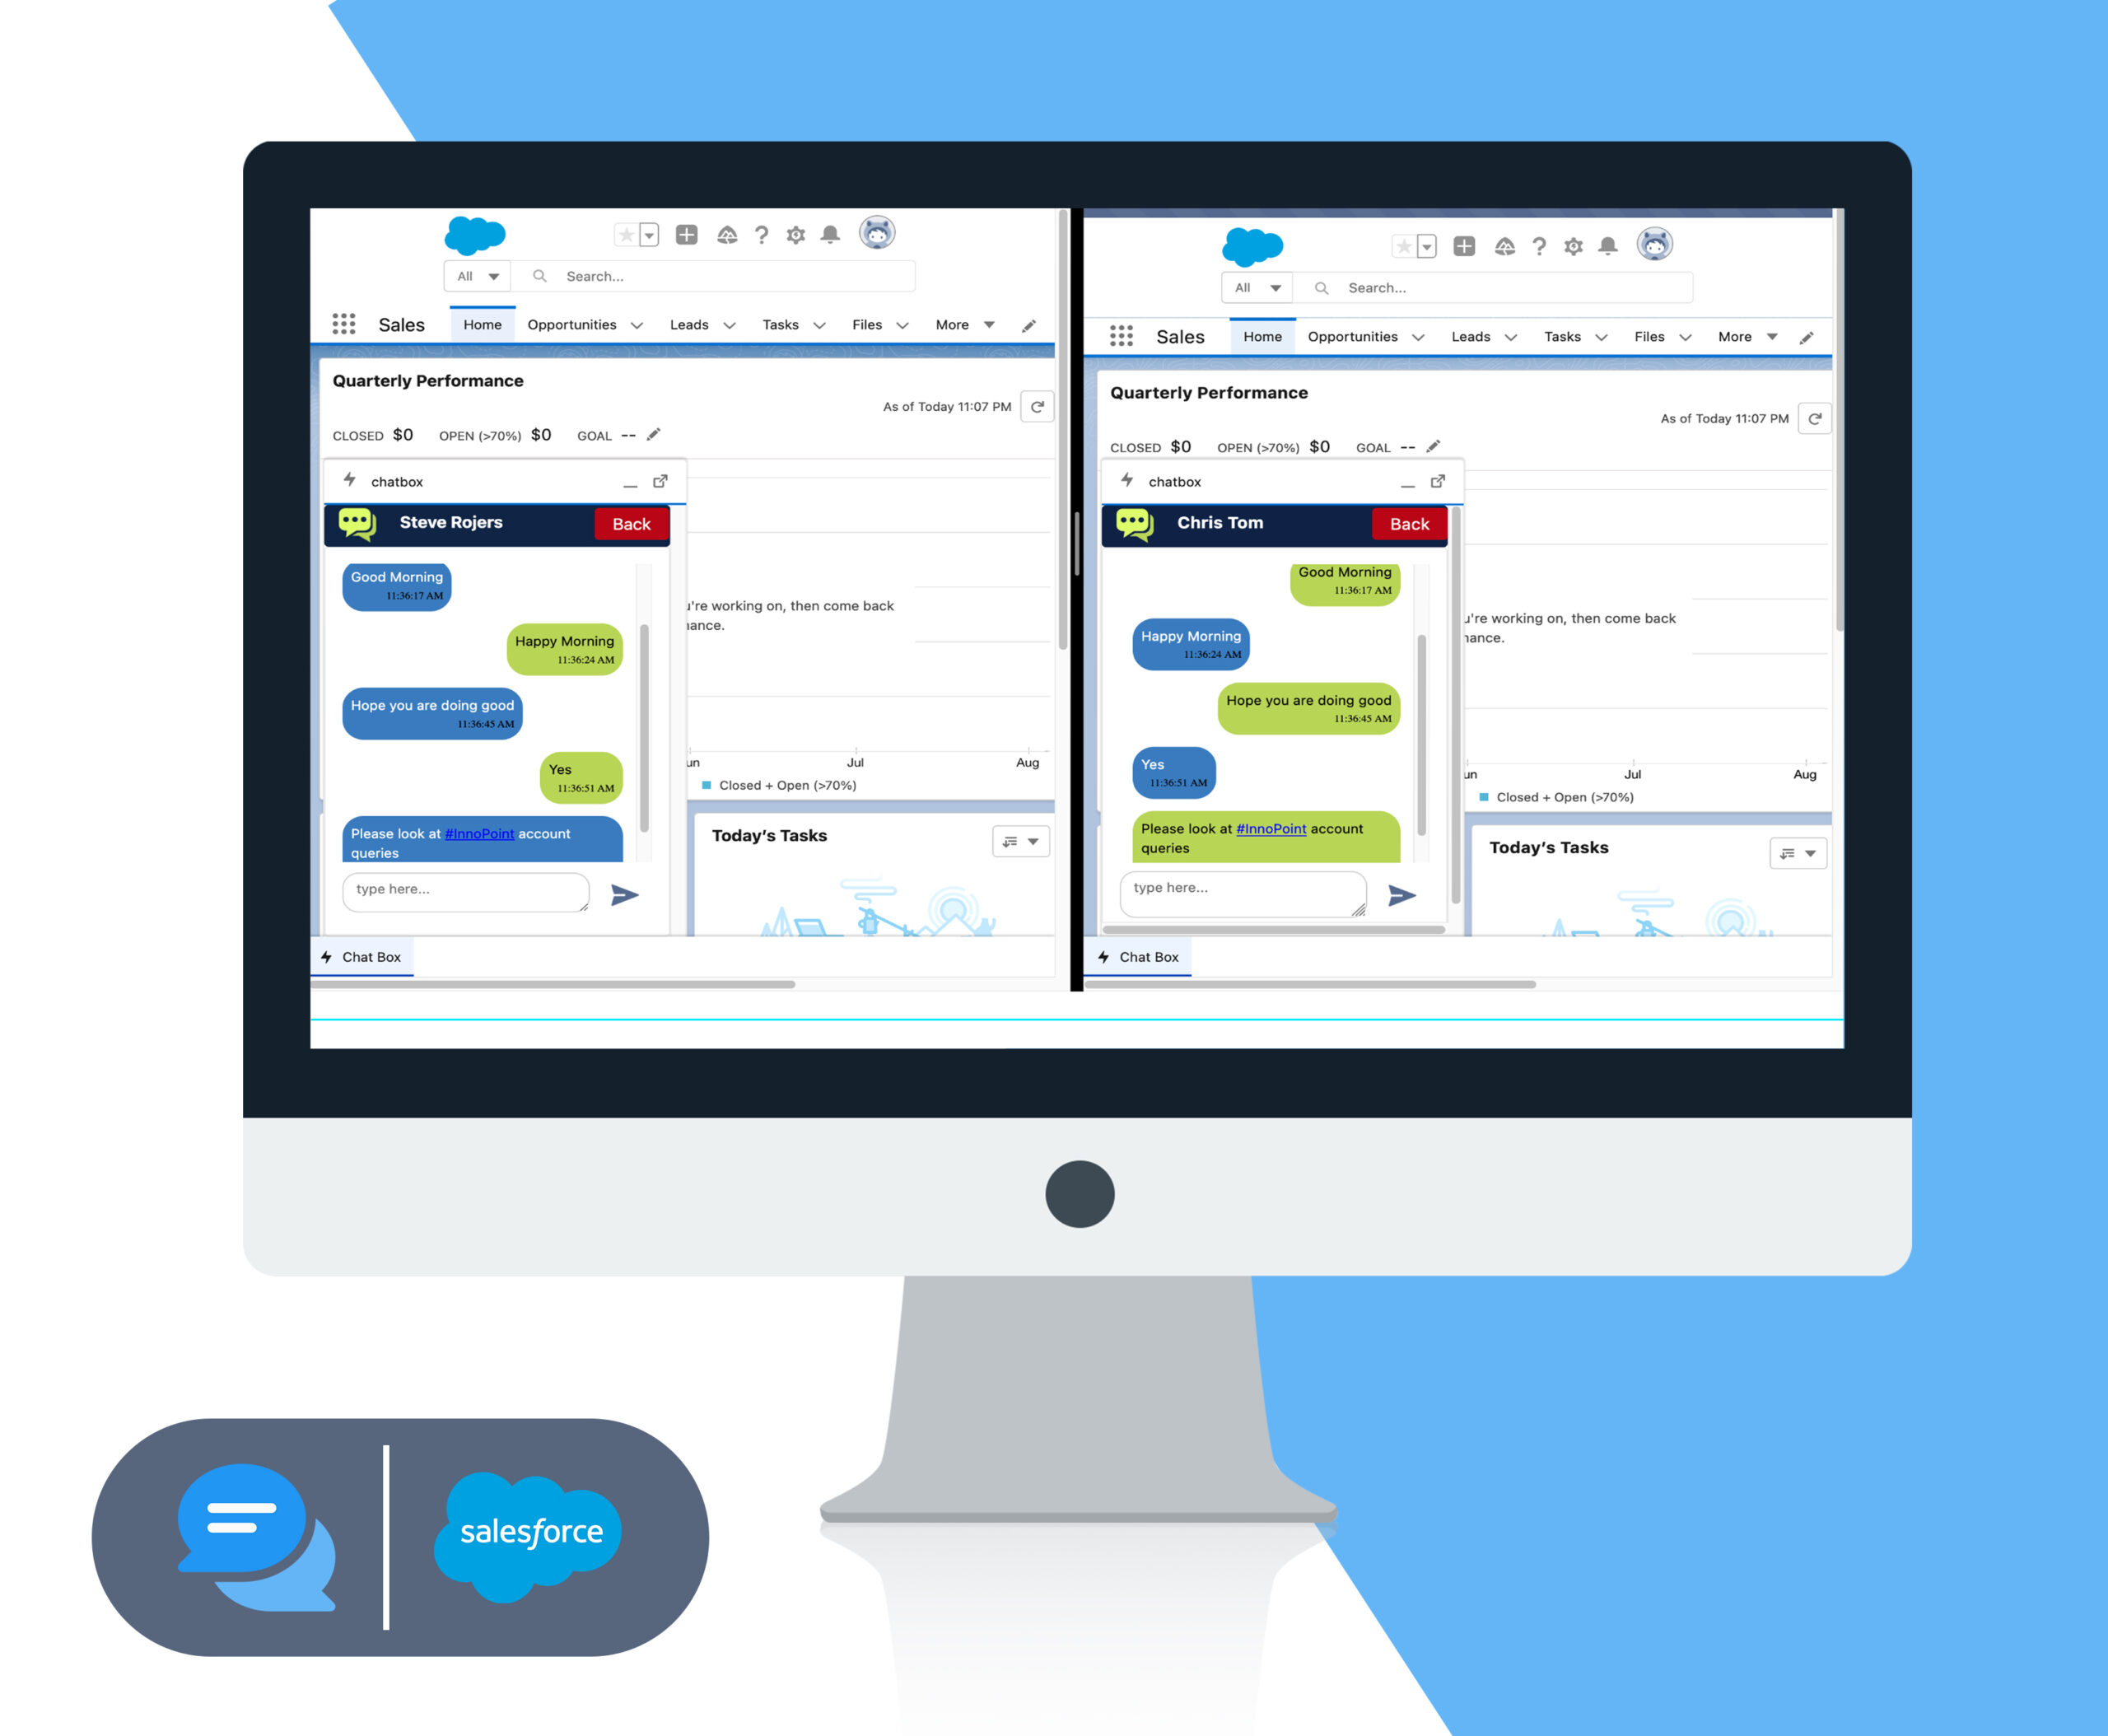
After installing the Chat Box package
Chat Box - Post Install Configuration
![SignupForm - Chat Box - 01 SignupForm - Chat Box - 01](https://www.innovalleyworks.com/wp-content/uploads/2023/04/SignupForm-Chat-Box-01-scaled.jpg)
1. Placing the chat component in the utility bar:
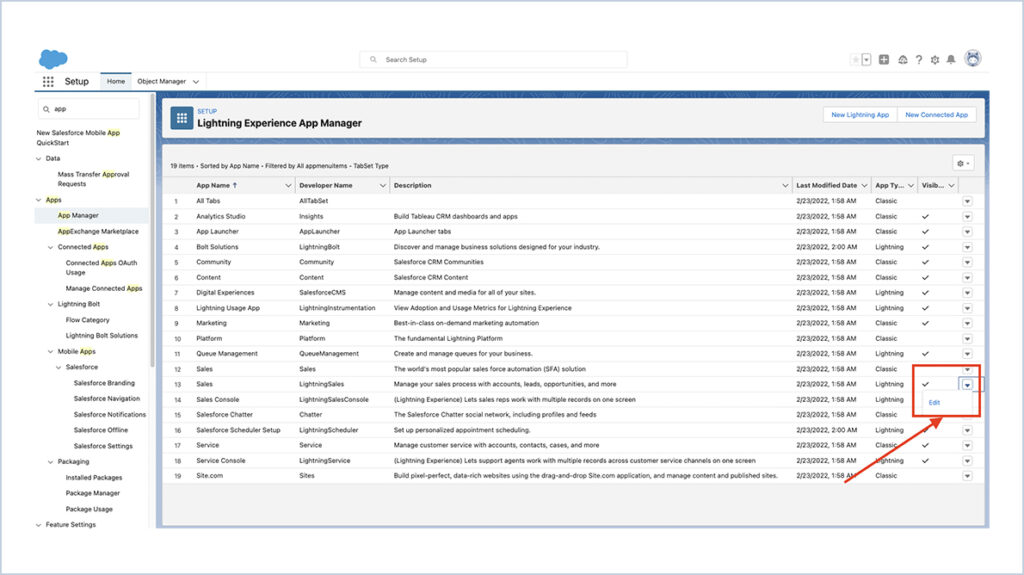
- In the Quick Find box, type App Manager and select it.
- Click on the down-arrow button of the application where the component needs to be
placed and select Edit.
![chatbox-Installation-Guide-01](https://www.innovalleyworks.com/wp-content/uploads/2022/02/chatbox-Installation-Guide-01-1024x575.jpg)
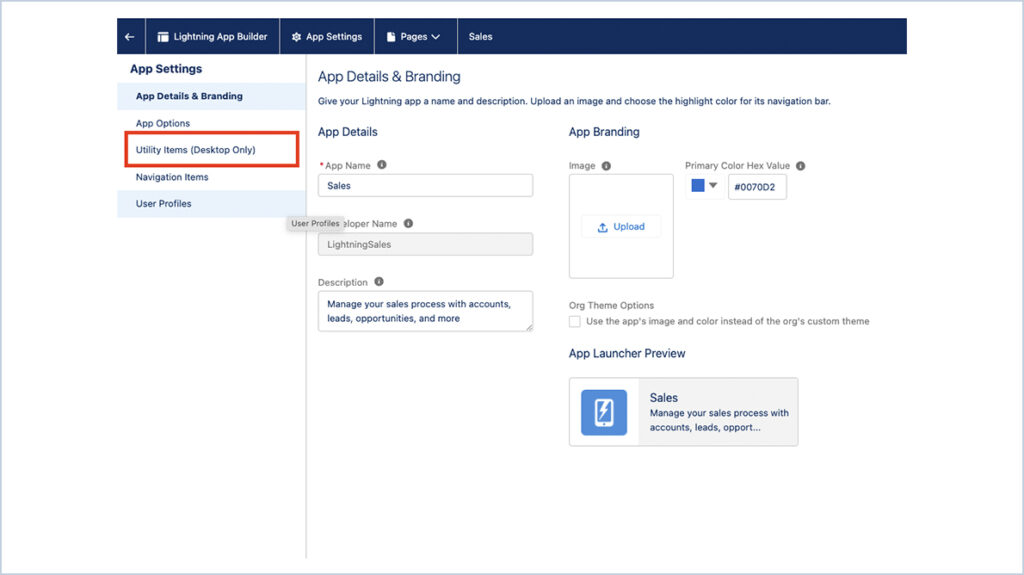
- Select Utility Items from the left side panel.
![chatbox-Installation-Guide-02](https://www.innovalleyworks.com/wp-content/uploads/2022/02/chatbox-Installation-Guide-02-1024x575.jpg)
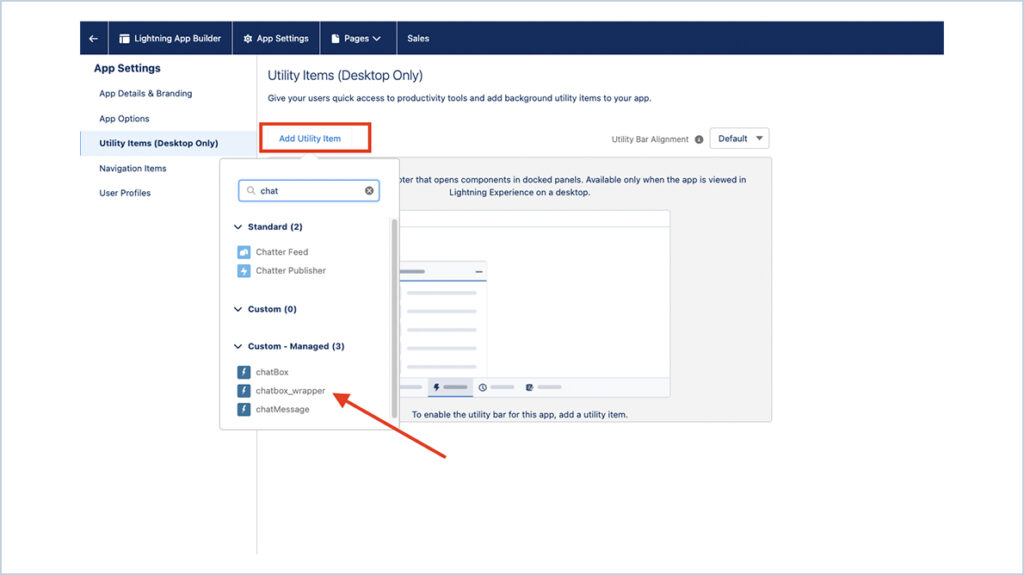
- Click the Add Utility Item button and Search the chatbox_wrapper component.
![chatbox-Installation-Guide-03](https://www.innovalleyworks.com/wp-content/uploads/2022/02/chatbox-Installation-Guide-03-1024x575.jpg)
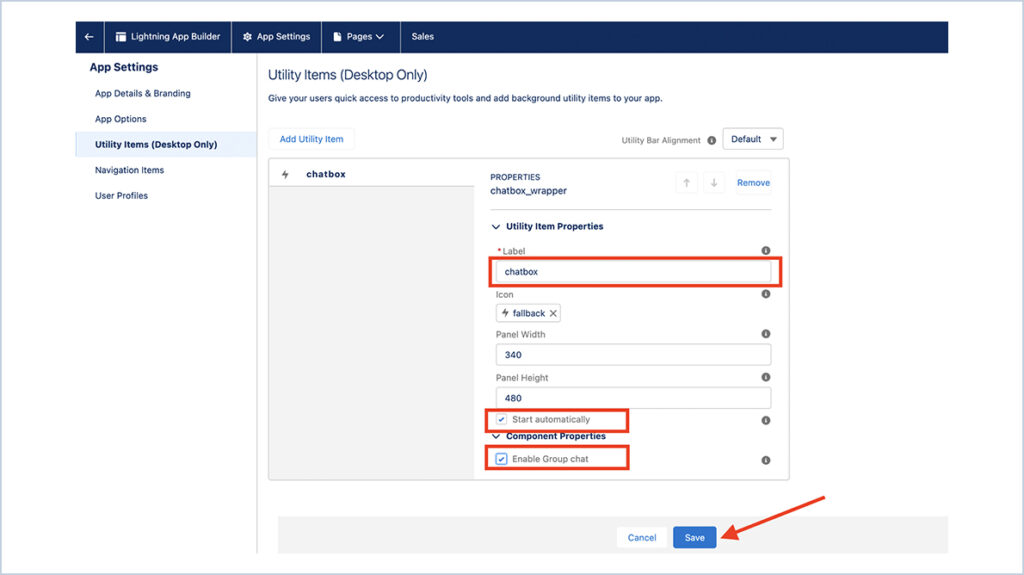
- The Properties dialog box will appear. Change the label as you want and check the
Start automatically checkbox as well. - If you want to enable the Group Chat feature along with Chat Box, check the ‘Enable
Group Chat’ checkbox and click Save.
![chatbox-Installation Guide - 04](https://www.innovalleyworks.com/wp-content/uploads/2022/04/chatbox-Installation-Guide-04-1024x575.jpg)
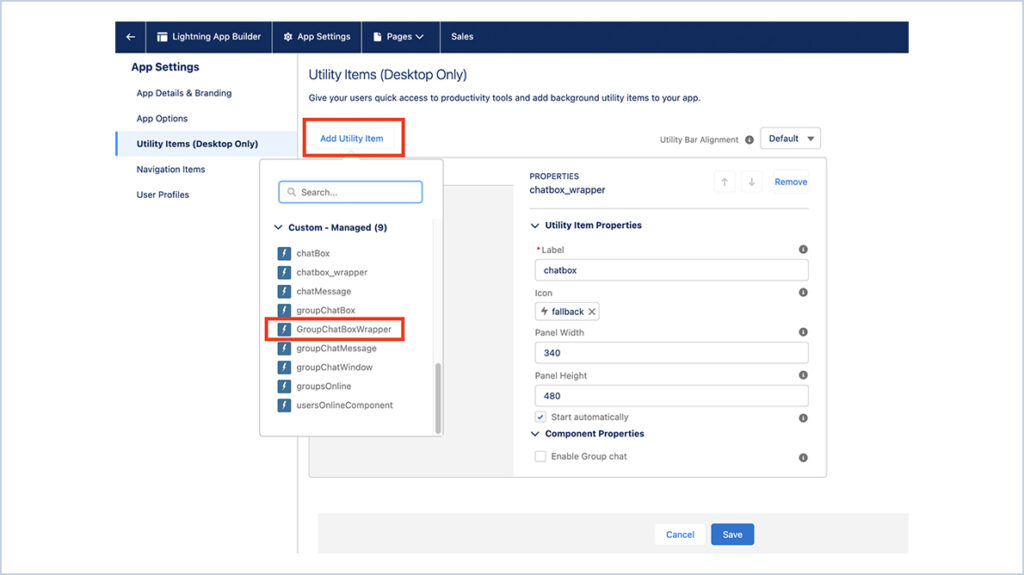
- If you want to access the Group Chat feature Separately, then Click the Add Utility
Item button and Search the GroupChatBoxWrapper component.
![chatbox-Installation Guide - 05](https://www.innovalleyworks.com/wp-content/uploads/2022/04/chatbox-Installation-Guide-05-1024x575.jpg)
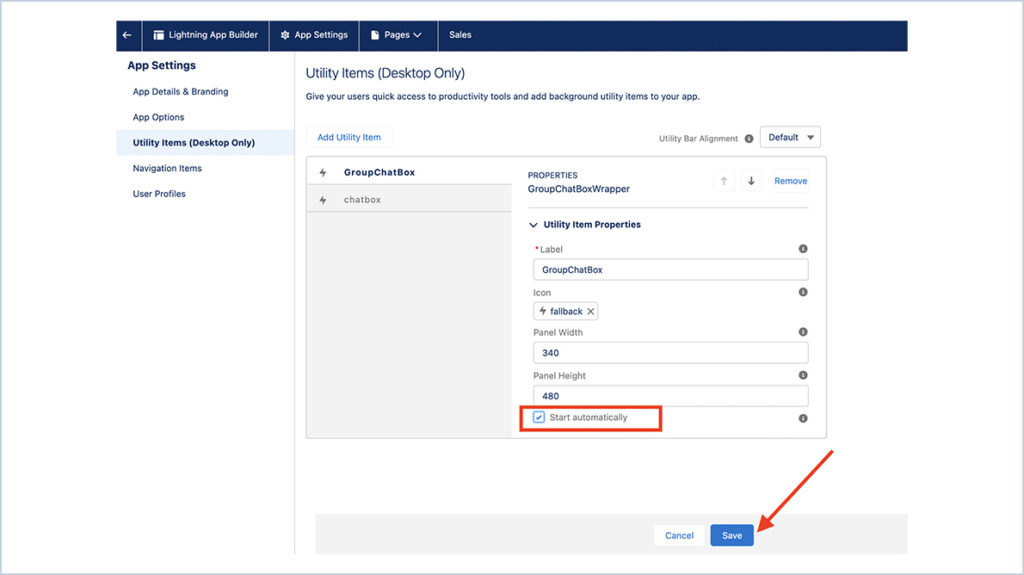
- The Properties dialog box will appear. Change the label as you want and check the
Start automatically checkbox as well and click Save.
![chatbox-Installation Guide - 06](https://www.innovalleyworks.com/wp-content/uploads/2022/04/chatbox-Installation-Guide-06-1024x575.jpg)
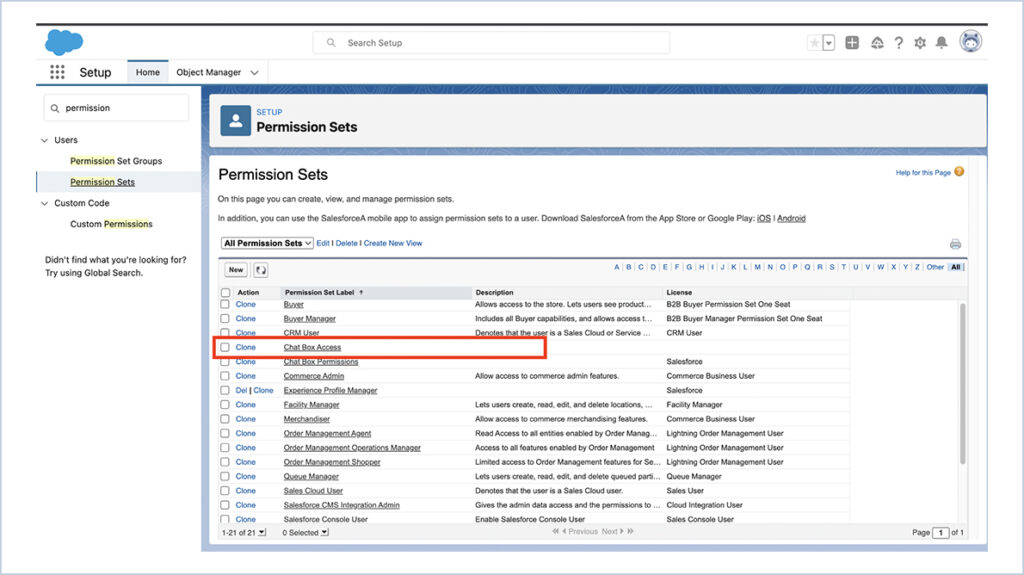
2. Providing Access for the users to use Chat Box
- In the Quick Find Box, type Permission Set and select it.
- Click the ‘Chat Box Access’ permission set.
![chatbox-Installation Guide - 07](https://www.innovalleyworks.com/wp-content/uploads/2022/04/chatbox-Installation-Guide-07-1024x575.jpg)
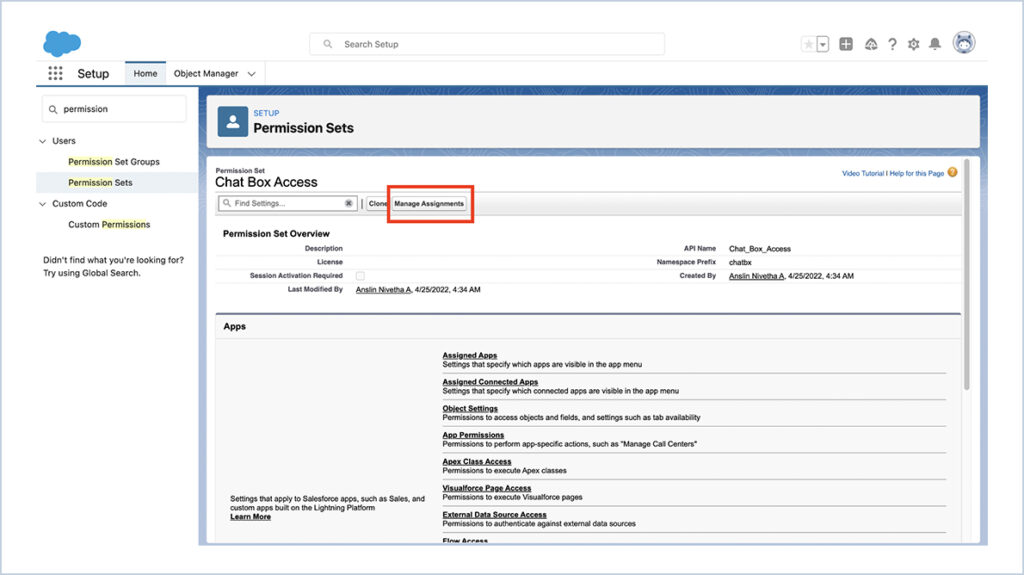
- Click on the Manage Assignments button.
![chatbox-Installation Guide - 08](https://www.innovalleyworks.com/wp-content/uploads/2022/04/chatbox-Installation-Guide-08-1024x575.jpg)
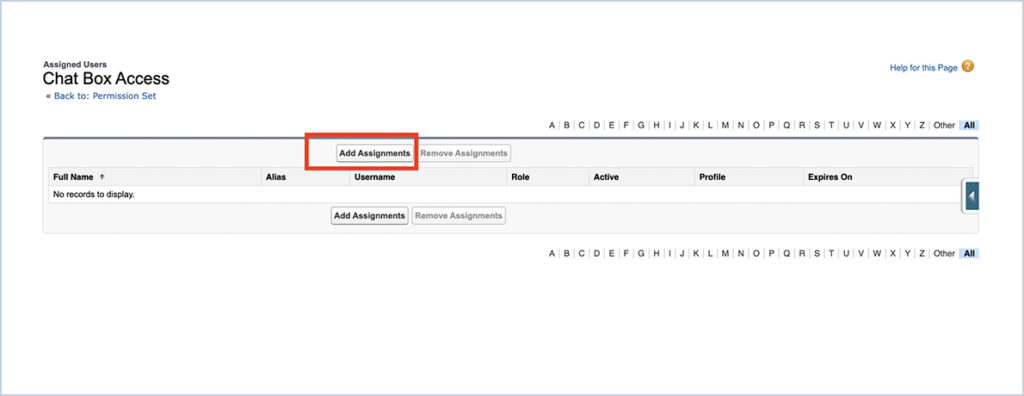
- Click on the Add Assignments button.
![chatbox-Installation Guide - 09](https://www.innovalleyworks.com/wp-content/uploads/2022/04/chatbox-Installation-Guide-09-1024x396.jpg)
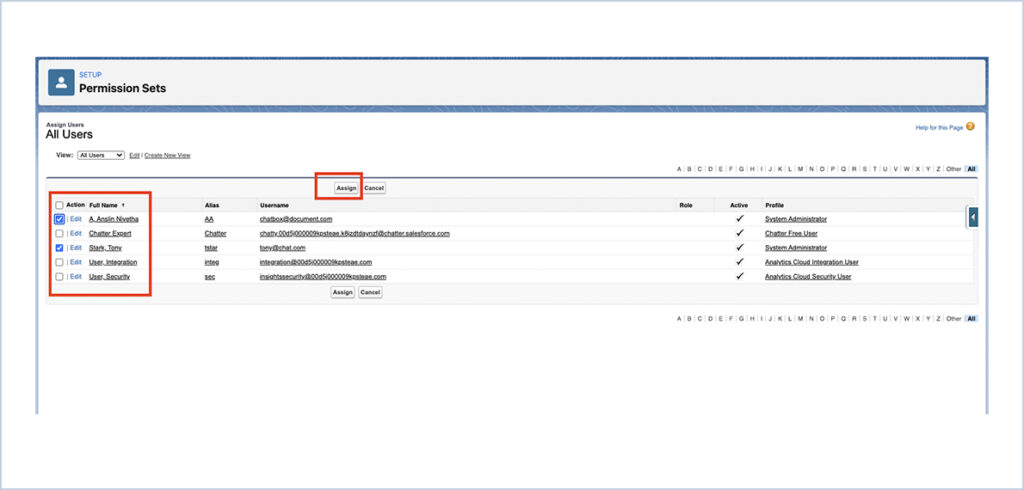
- Select the users, for whom you want to give access to use the chatbox component.
- Click the Assign button.
![chatbox-Installation Guide - last](https://www.innovalleyworks.com/wp-content/uploads/2022/04/chatbox-Installation-Guide-last-1024x490.jpg)
- Click the Done button.
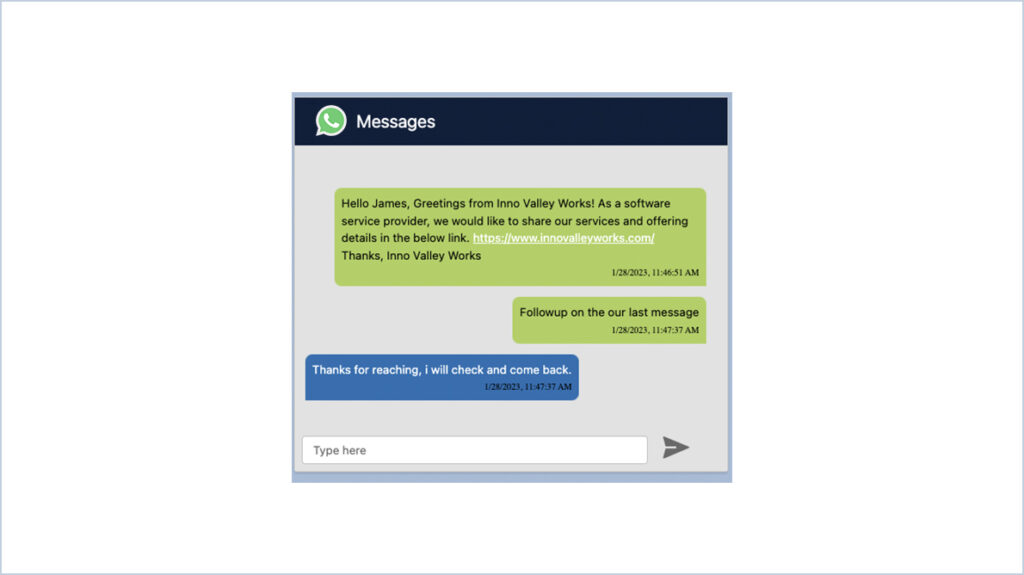
WhatsApp Business In Salesforce
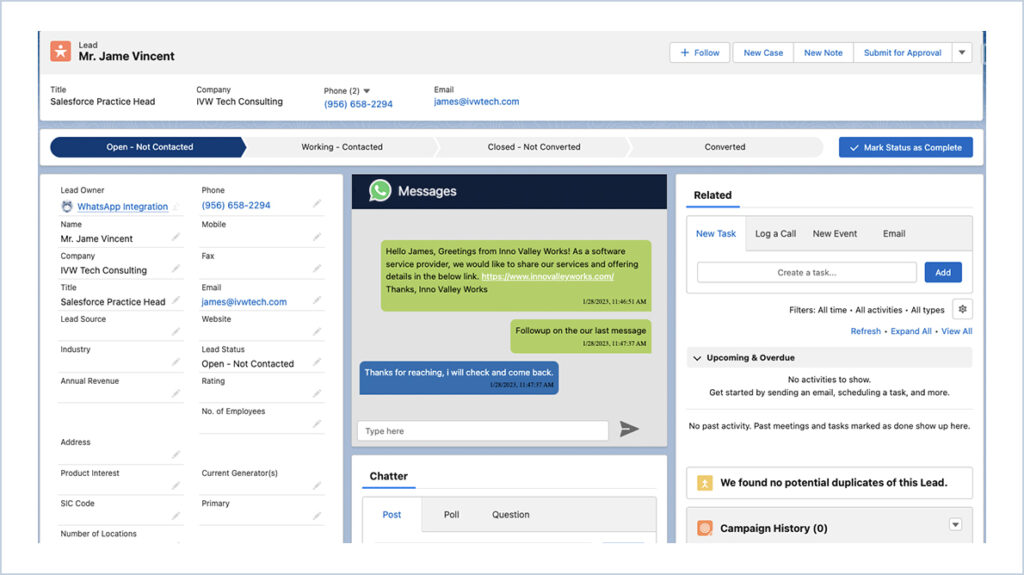
Below component can be placed on any Object(Account, Lead, Contact, Case) to chat with customers/leads on WhatsApp from Salesforce.
![chatbox-Installation Guide - 11](https://www.innovalleyworks.com/wp-content/uploads/2023/01/chatbox-Installation-Guide-11-1024x575.jpg)
WhatsApp component in Salesforce
![chatbox-Installation Guide - 12](https://www.innovalleyworks.com/wp-content/uploads/2023/01/chatbox-Installation-Guide-12-1024x575.jpg)
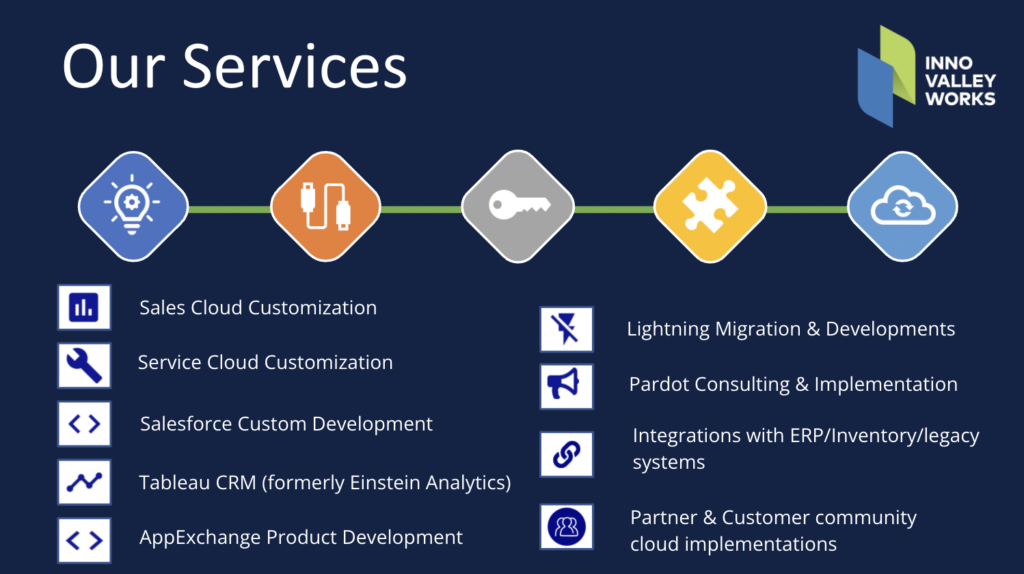
Please reach out to sales@innovalleyworks.com for the WhatsApp business API configurations and support.
![9-1 Chat Box - Post Install Configuration](https://www.innovalleyworks.com/wp-content/uploads/2022/02/9-1-1024x574.png)