

The functionality of Salesforce is currently being upgraded, making human work simple and secure. Applications and packages are also getting updated versions that make users feel more comfortable. Field Service Lightning(FSL) is the best example for this. Salesforce Field Service is another name for Field Service Lightning. It is a Salesforce product that creates a solitary platform for connecting customers, workers, and products. It assists agents and dispatchers in carefully planning the service appointments depending on the expertise and geographic area of the service resource.
Using FSL, service appointments are wisely scheduled for service resources depending on their expertise, primary and secondary territory, and availability. When service appointments are assigned, technicians receive information on their FSL Mobile app, which is available for free in online stores (Ex: Google Play store). After the job is completed, they update the appointment or job status as dispatched. This will automatically be shown in the dispatcher console to the dispatcher or technician. The Dispatcher console is like a report of the appointments with some filters that helps the dispatcher to update the job status to the bulk records and to view the customer location and their location which will lead to knowing their current position and estimated time to reach the place.
Four types of players have a vital role in this process.
- Administrator
- Agents
- Dispatchers
- Technicians
Administrator
Who integrate the Field Service Lightning in Salesforce as per their business needs and also configure objects, fields, tabs, application, and permission to the different users.
Agents
Who handle the cases (created by them or inbound cases) and create the work orders after the case is created.
Dispatcher
Who schedules and manages the service appointments for the technicians based on their skills and territory which is already stored with their details.
Technicians
Who are directly related to the customer. After the work is completed, they update the progress via mobile. Technicians mostly use the FSL mobile app to update their job.
Following are some key points to remember :
Service Resources – End workers who reached the customer at the end.
Service Territories – Geographic regions of the Service resources are split into the primary and secondary territories of them to help to know their priority.
Service Appointment – Managing the appointments.
Operating hours – Working time of the Service Resources.
Skills & Work Type – Includes the resources skills and work types to help in work assigning and scheduling.
Work orders – This is managed by agents that maintain the customer’s requests.
Product requests – Having details about which work order needs which product. It is defined by the agents or dispatchers related to the work type.
Steps to setup FSL:
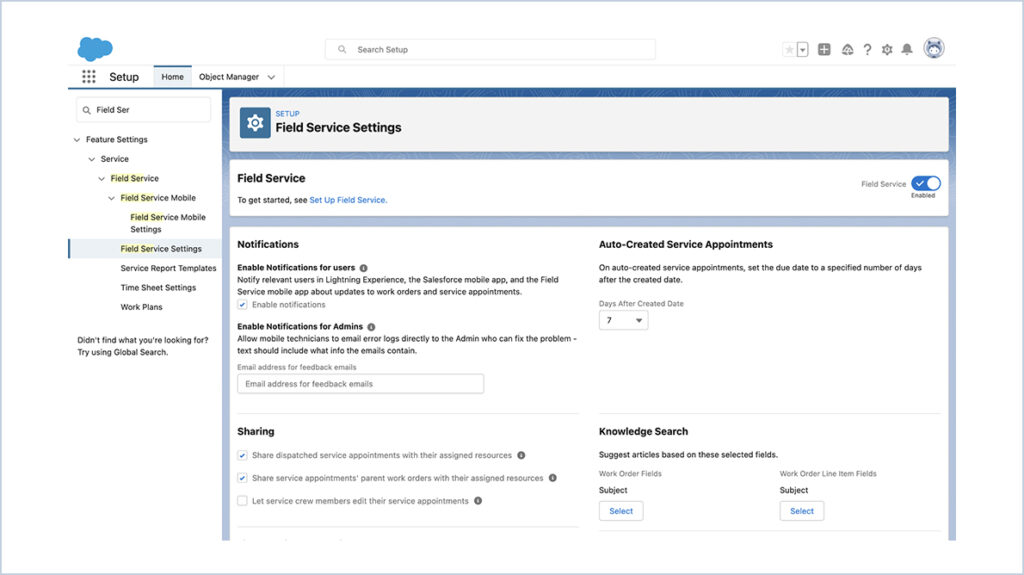
1. Goto Quick Find —> Field Service Setting. Enable Field Service.
2. Check the following checkboxes :
Under Notification – Enable notification.
Under Sharing –
i. Share dispatched service appointments with their assigned resources.
ii. Share service appointments’ parent work orders with their assigned resources.
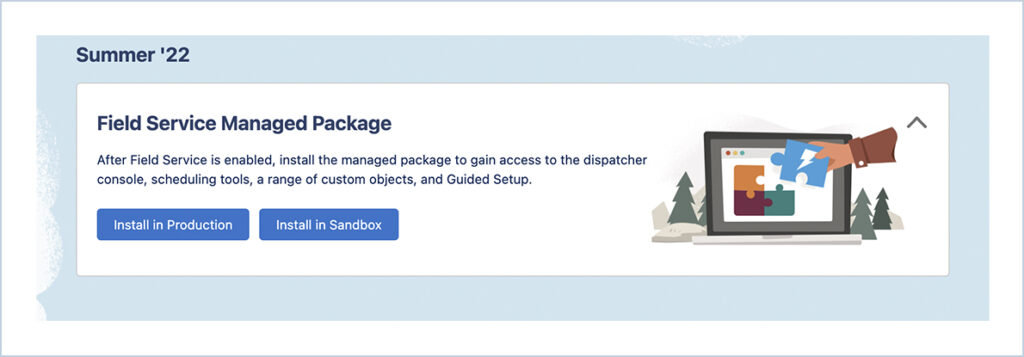
3. Goto https://fsl.secure.force.com/install and install the package by clicking the Install in Production / Install in Sandbox. It took some time to install after signed in.
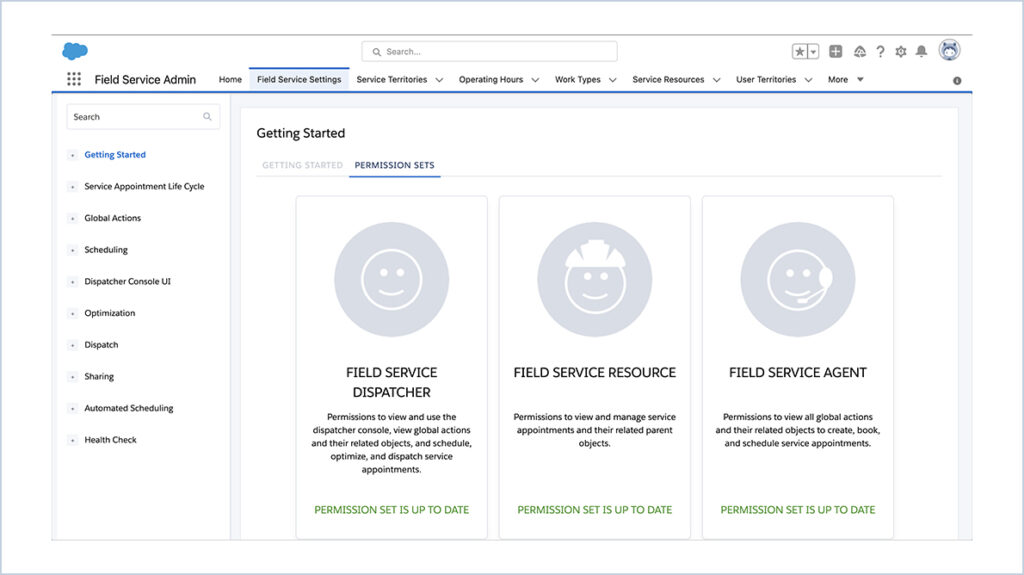
4. After installing the package Goto App Launcher —> Field Service Admin App —> Field Service Settings tab —> Permission Sets. Click all “Create Permission” options.
5. Goto Quick Find —> Users —> Click the User Name —> Permission Set Assignments —> Edit Assignments — > Enable the FSL Permission Sets to the user.
6. Goto Quick Find —> Data Integration Rules —> Check the Bypass triggers option is unchecked in the Field Service-related records.
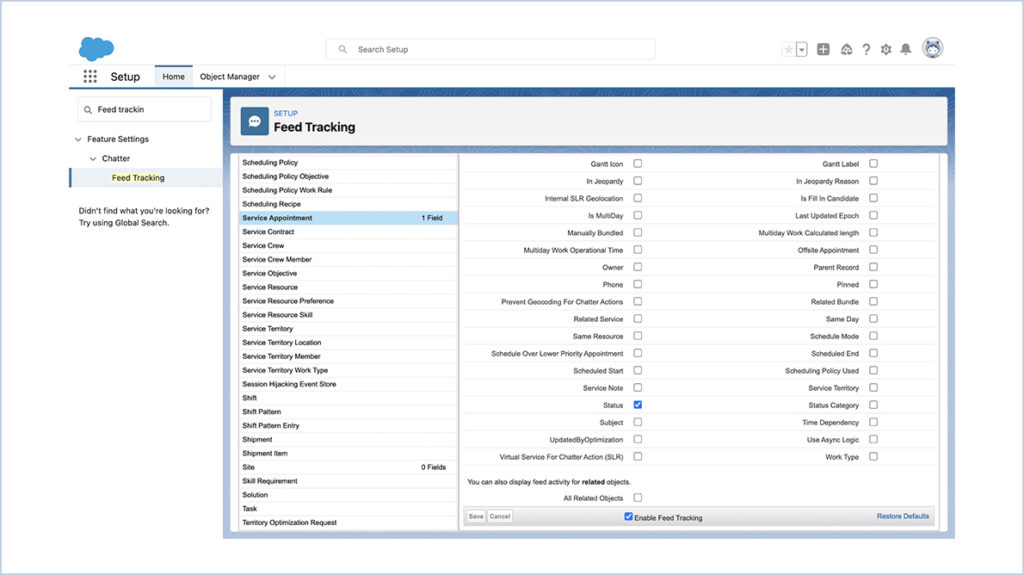
7. Goto —> Feed Tracking —> Select Service appointments Object —> Check the Enable Feed Tracking & Status field —> Save.
8. Add the needed related list in the layout of the Service Appointments, Service Territories, Case, Work order, Skills, and Service resources.
Some of the Licenses and their uses:
Field Service Dispatcher License – Access to the dispatcher console
Field Service Scheduling License – Access to dispatcher console Gantt, scheduling, and optimization.
Field Service Mobile License – Access to Mobile Field Service Application to the Technicians.
Field Service Community Dispatcher License – Access to the dispatcher console, global actions, and dispatch service appointments.
Profile needed Licenses :
Field Service Admin – FSL Admin Permissions & Field Service Admin License.
Field Service Agent – FSL Agent Permissions & Field Service Agent License
Field Service Resource – Field Service Mobile License, Field Service Scheduling License & FSL Resource Permissions.
Field Service Dispatcher – Field Service Dispatcher License & FSL Dispatcher Permissions.
Three important components in FSL:
1. Core Field Service Lightning:
- Set operating hours, skills, Service appointments, Service
- resources, and related records.
- Enable Mobile access to dispatchers.
- Generate reports and store the data to analyze the field data.
- Track all works and monitor them in the dispatcher console.
2. FSL Package:
- Integrate Salesforce with Workforce and maintain scheduling policies, global actions, and optimization rules with the administration. This helps the admins to schedule the appointment to the technicians.
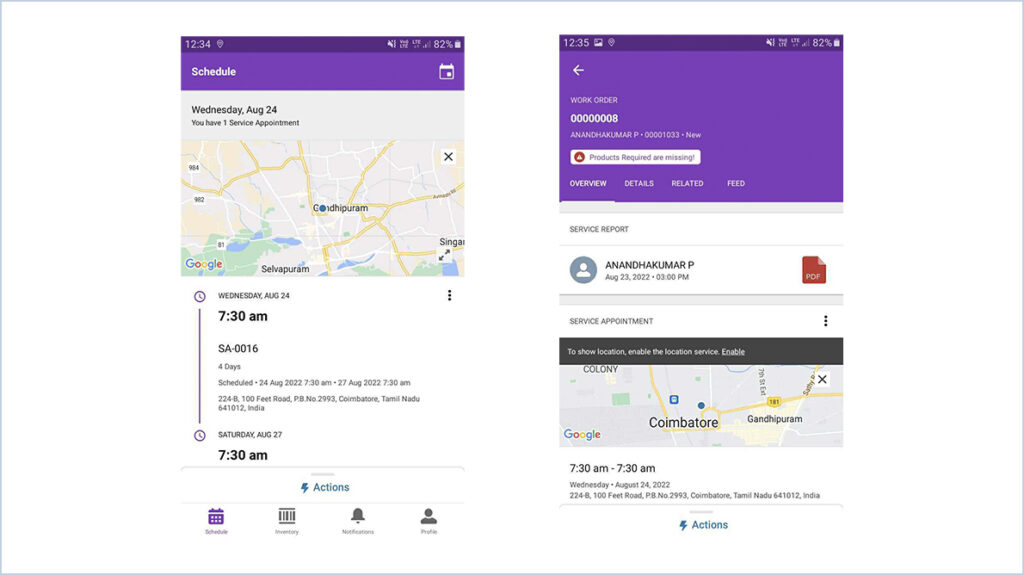
3. FSL Mobile App:
- Check assigned service appointments.
- Update the status of the appointments.
- Create Event, Task, Contact, Opportunity, Case, and Lead.
- Check the customer location in Map.
- Stay connected with the Dispatcher and admin via chatter.
- Generate service report (PDF) after getting customer’s digital signature.
MOBILE VIEW