After installing the Chat Box package
Chat Box - Post Install Configuration
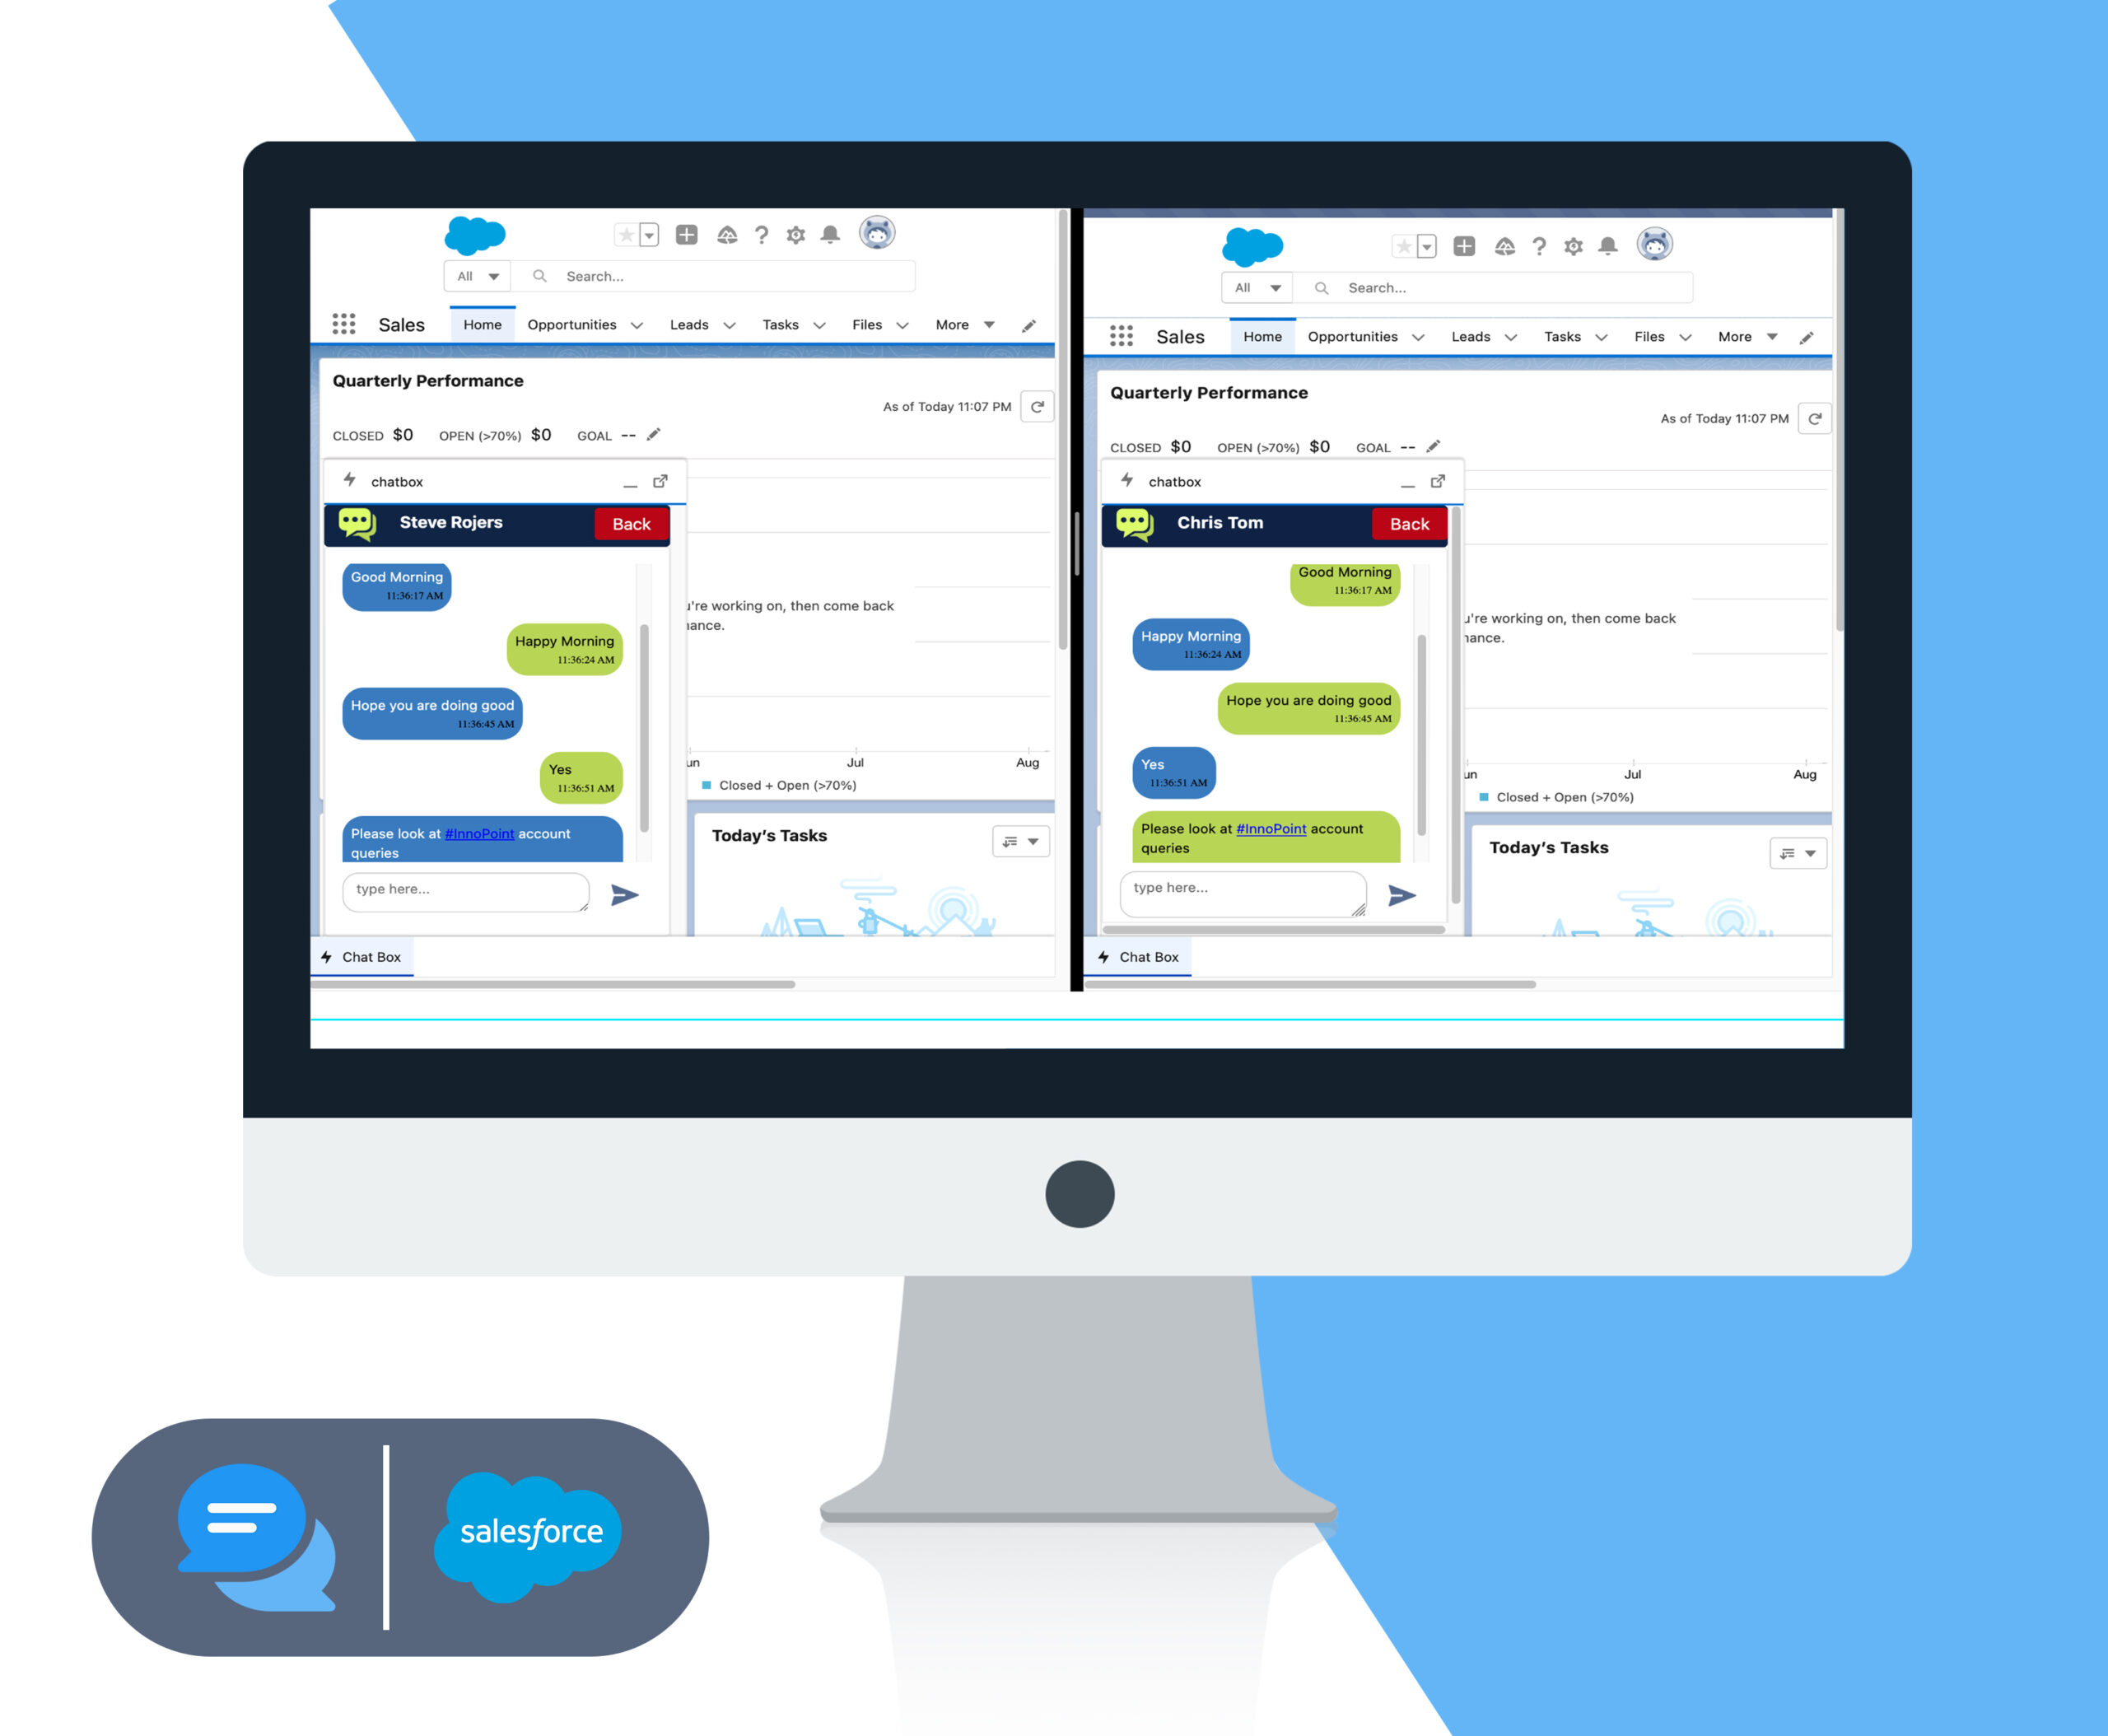
1. Placing the chat component in the utility bar:
- In the Quick Find box, type App Manager and select it.
- Click on the down-arrow button of the application where the component needs to be
placed and select Edit.
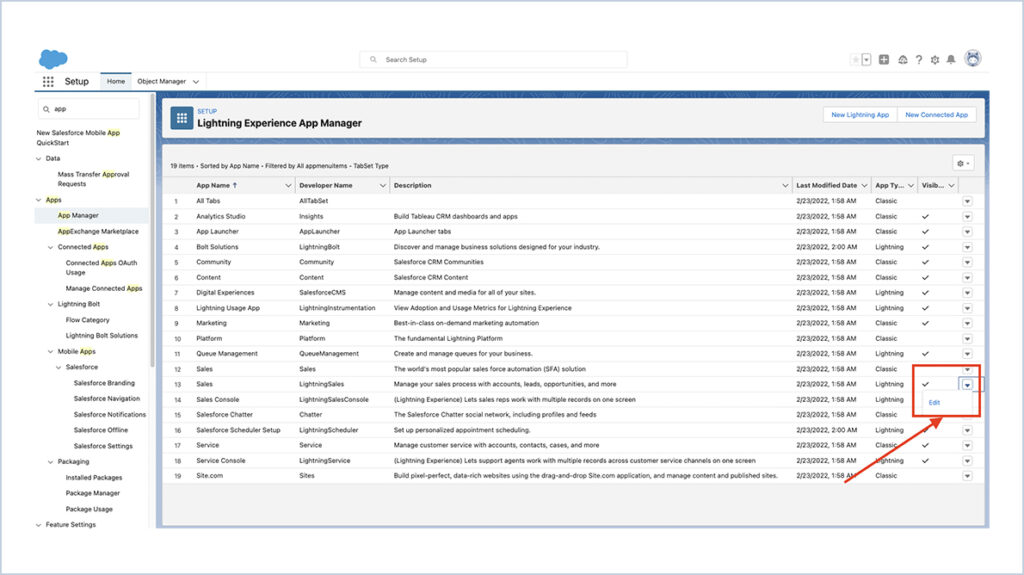
- Select Utility Items from the left side panel.
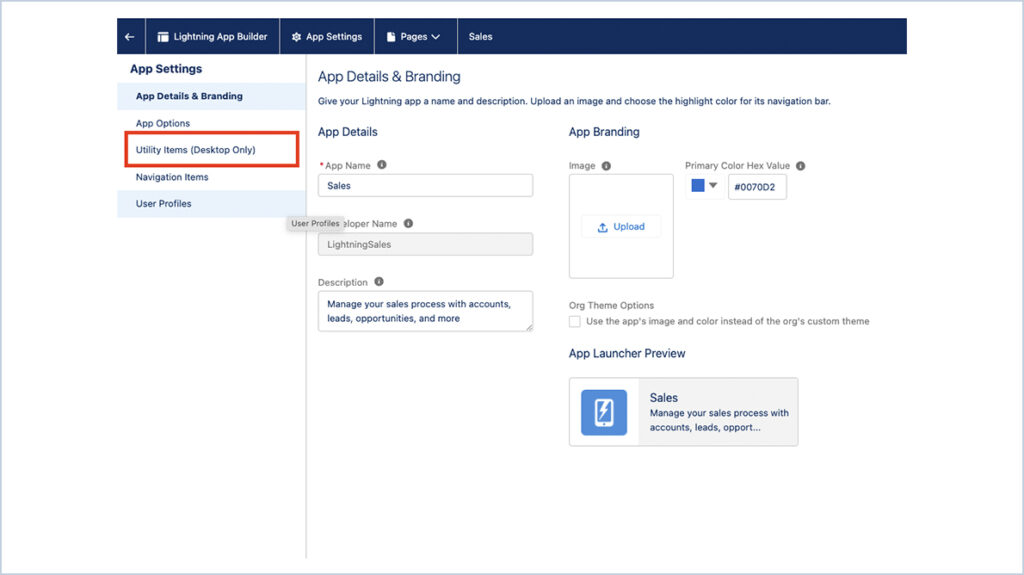
- Click the Add Utility Item button and Search the chatbox_wrapper component.
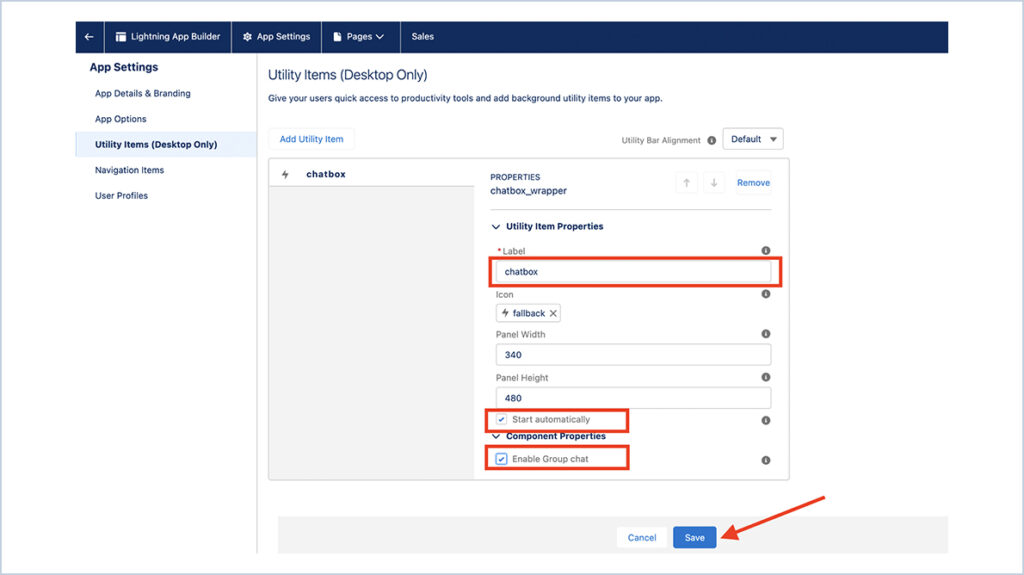
- The Properties dialog box will appear. Change the label as you want and check the
Start automatically checkbox as well. - If you want to enable the Group Chat feature along with Chat Box, check the ‘Enable
Group Chat’ checkbox and click Save.
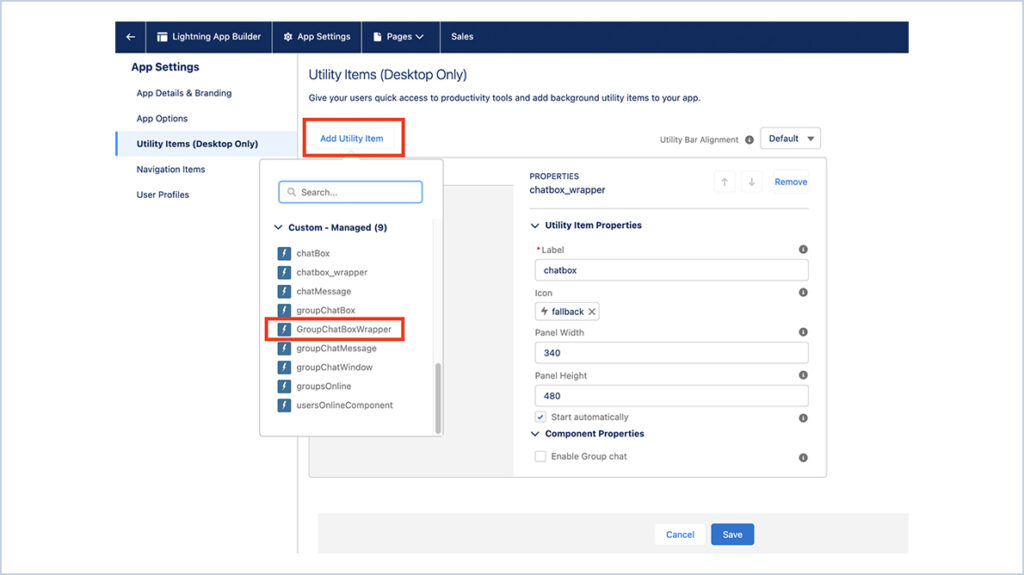
- If you want to access the Group Chat feature Separately, then Click the Add Utility
Item button and Search the GroupChatBoxWrapper component.
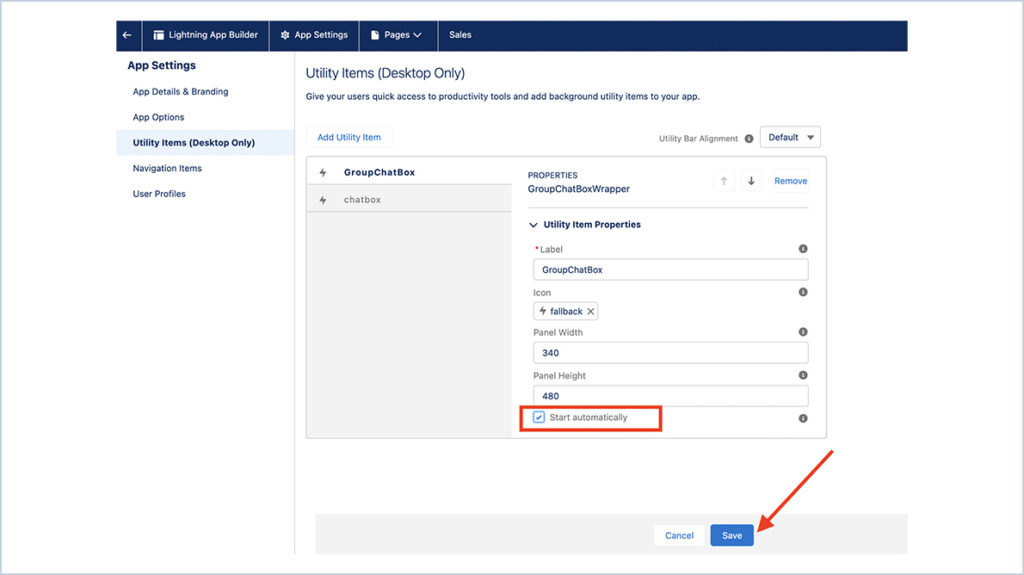
- The Properties dialog box will appear. Change the label as you want and check the
Start automatically checkbox as well and click Save.
2. Providing Access for the users to use Chat Box
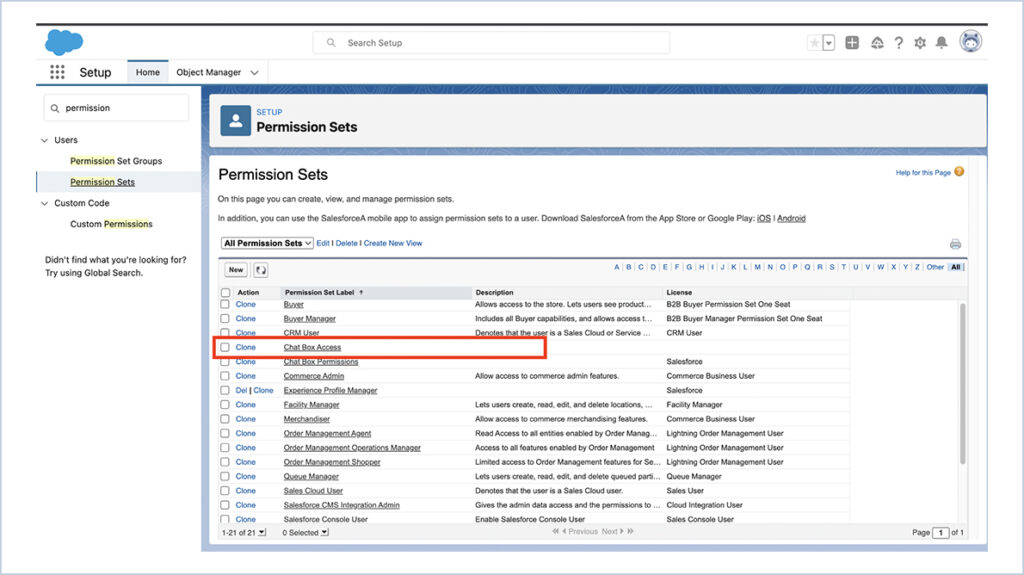
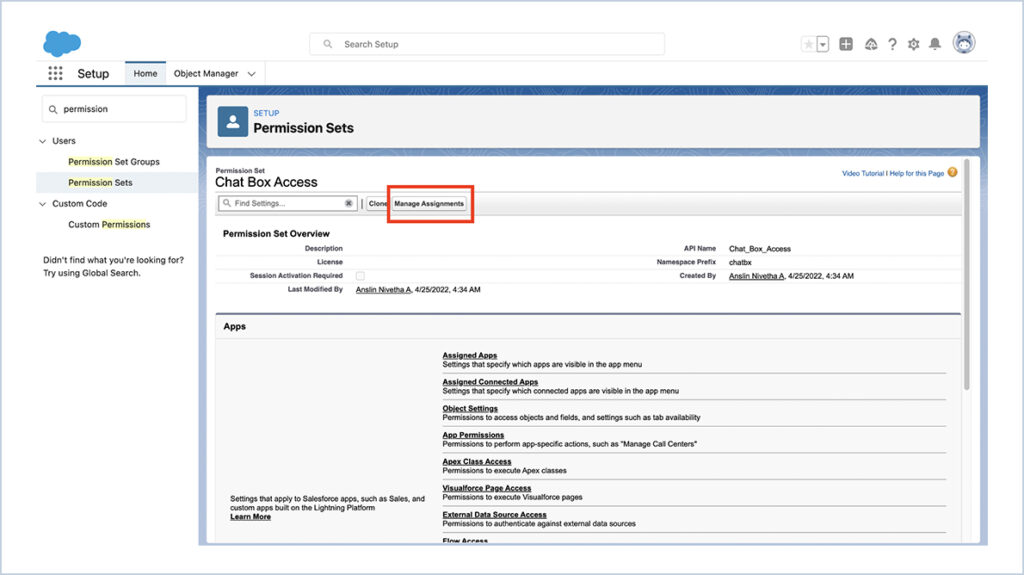
- In the Quick Find Box, type Permission Set and select it.
- Click the ‘Chat Box Access’ permission set.
- Click on the Manage Assignments button.
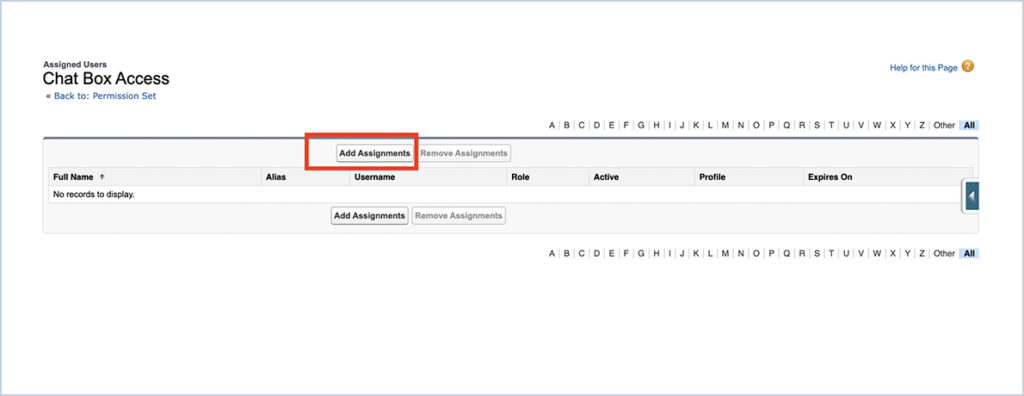
- Click on the Add Assignments button.
- Select the users, for whom you want to give access to use the chatbox component.
- Click the Assign button.
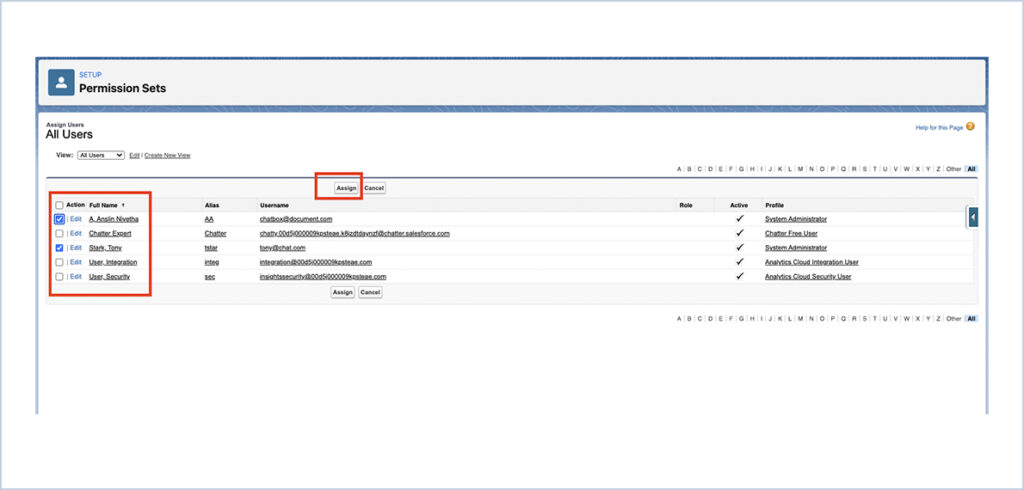
- Click the Done button.
WhatsApp Business In Salesforce
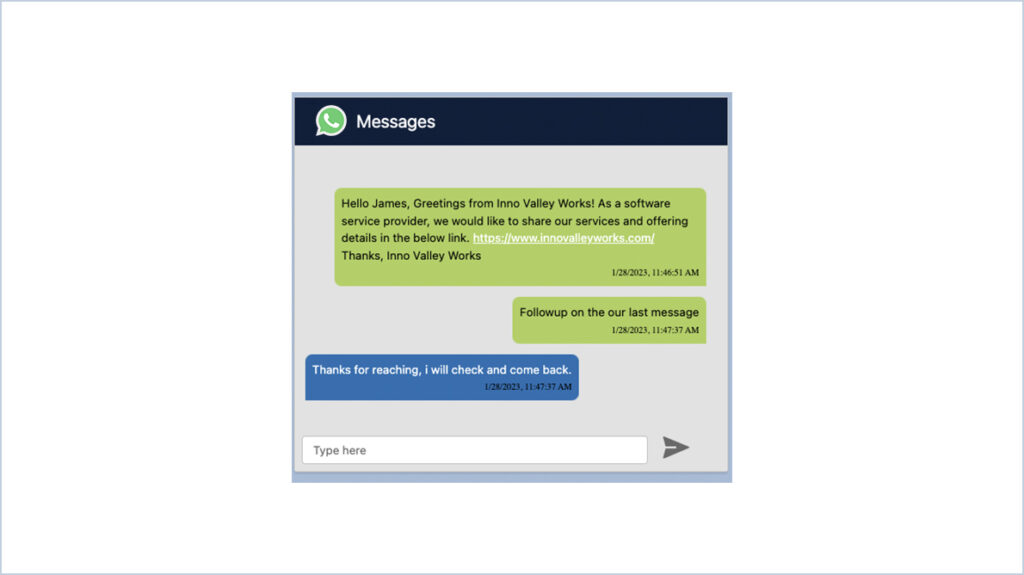
Below component can be placed on any Object(Account, Lead, Contact, Case) to chat with customers/leads on WhatsApp from Salesforce.
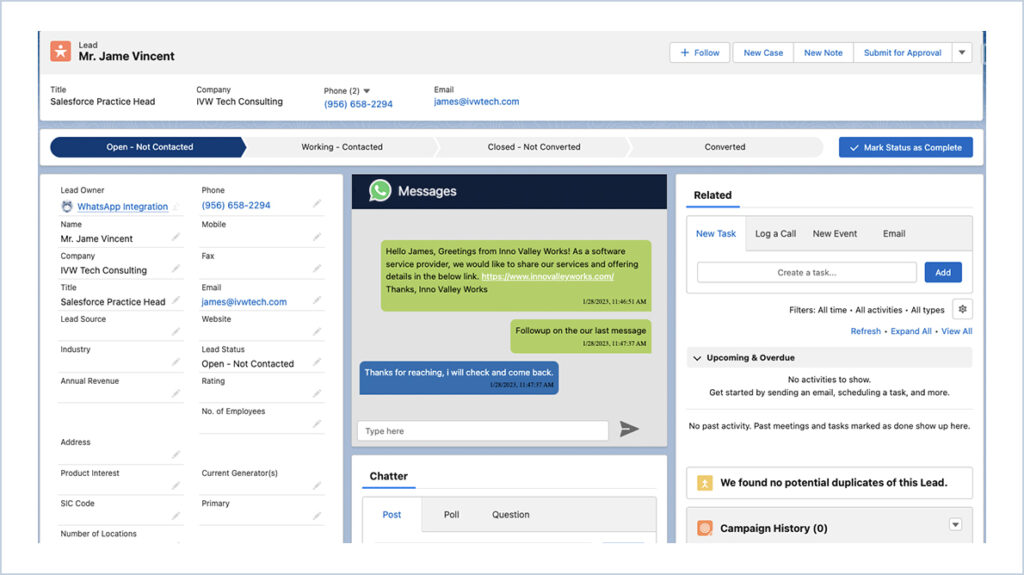
WhatsApp component in Salesforce
Please reach out to sales@innovalleyworks.com for the WhatsApp business API configurations and support.


 .
.