Map For Any Object - Post Install Configuration
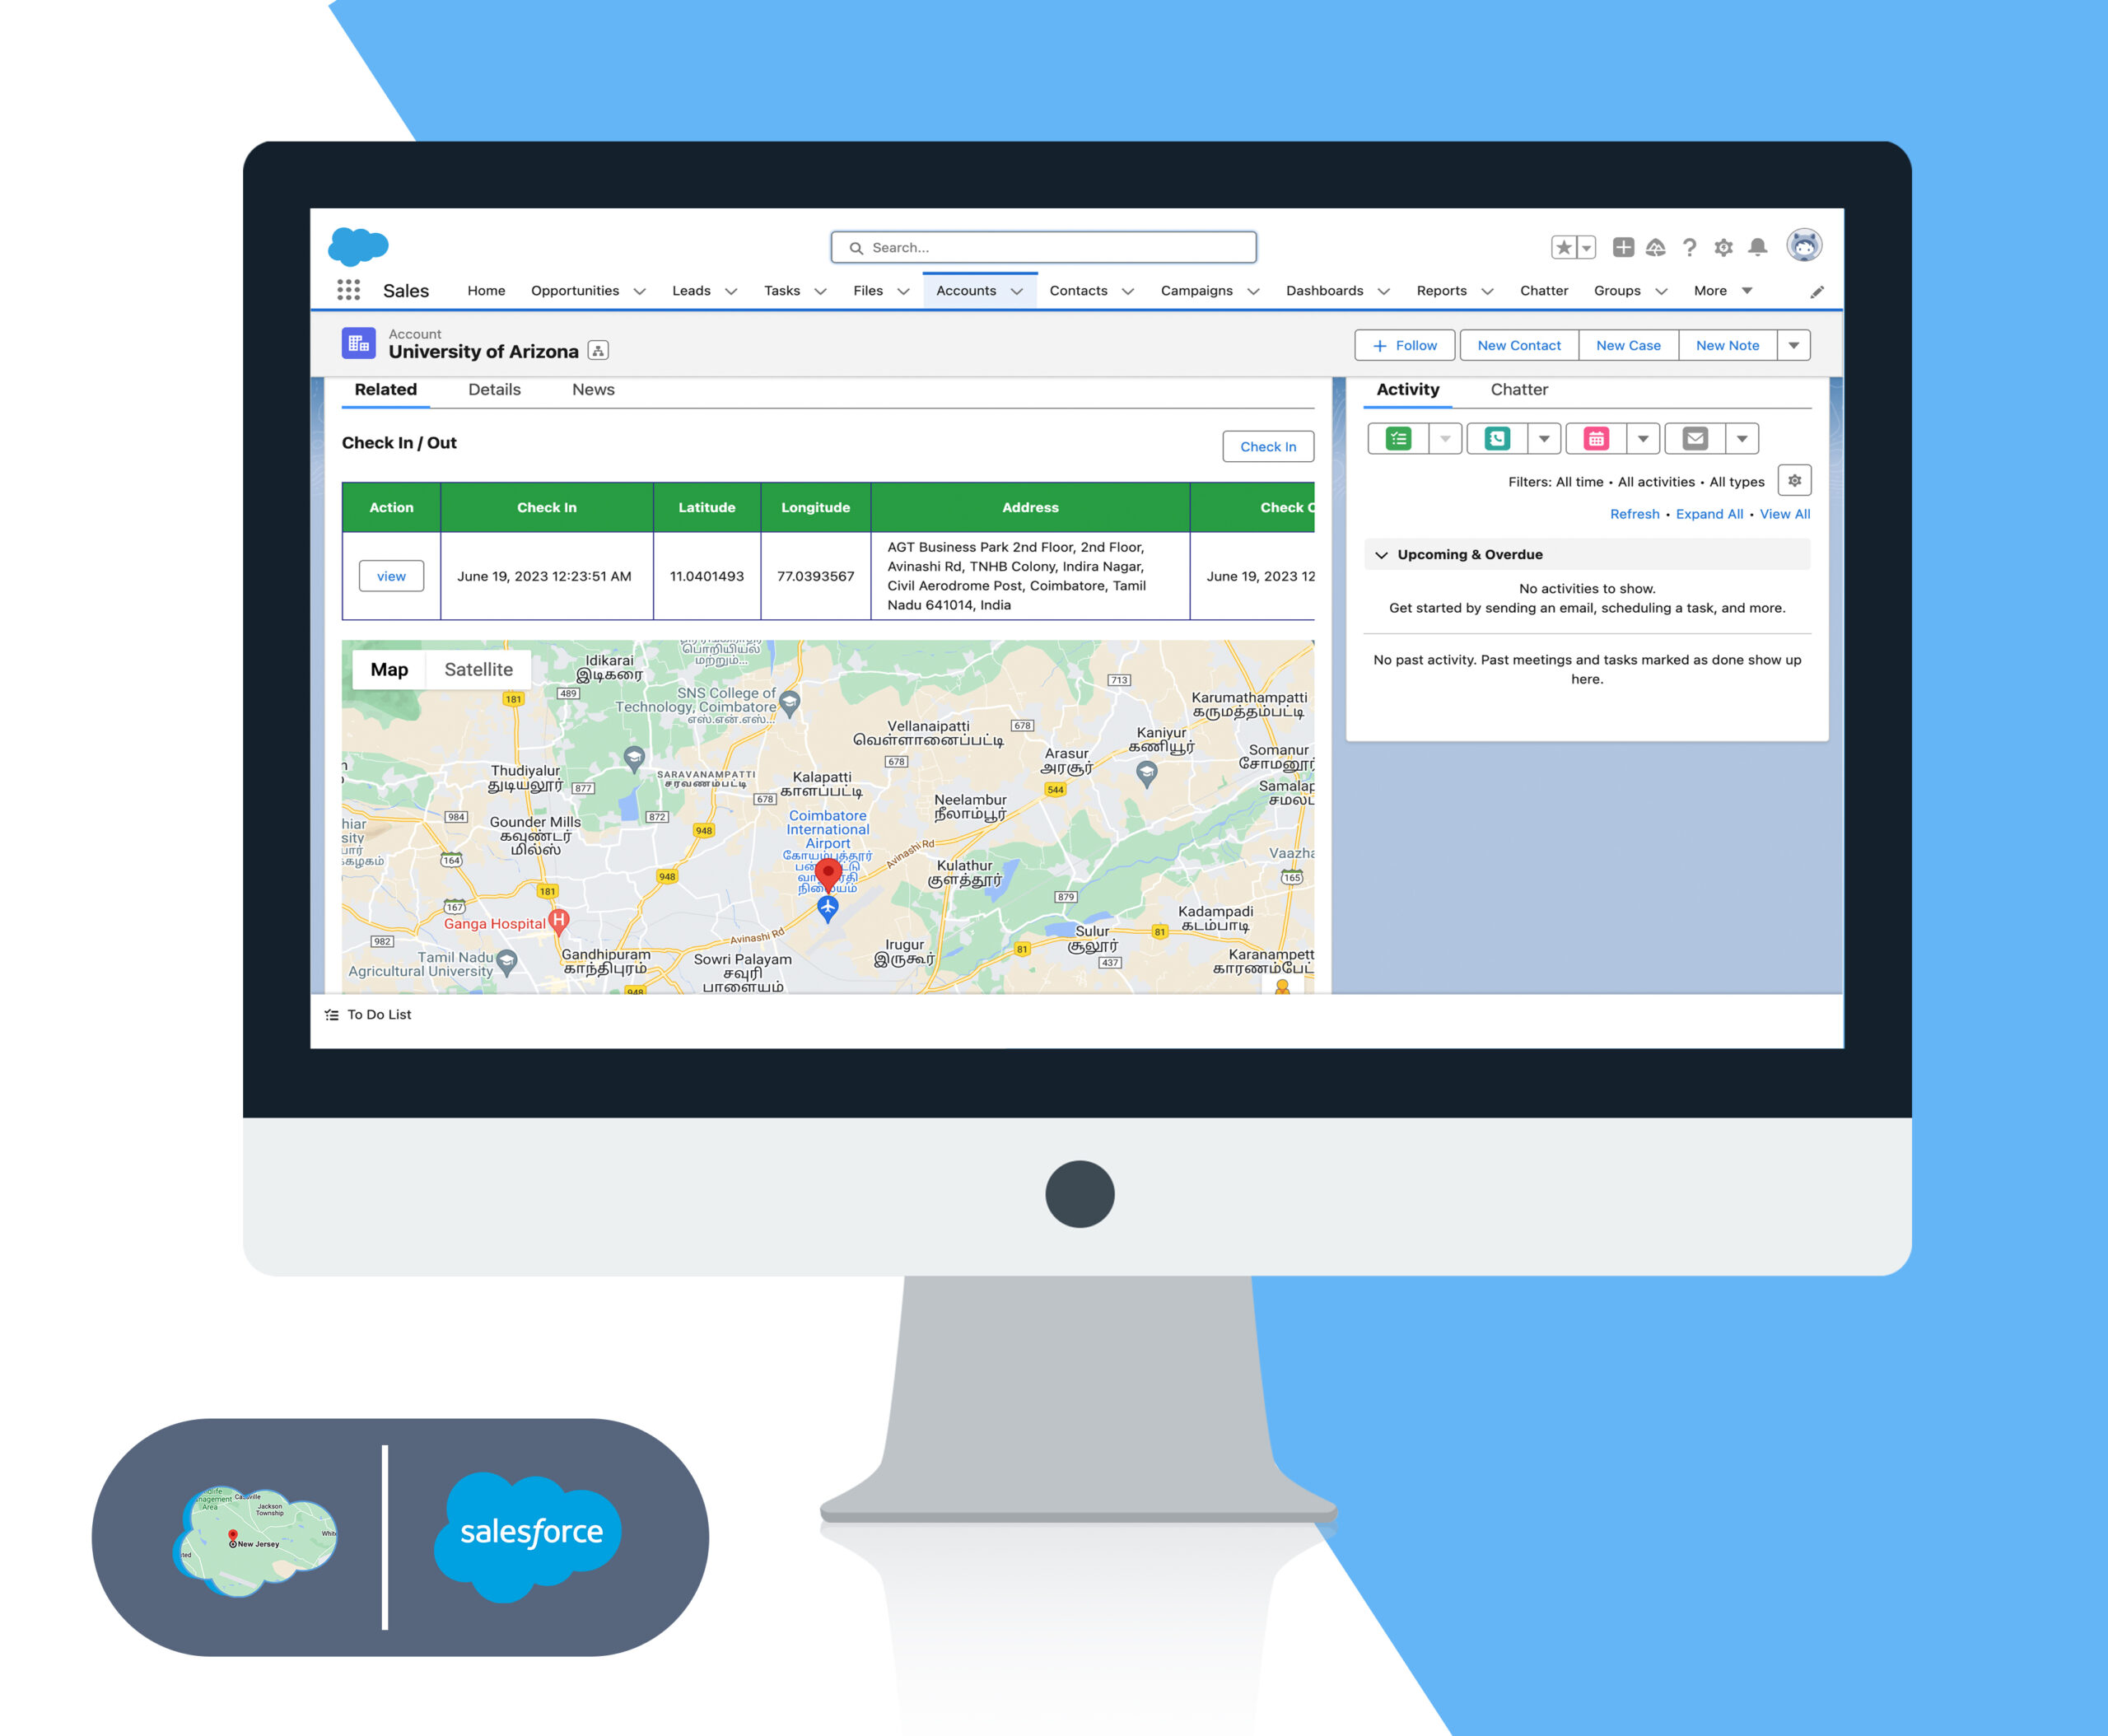
Setup Video :
Find Nearby Records :
- Go to Setup>Data integration rule
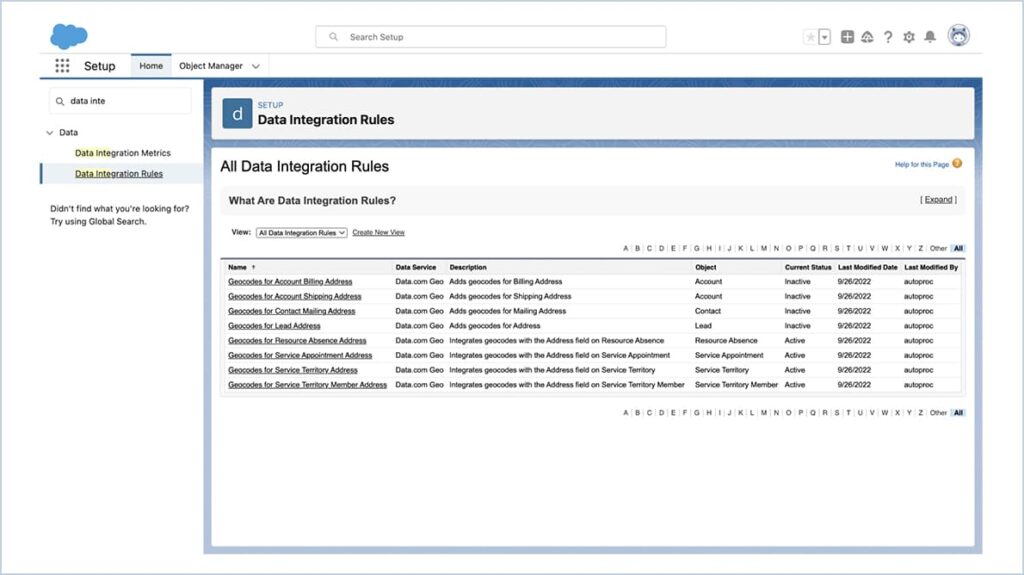
- Click on the necessary objects(Account, contact, and Lead).
- Click on the Activate button.
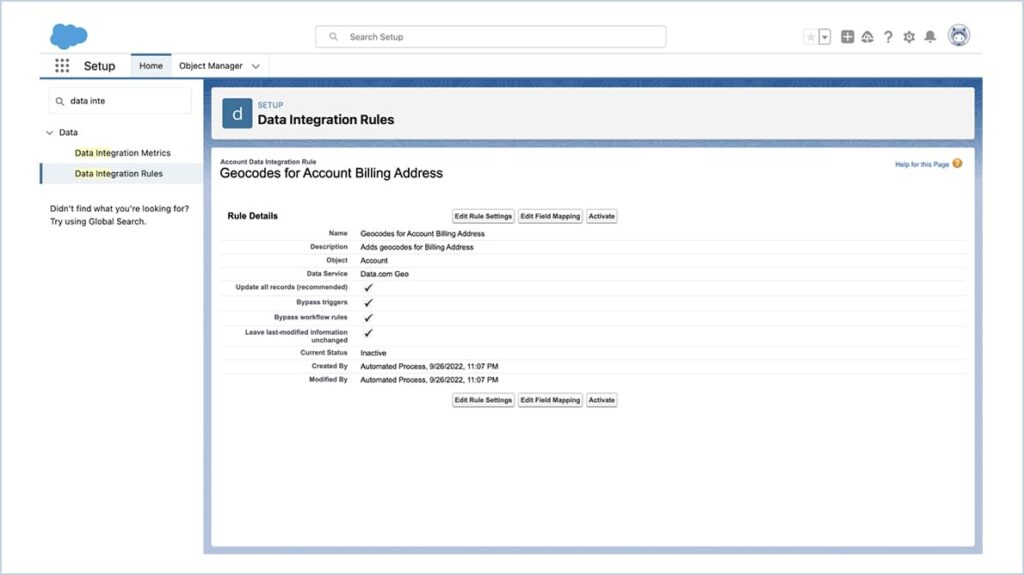
- For Sandbox, Activation may fail with below Error message. You can raise a case with Salesforce to solve this issue. also for production, we will not face this error.
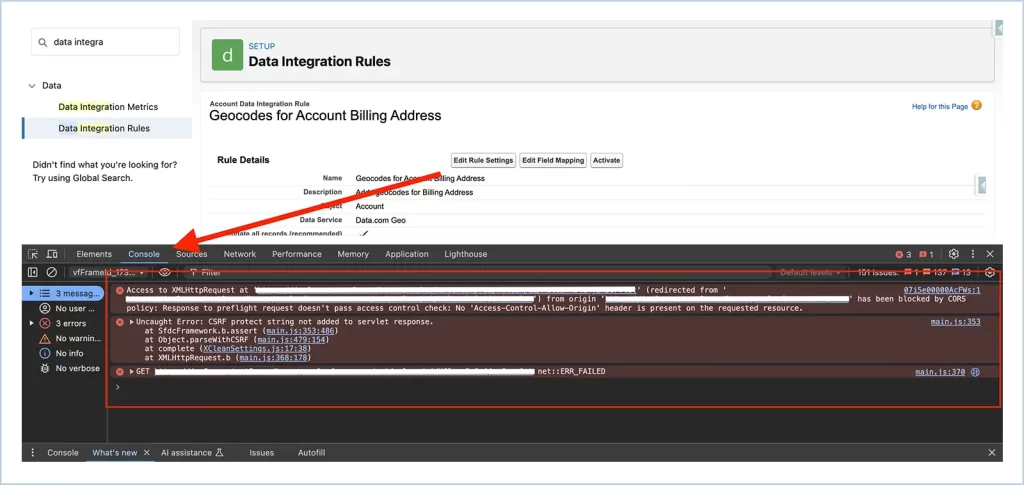
- Once it’s done, place the nearby Records component on the required object detail pages(Account, Lead, Contact).
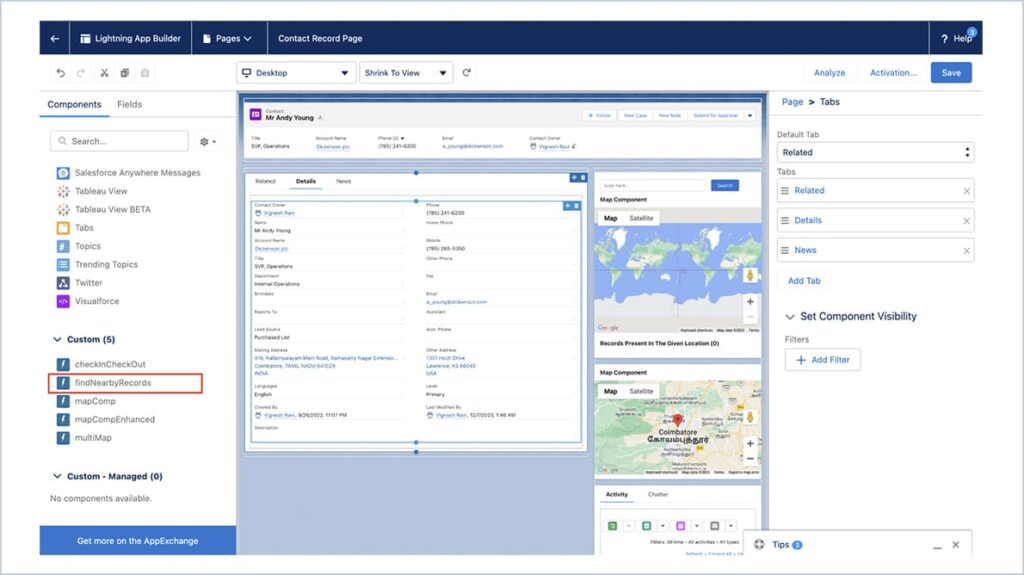
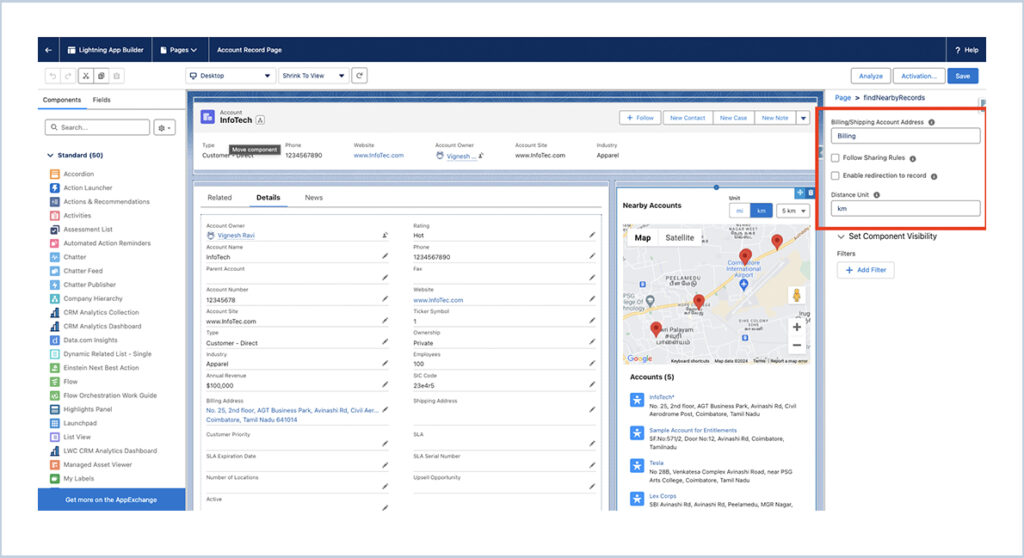
- For the Account object alone, the address type needs to be set, that is either Shipping or Billing in the property of the component. Skip this step for Lead and Contact.
- Check the “Follow Sharing Rules” checkbox if the running user needs to follow the sharing rules of the org.
- When the user clicks on the map marker, check the “Enable redirection to record” checkbox to redirect to the record.
- Set the default distance unit(Either Kilometers or miles) to calculate the distance between nearby records.
Find Nearby Records - Custom Objects :
- Go to Setup>Data integration rule

- Click on the necessary objects(Account, contact, and Lead).
- Click on the Activate button.

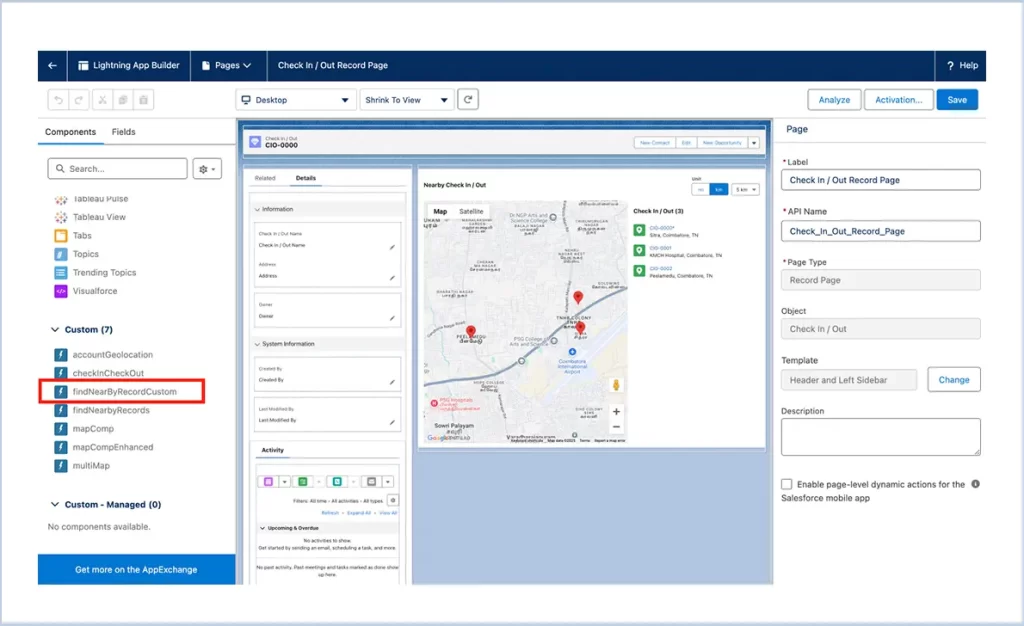
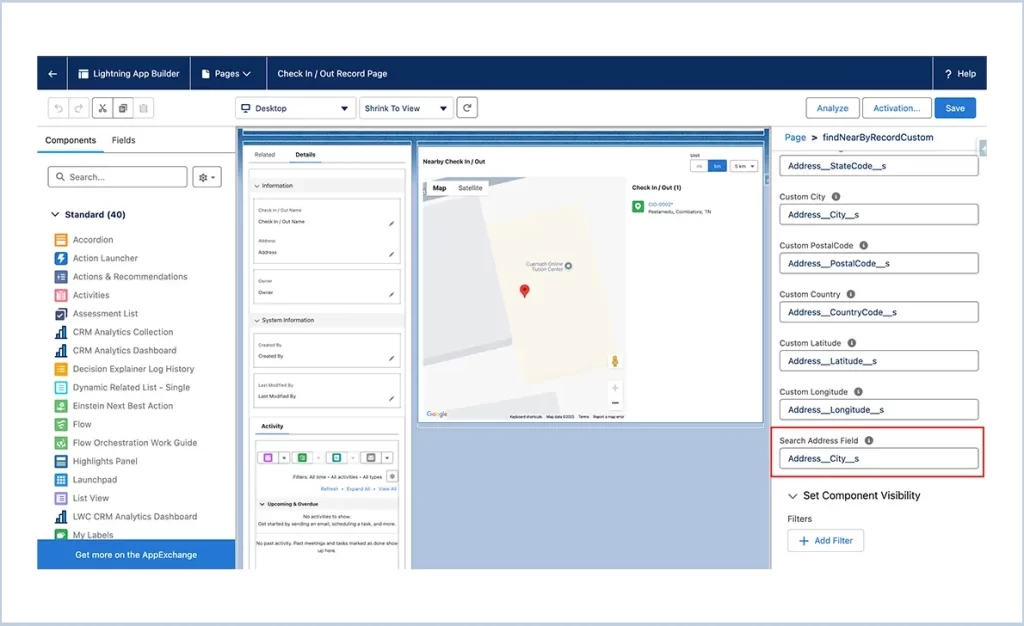
- Once it’s done, place the FindNearByRecordsCustom component on the required custom object detail pages.
- For a custom object, the API names of the fields Address, State, Street, City, Country, PostalCode, Latitude, and Longitude need to be set.
- Check the “Follow Sharing Rules” checkbox if the running user needs to follow the sharing rules of the org.
- When the user clicks on the map marker, check the “Enable redirection to record” checkbox to redirect to the record.
- Set the default distance unit(Either Kilometers or miles) to calculate the distance between nearby records.
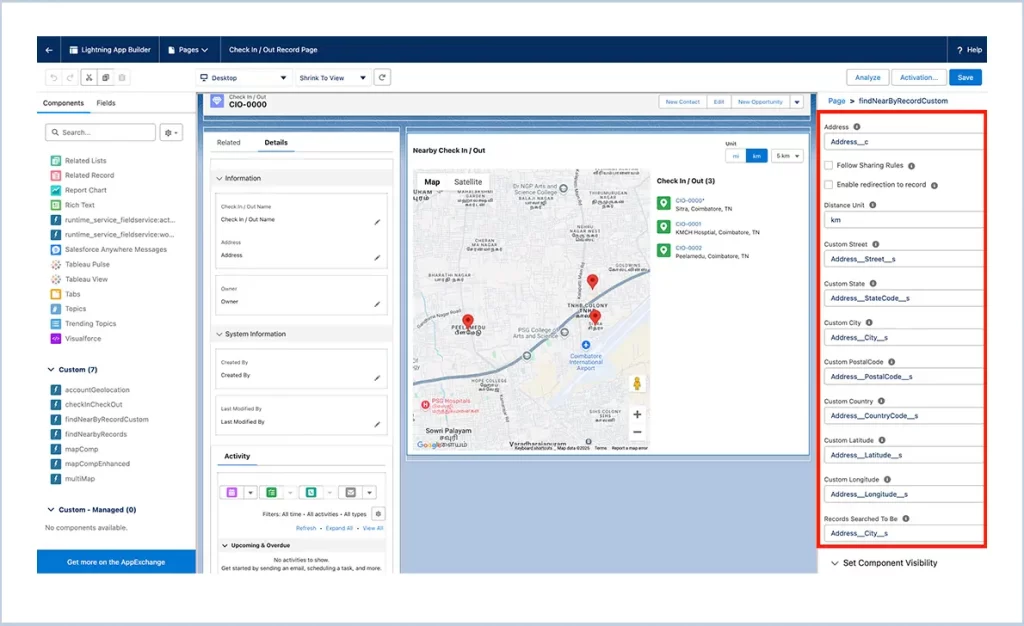
- If custom object records do not have latitude and longitude, Enter field API Name by which to show the nearby records like (City, State, ZipCode). Else, it shows based on nearBy records based on latitude and longitude.
CheckIn/CheckOut :
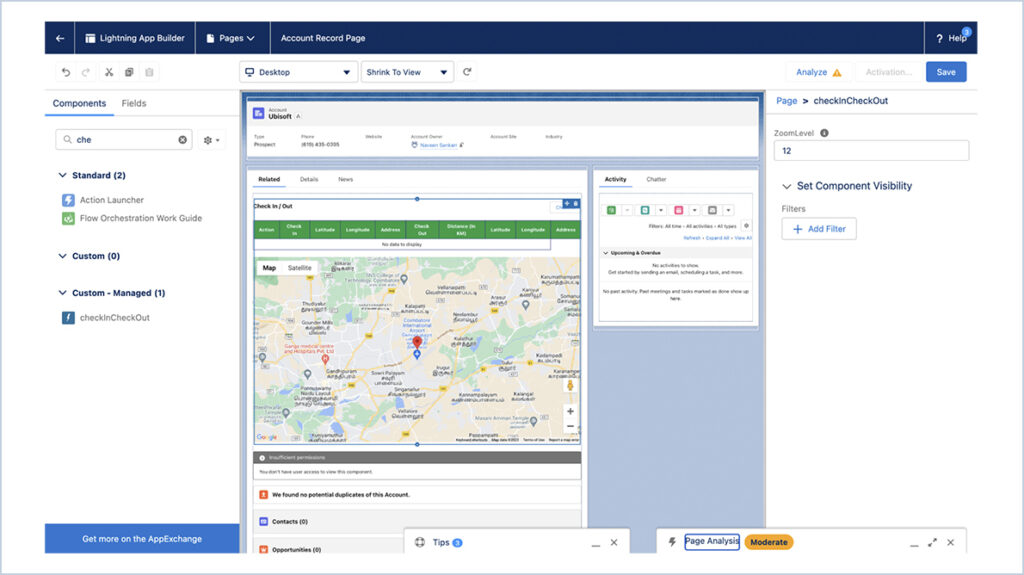
- Place the component in a record detail page of any sobject.
- Enter the default zoom level of the map in the ZoomLevel property.
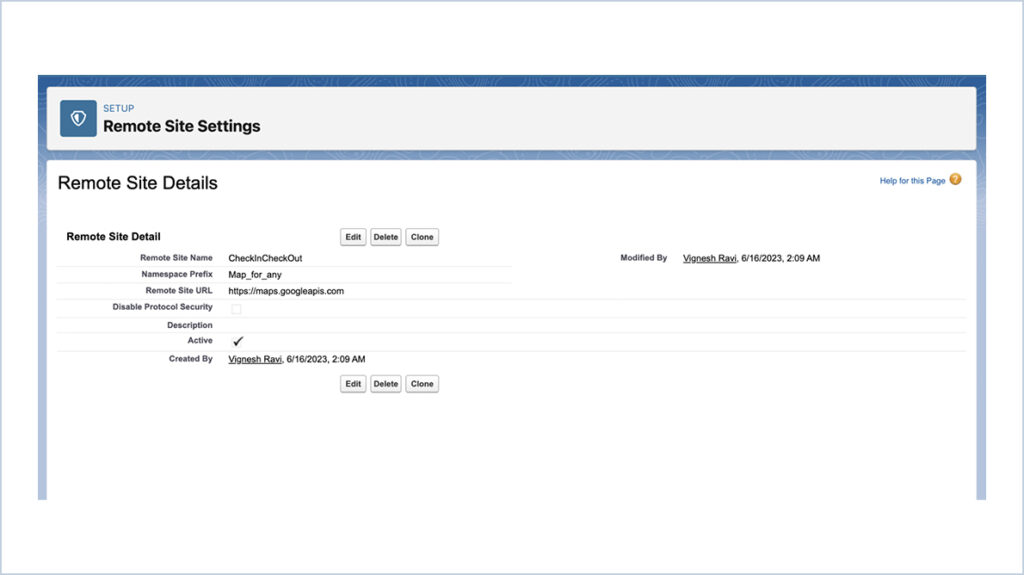
- Add the “https://maps.googleapis.com” URL in the remote site settings.
- Go to Setup > Custom metadata types and Click on manage records besides API Key.
- Click on New and enter the Google map API key in API Key Value.
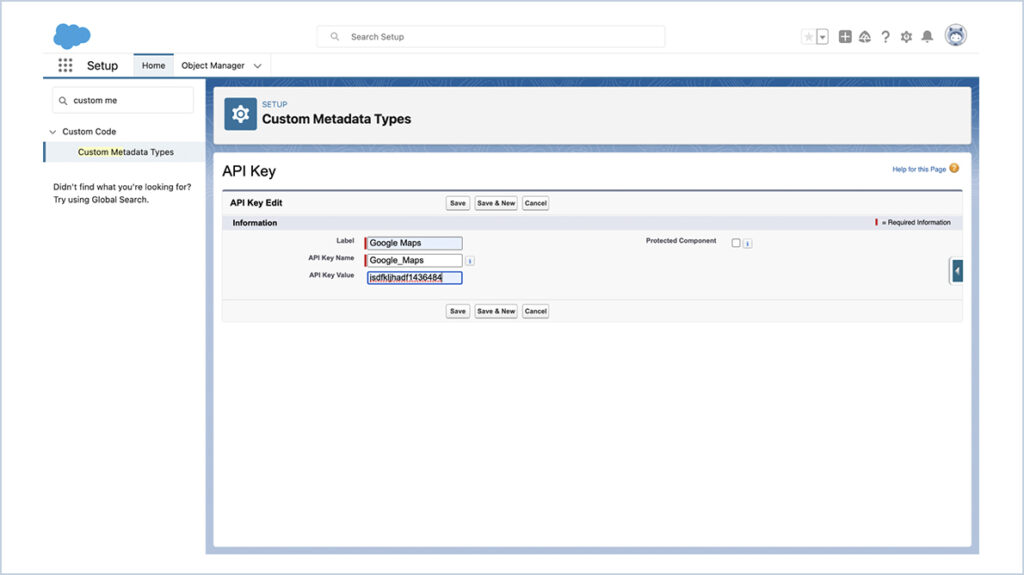
- Note: Google Map API must be purchased in order for this component to work.
MapCompEnhanced :
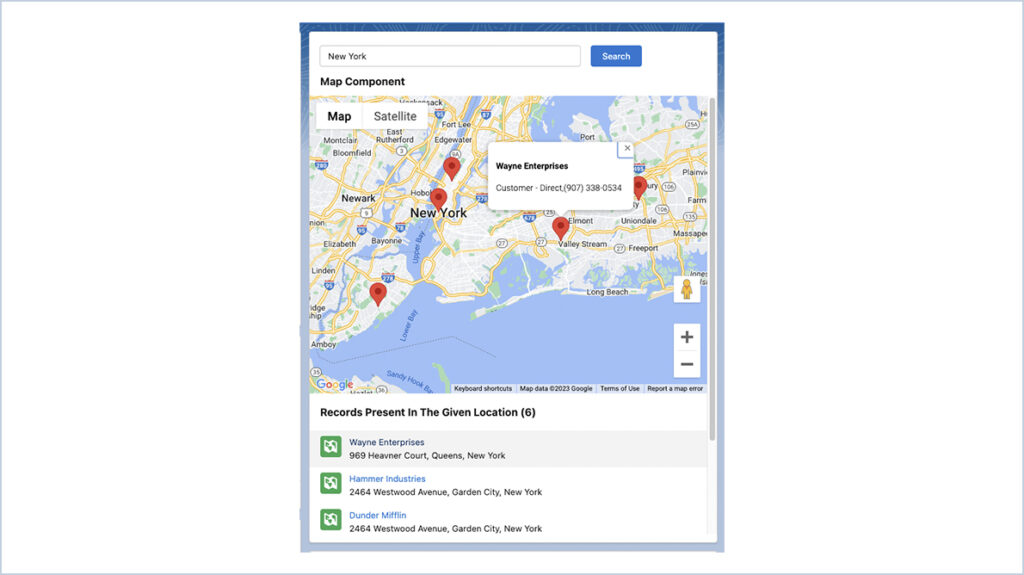
- Place the mapCompEnhanced on the Homepage and fill the Address values with the Address field API Names, Specify Sobject, Specify the fields which need to be displayed other than the address, tick the custom address field checkbox if you are using a custom address field or leave it as it is and Save the changes.
- Check the “Follow Sharing Rules” checkbox if the running user needs to follow the sharing rules of the org.
- When the user clicks on the map marker, check the “Enable redirection to record” checkbox to redirect to the record.
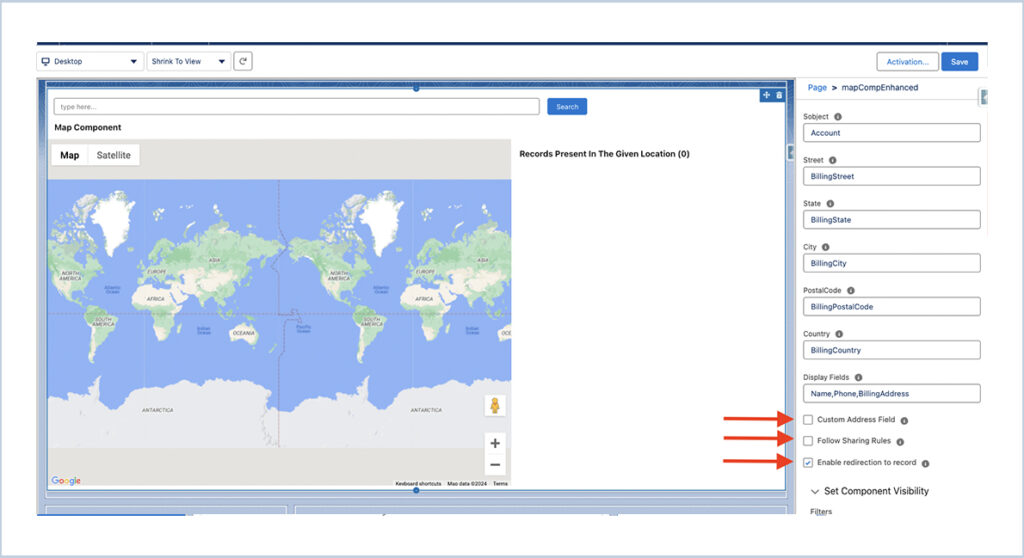
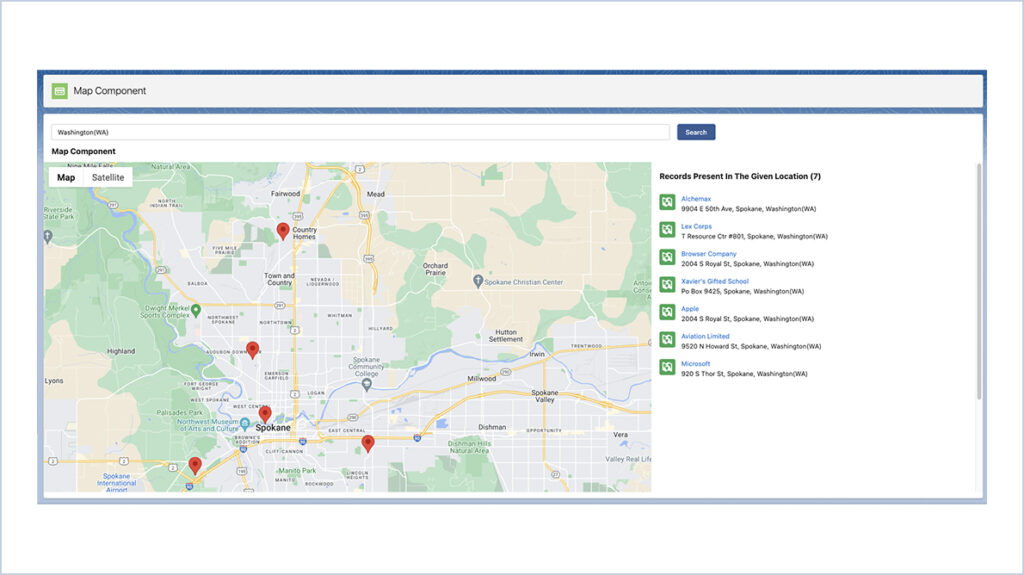
- In the Display Fields property, the first entered field would be the title of the marker and the rest would be in the description of the marker.
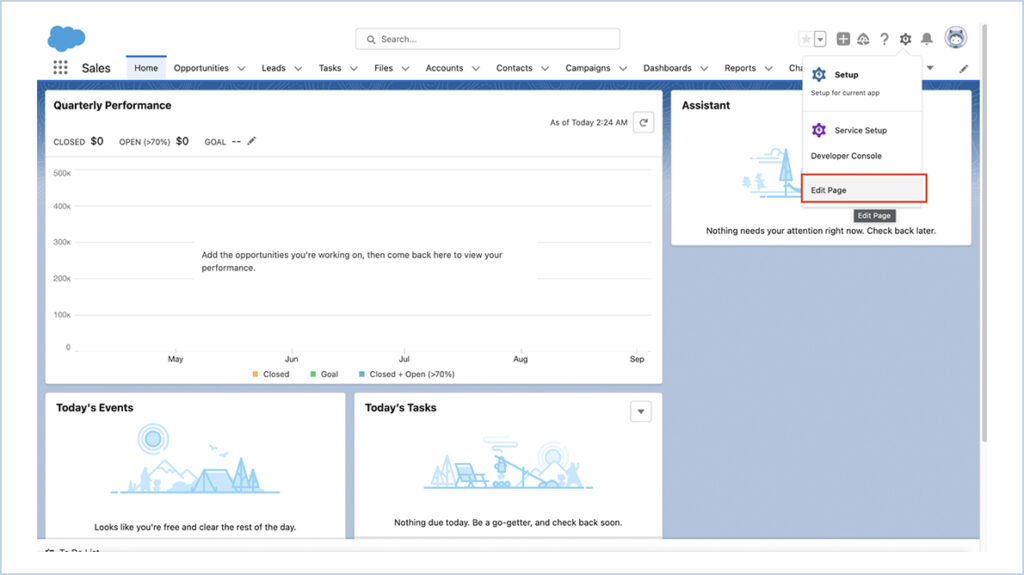
- On the Homepage, Select Edit page.
- Place the mapCompEnhanced on the Homepage and fill the Address values with the Address field API Names, Specify sobject, Specify the fields which need to be displayed other than the address, and Save the changes.
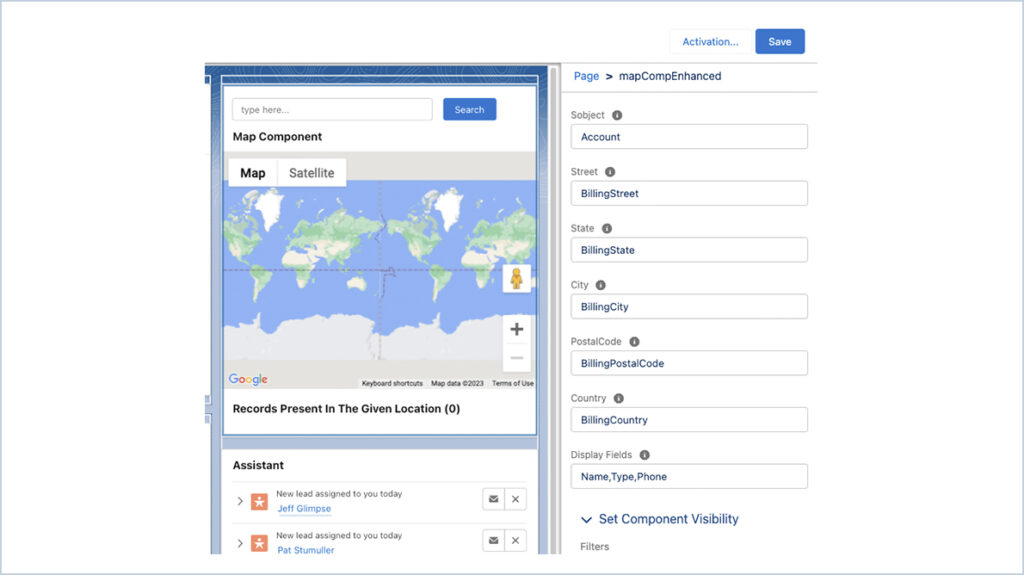
- In the Display Fields property, the first entered field would be the title of the marker and the rest would be in the description of the marker.
MapComp :
- Place the component on a record detail page and fill the Address values with the Address field API Names.
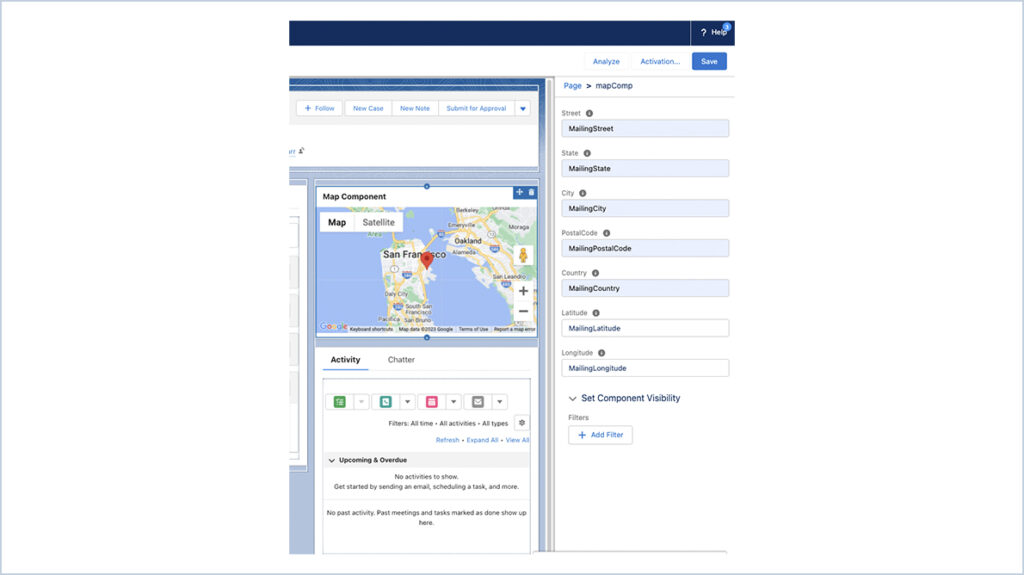
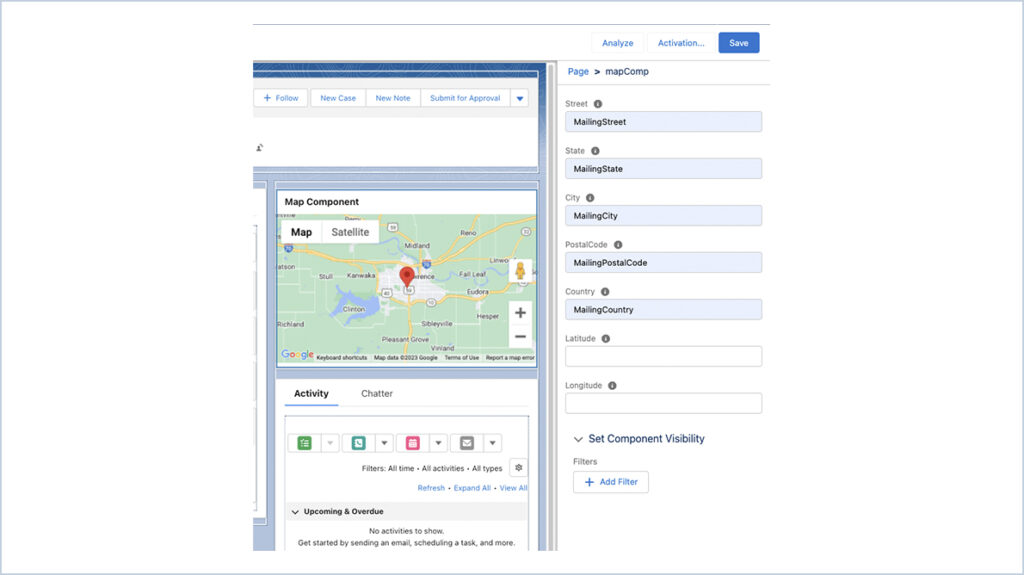
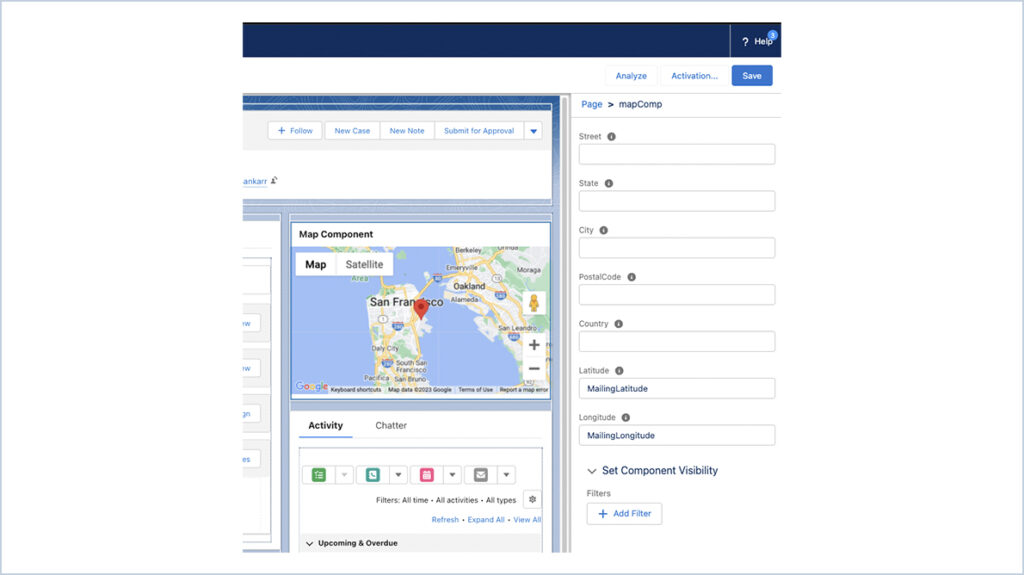
- The marker is shown on the map depending on either the address field or latitude and longitude, not both. That is, when latitude and longitude are given, the address field would not be considered. On the other hand, if the latitude and longitude fields are empty, only then the address field would be considered.
Please reach out to sales@innovalleyworks.com for the WhatsApp business API configurations and support.



 .
.