Before installing the WhatsApp Business package
Creating Meta Developer App & Register
WhatsApp Business Number
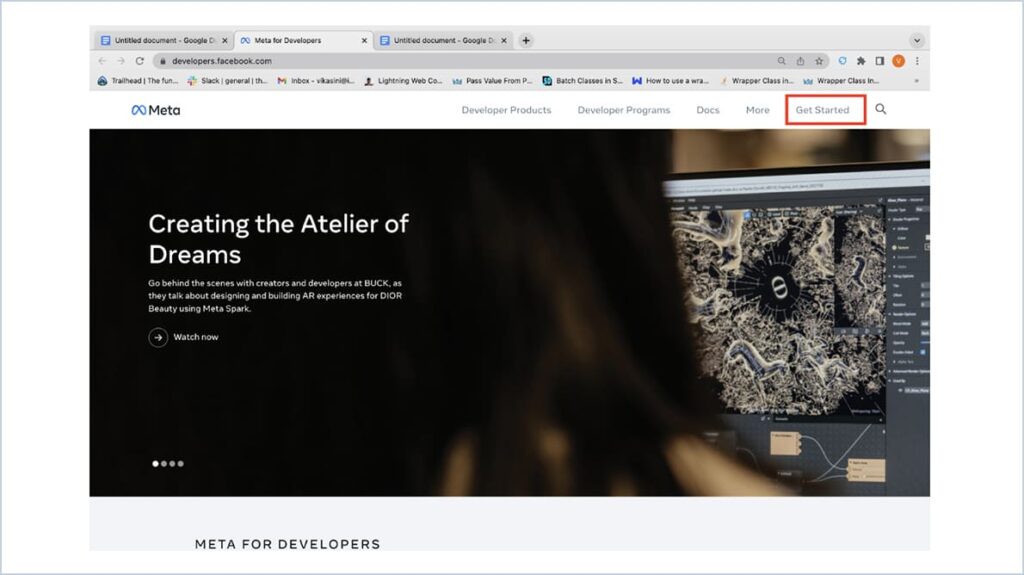
- Register and create a meta developer application using Facebook login – https://developers.facebook.com/
- Click Get Started and enter the details
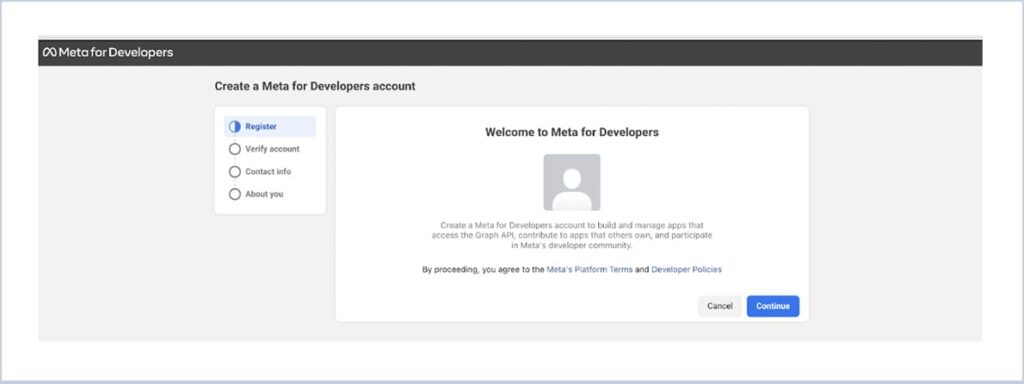
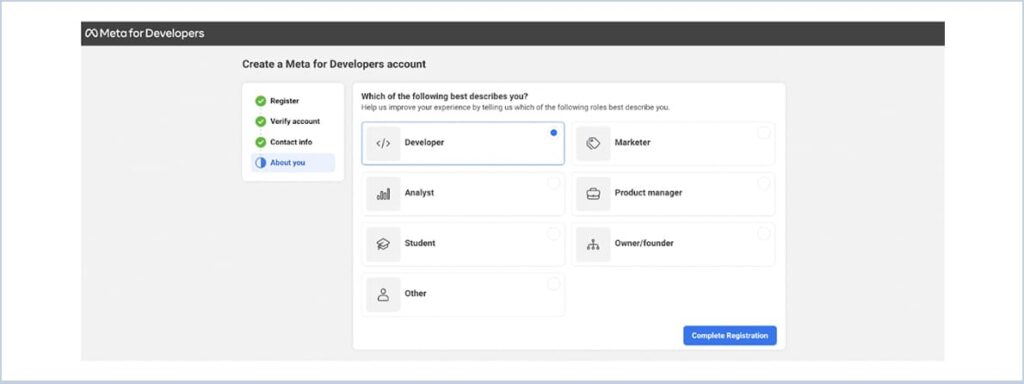
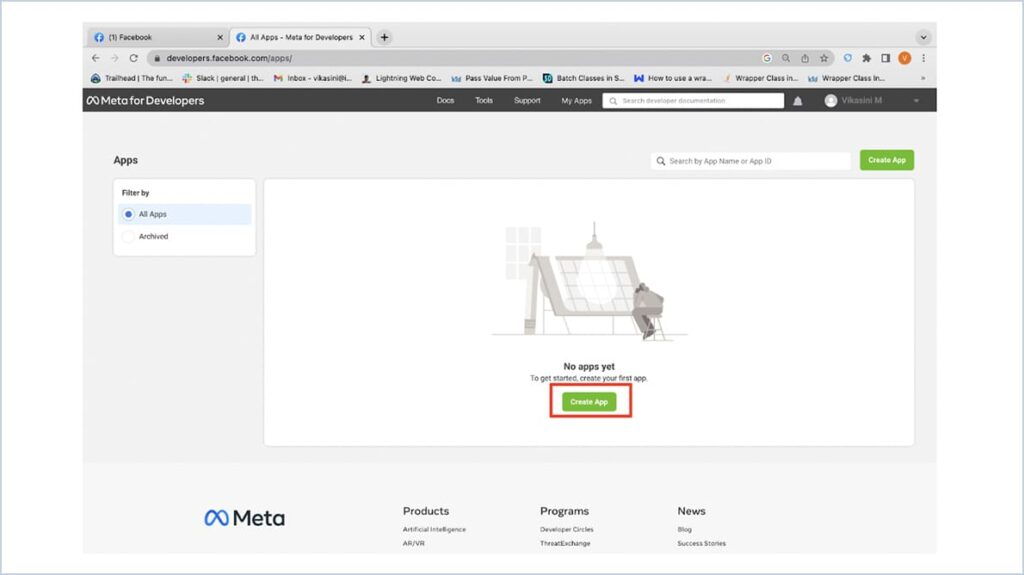
- Click Create App button
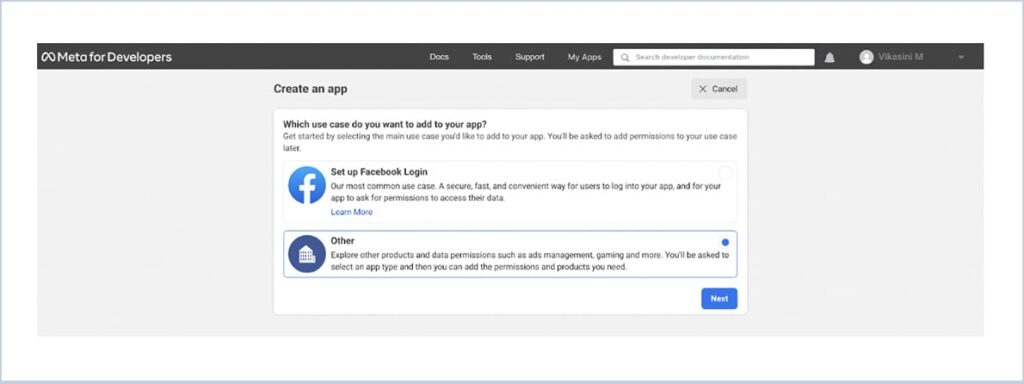
- Select Other and click Next
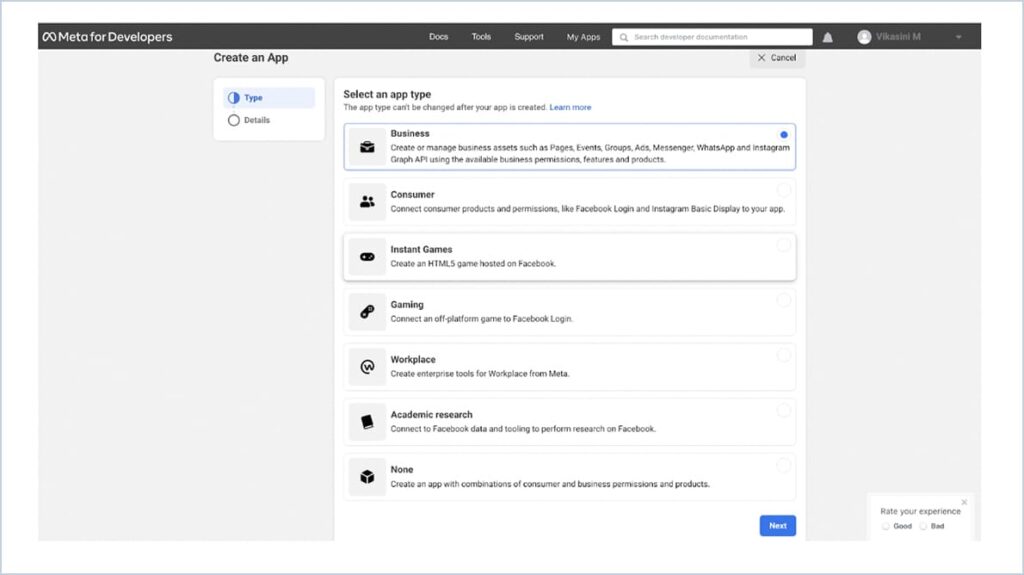
- Choose App type as Business and click Next
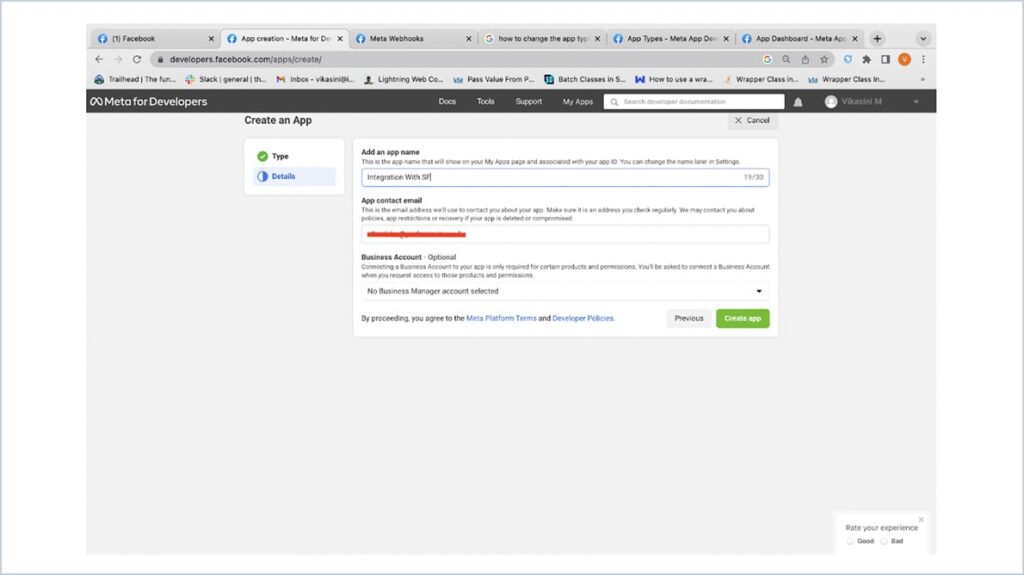
- Enter the app Name and email and click create app
- A Pop up box asks for a password and click Submit
- Click Setup in WhatsApp section
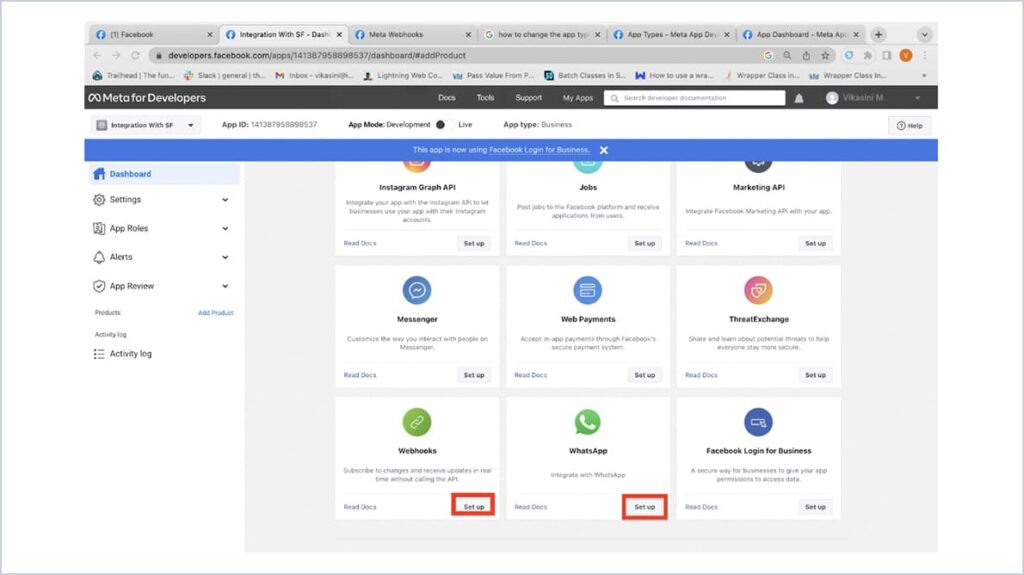
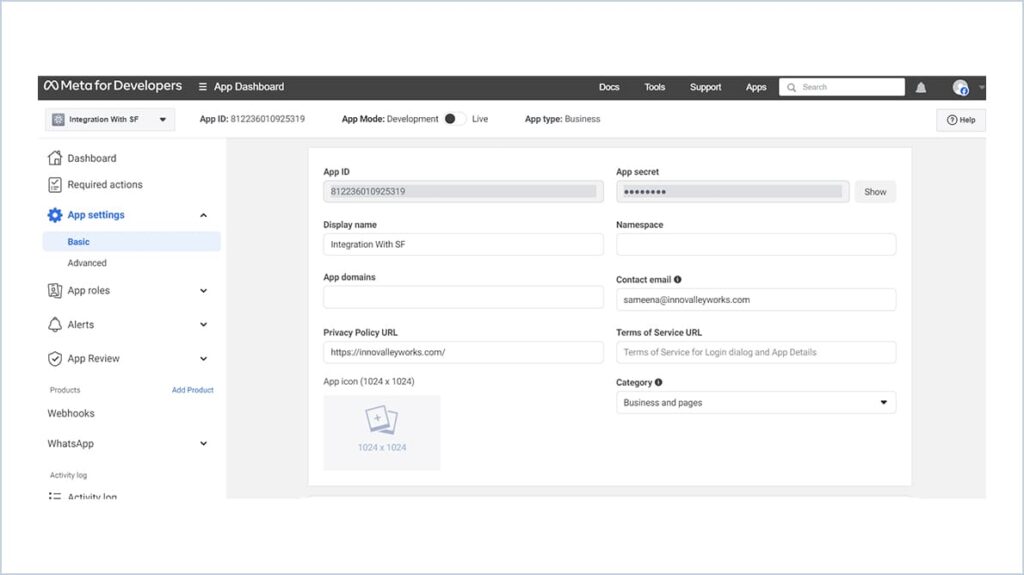
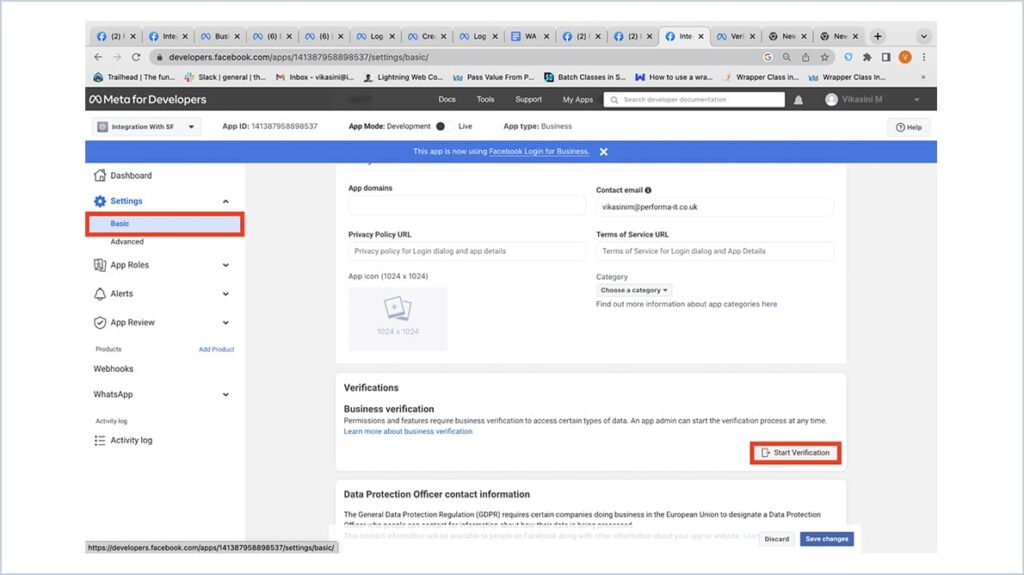
- Go to App Settings → Basic
- Enter the privacy policy URL in the respective field.
- Choose the Category of the business and Click Save Changes
-
Now Click Start Verification
-
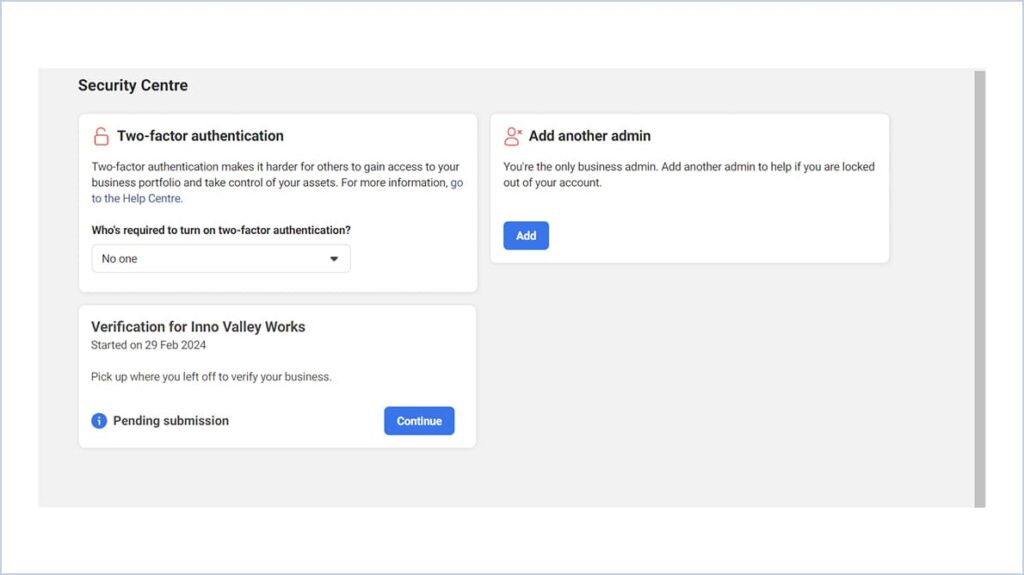
It will redirect you to another page. Click Start or ‘Continue’ if you had previously started the process
-
Click ‘Get Started’ in the pop-up
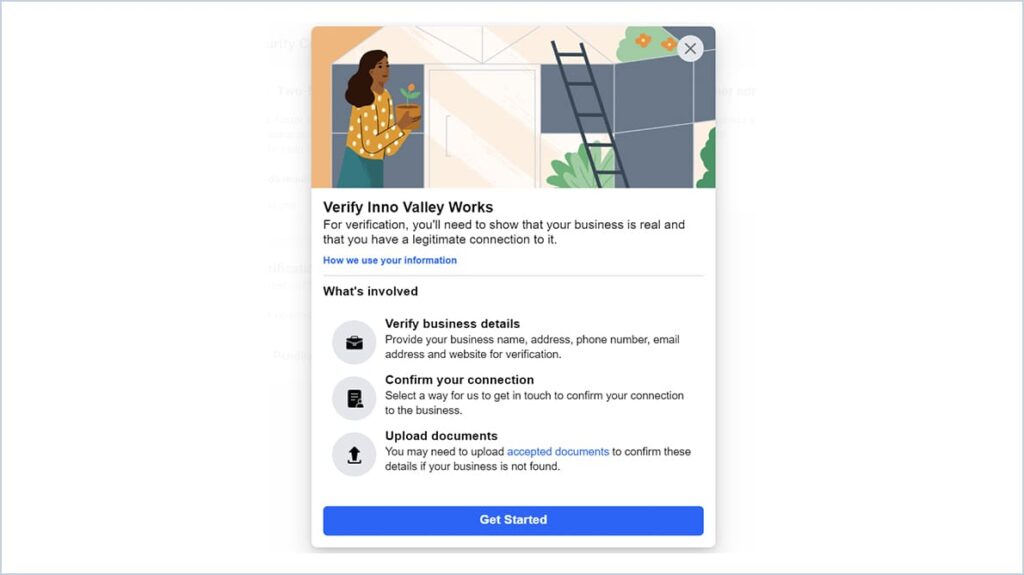
-
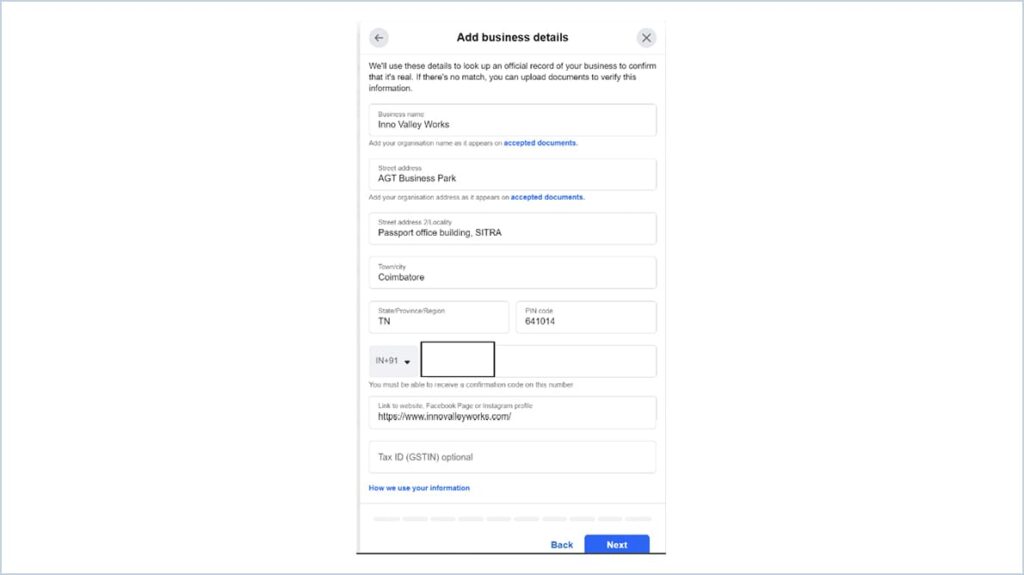
Select your country and then enter relevant business details and documents. Click Next.
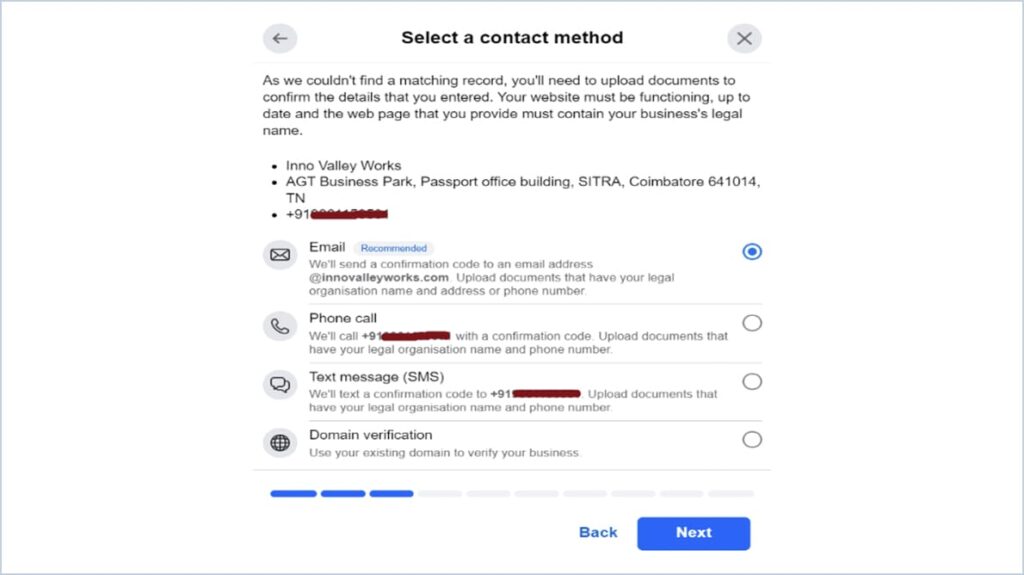
- Choose Email to receive your verification code. Click Next
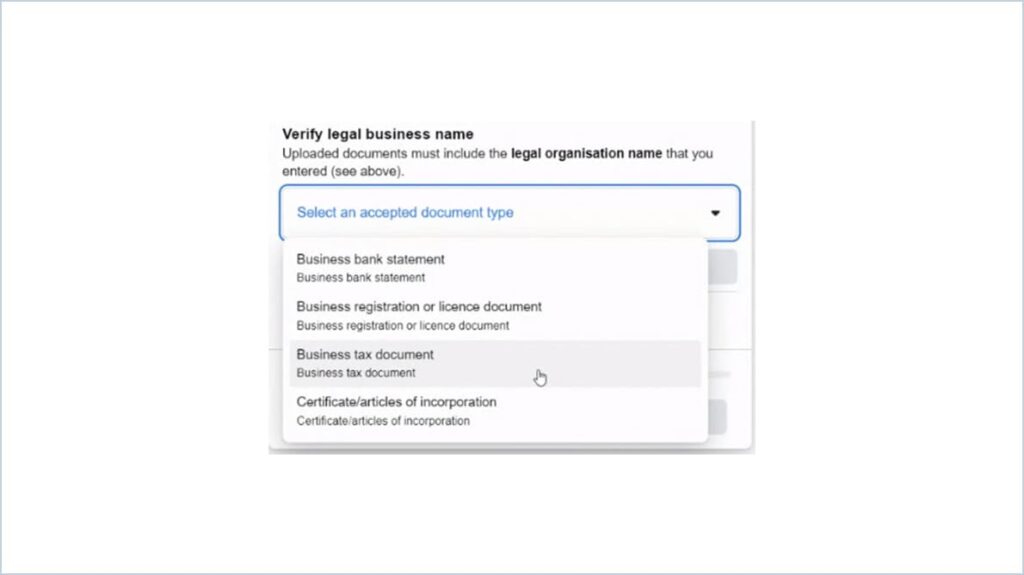
- Upload relevant documents asked by Meta to confirm authenticity of your business. Click Next until reaching the end
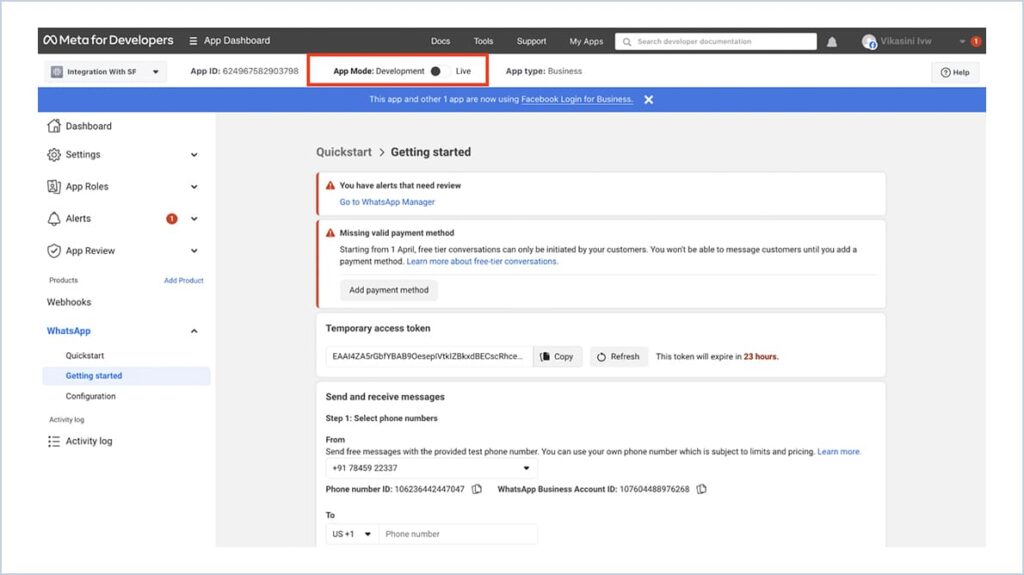
Changing App Mode To Live:
-
Change the App Mode from Development to Live.
-
App Mode is changed to Live

-
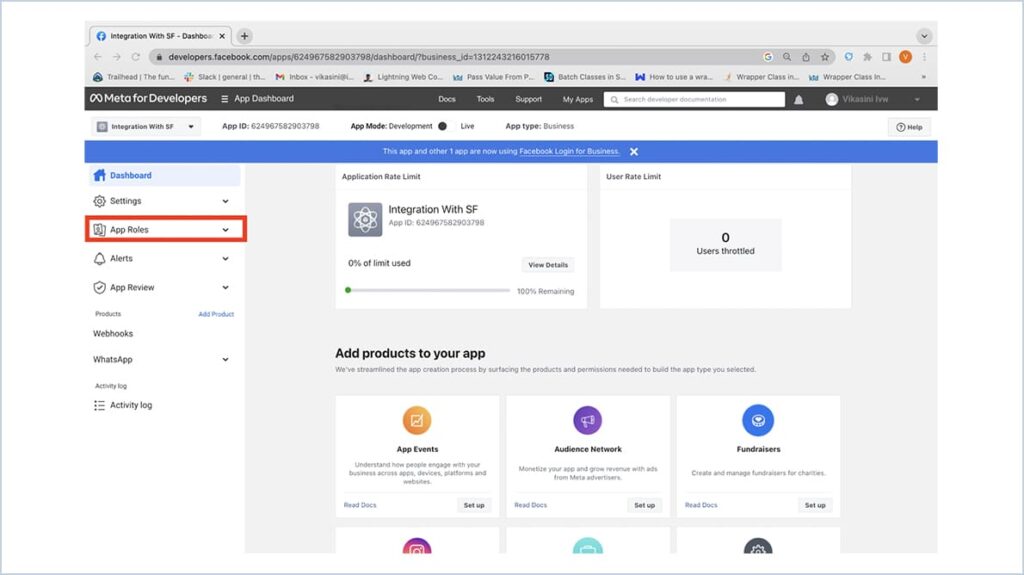
Click on the App Roles in the left panel of the Meta App page.
-
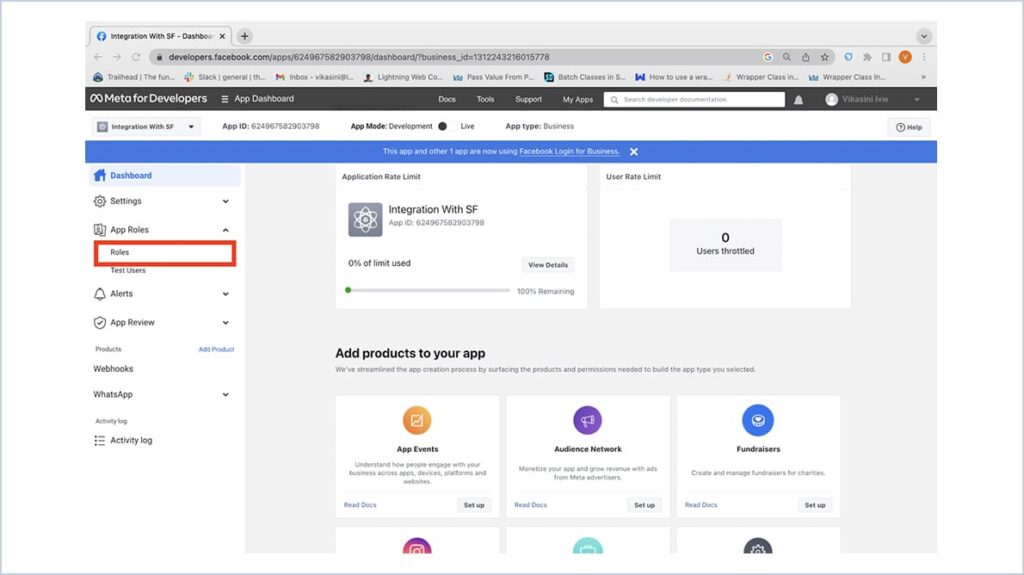
Click Roles
-
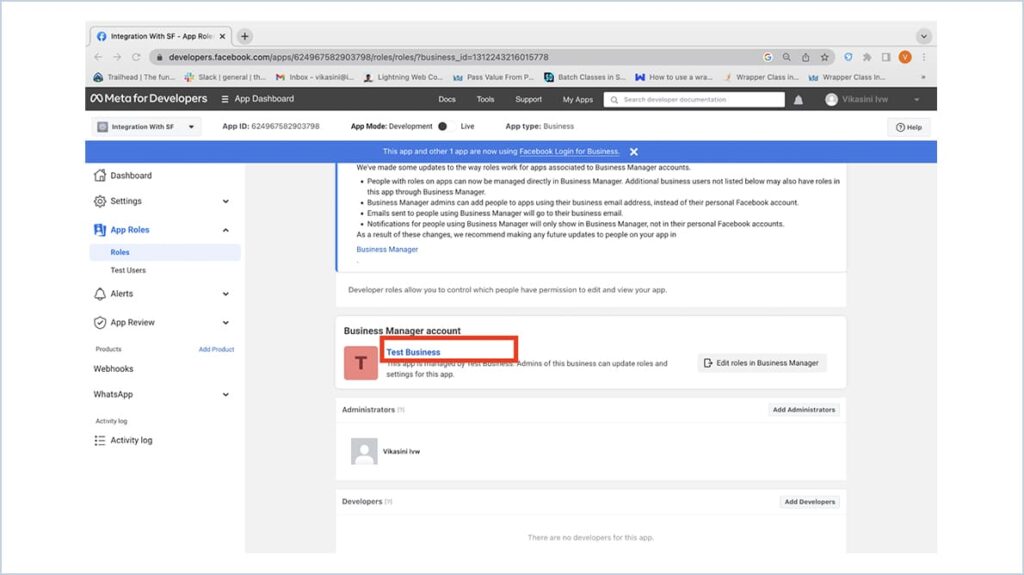
Click on the Business Manager Account created and linked with that.
- Click on the All Tools tab from the left panel on the Business Setting page.
- Select Business Settings.
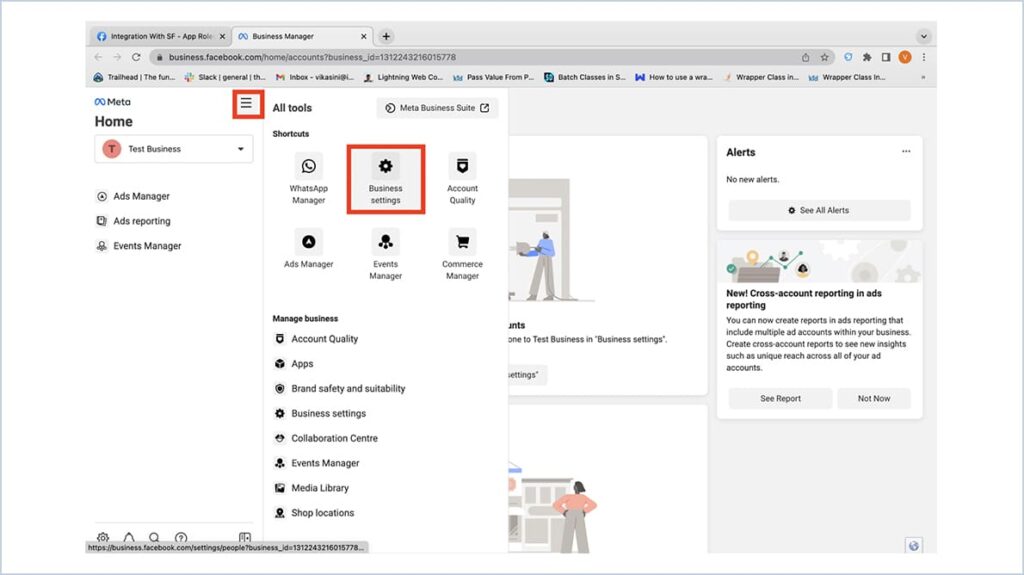
- Select the System Users in the left panel
- Click Add button to Add new user other than system admin
- Click on Add to add and give admin access
- If you face an error in creating the System User,
Please follow this link:
-
Add Assets for the user created
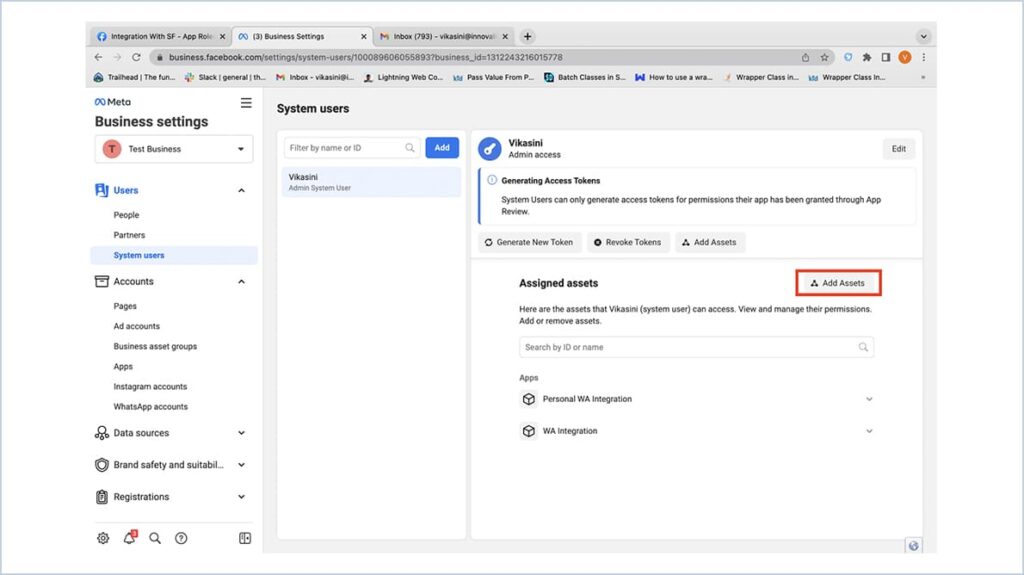
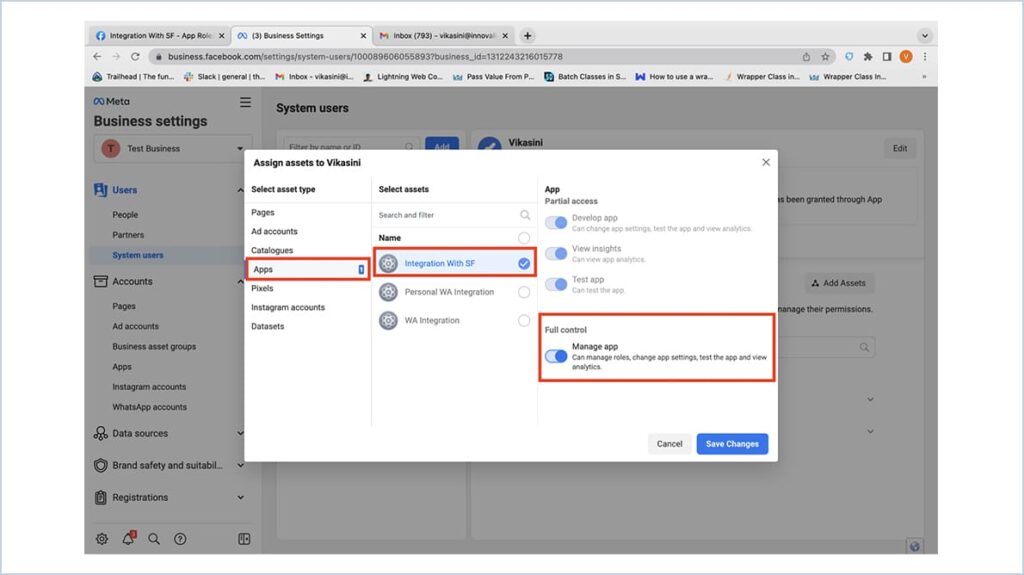
- Select Apps
- Choose the app that we have created
- Turn On Manage app under Full control and Click Save Changes button
-
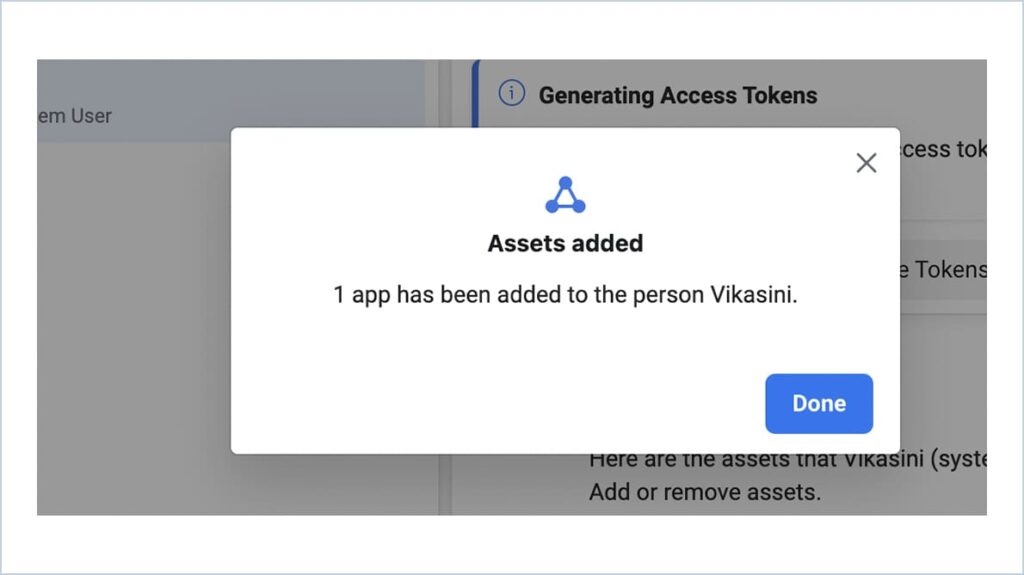
Click Done
-
Click on Generate new token
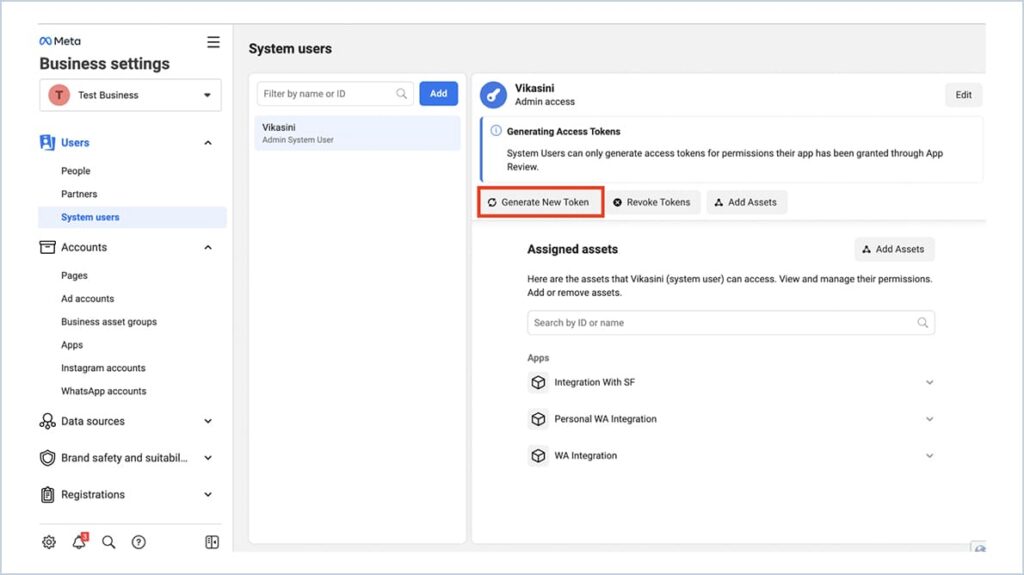
-
Select the app for which we want to generate a token and click on generate token.
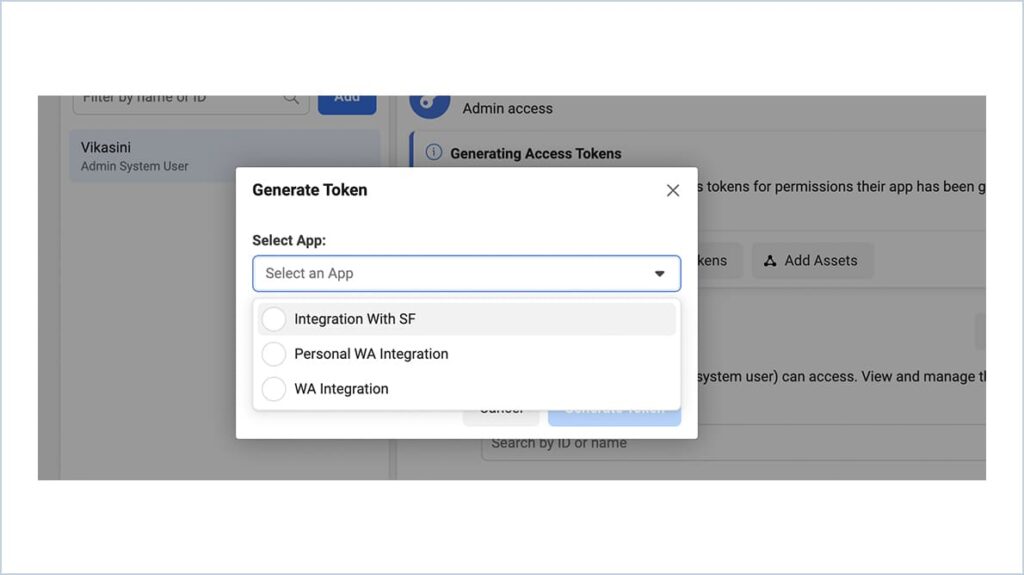
-
Choose the token expiration as Never
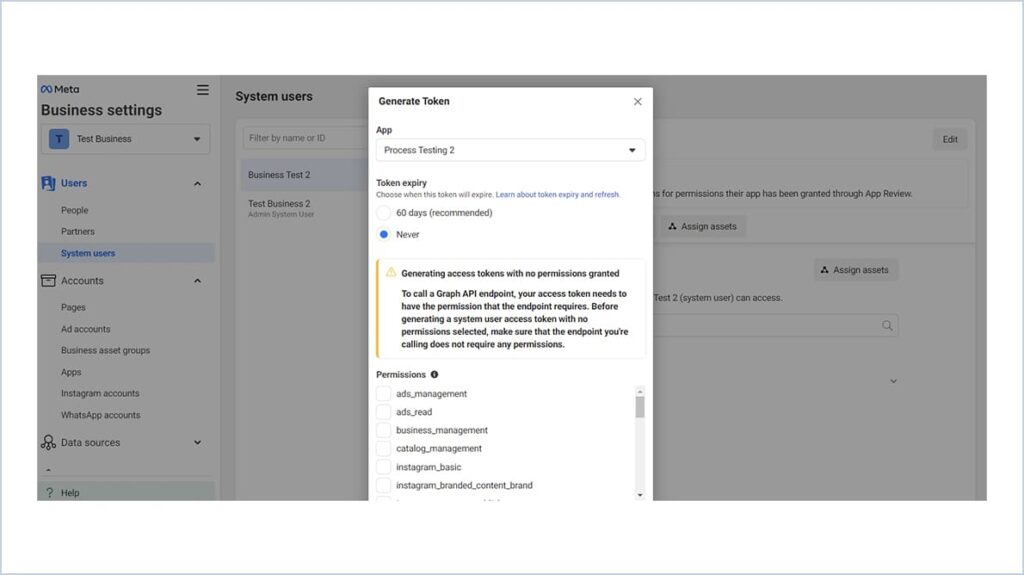
-
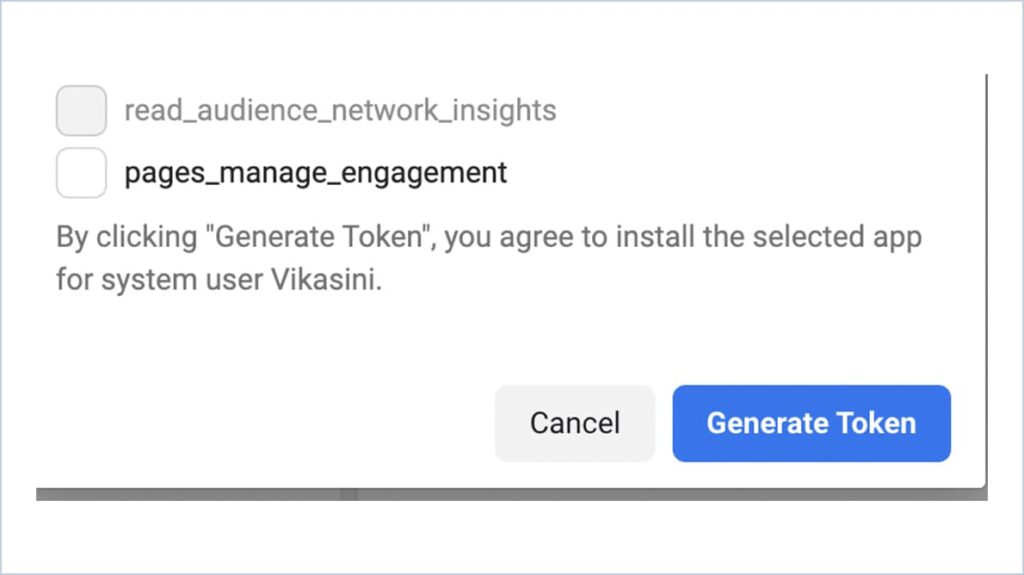
Check Business Management, Whatsapp business Messaging, Whatsapp business Management Check box under Available permissions
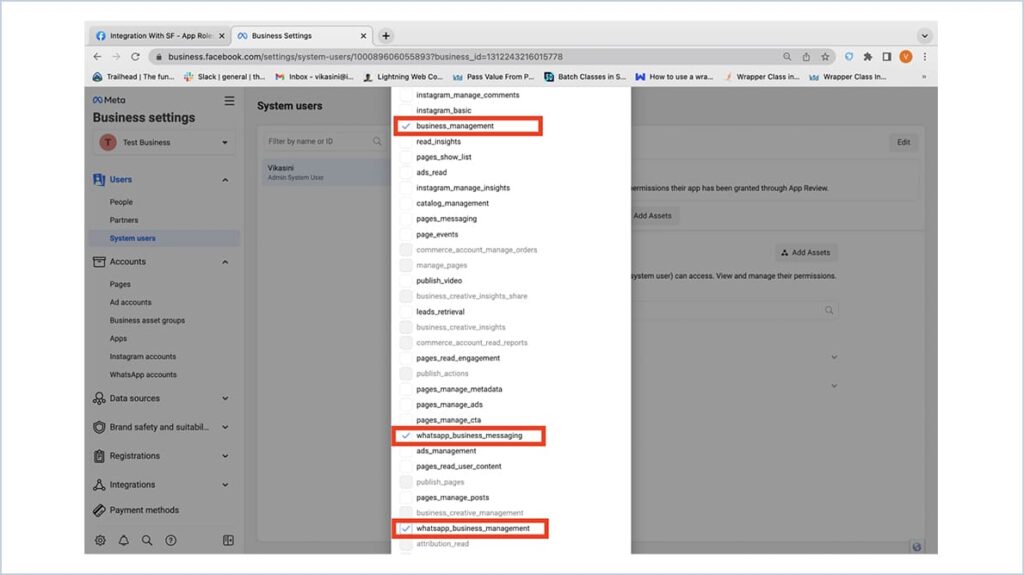
-
Click Generate Token Button
-
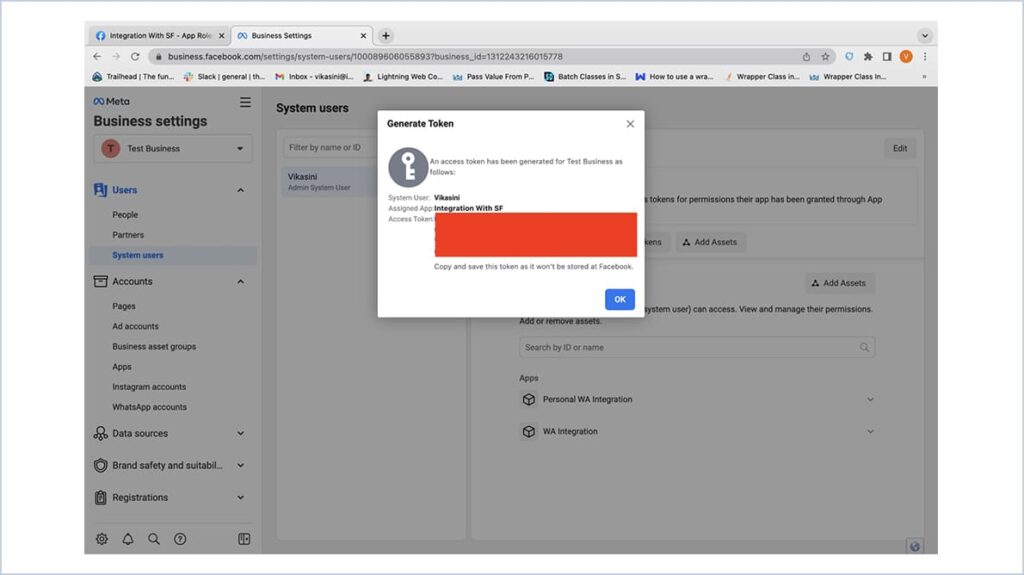
Permanent Access token is generated. Copy this access token for future use. This access token will be used in Custom metadata in Salesforce
- Creating WebHook
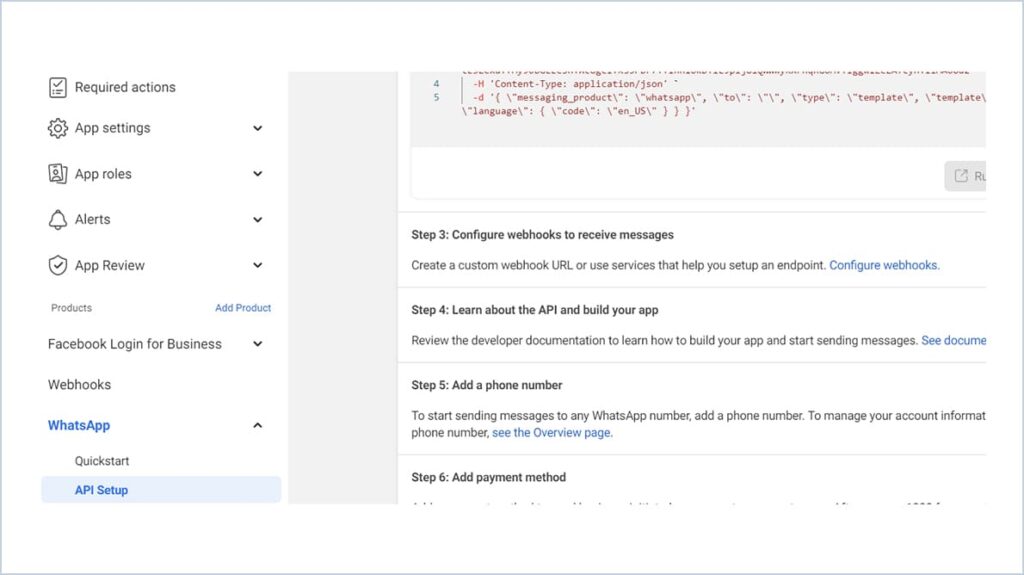
- Developers.facebook.com-> Your App -> WhatsApp -> API Setup -> Configure Webhooks.
-
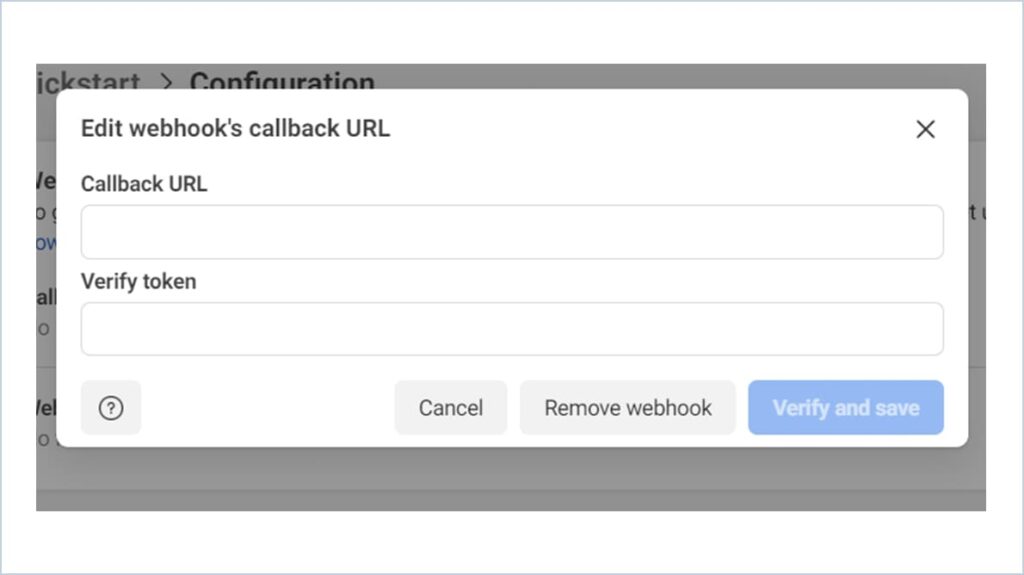
Click the ‘Configure Webhooks’ hyperlink and then click ‘Edit’
-
Enter the FB Verify token and Site URL, then click Verify and Save
Adding Business Number to Meta :
-
Whatsapp → API Setup -> Add Phone Number
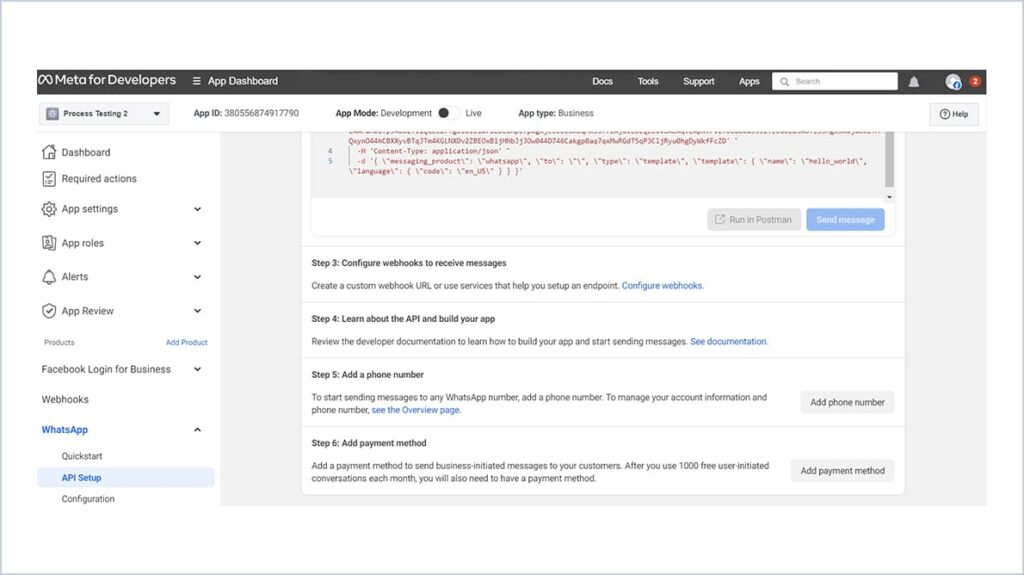
-
Enter the details Like business name, website and select the country and Click Next
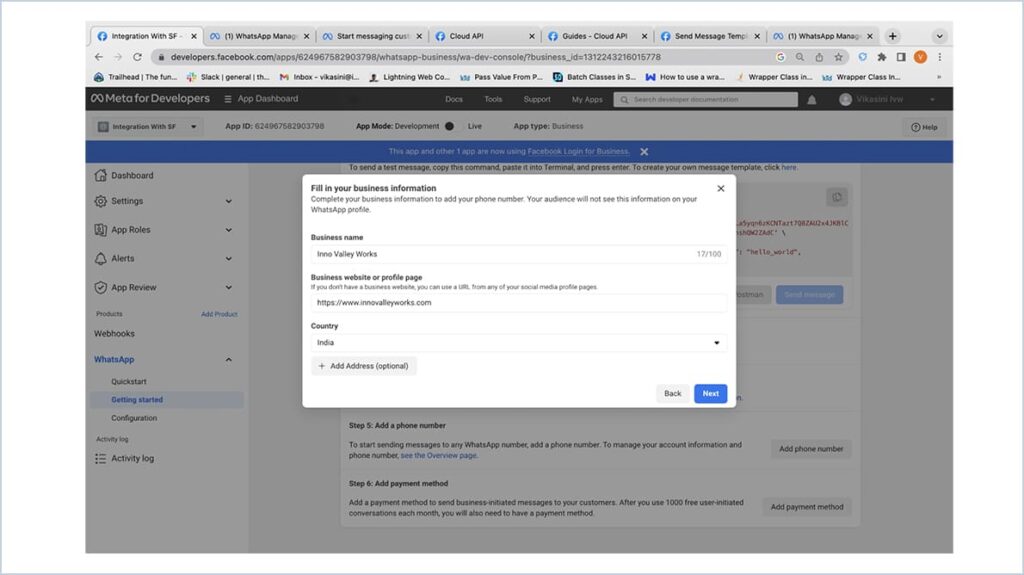
-
Select the appropriate category for your business and click Next
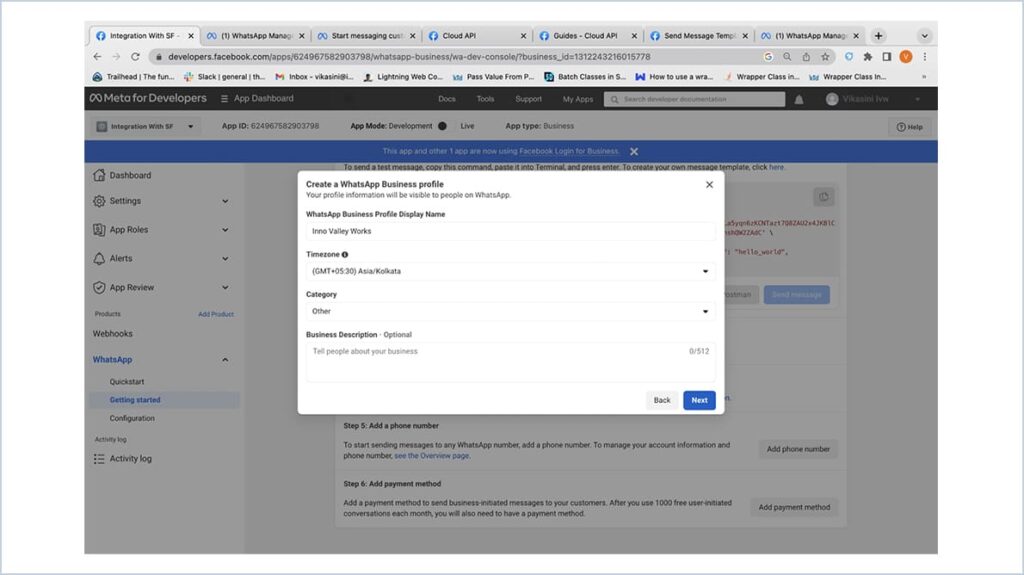
- Select country code and enter the phone number
- A verification code will be sent
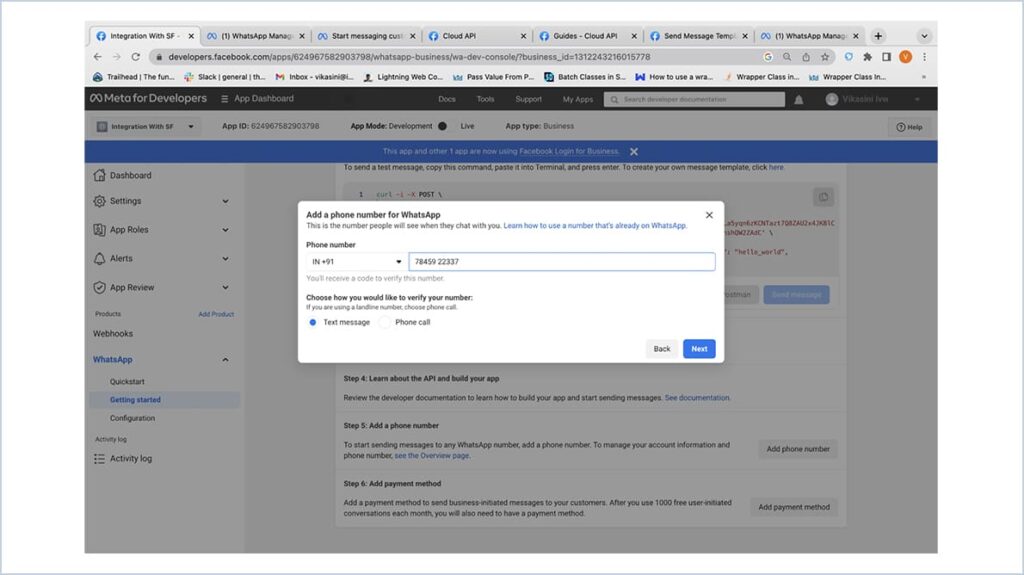
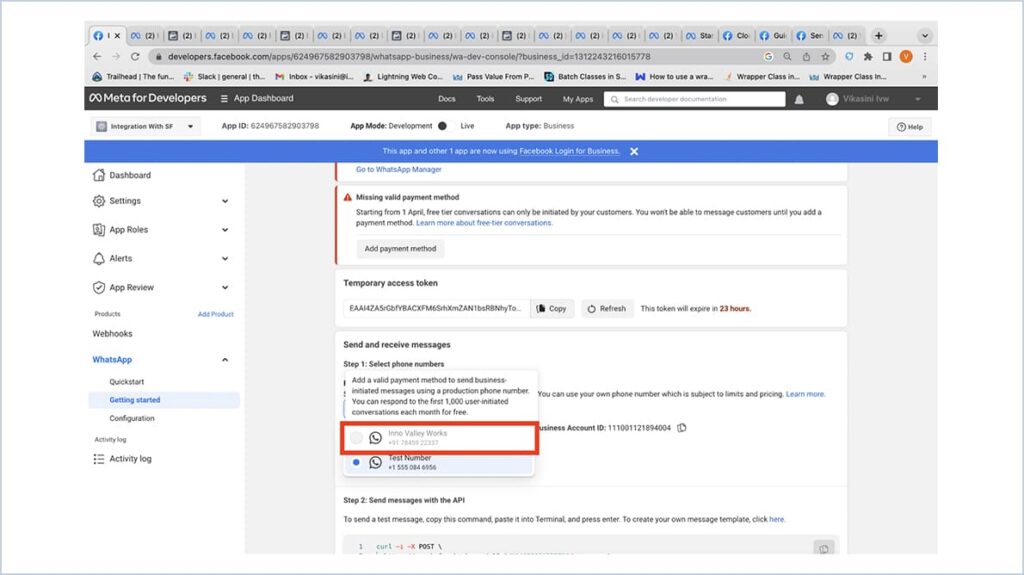
- Go to Whatsapp → API Setup
- Once the number is verified, it can be used to send messages
-
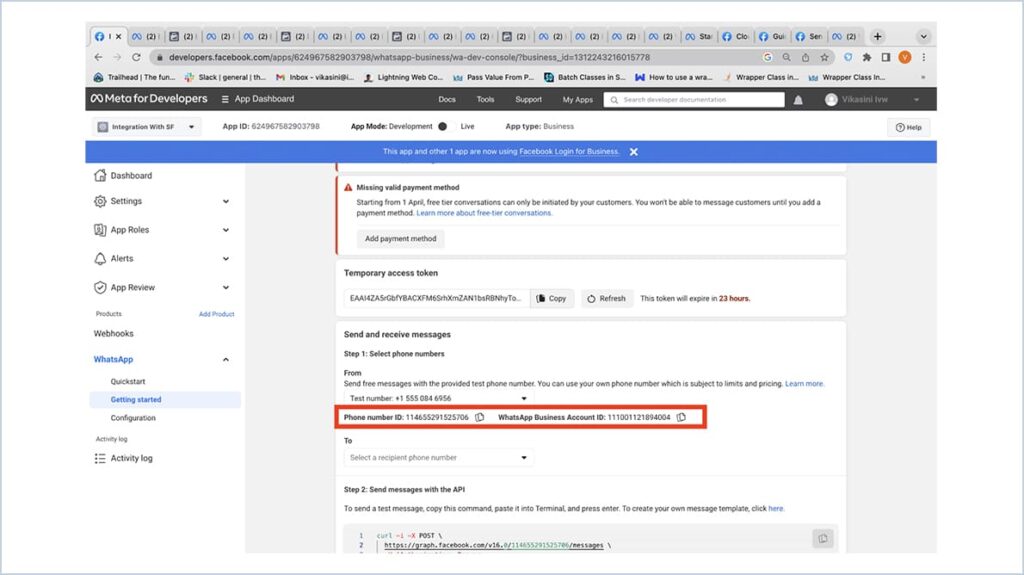
Copy the Phone number Id & Whatsapp business Account Id which will be used in Custom metadata of Salesforce
-
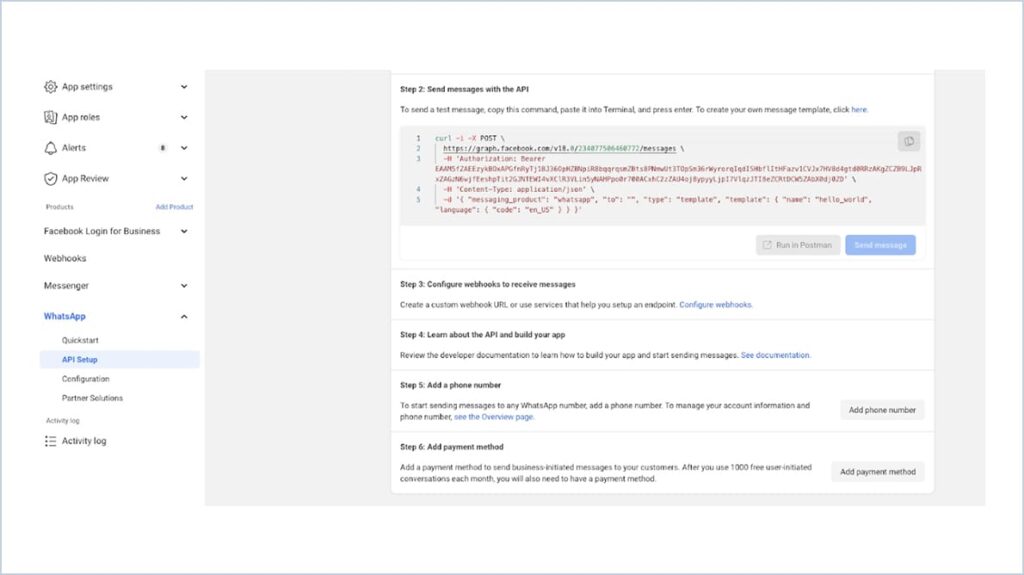
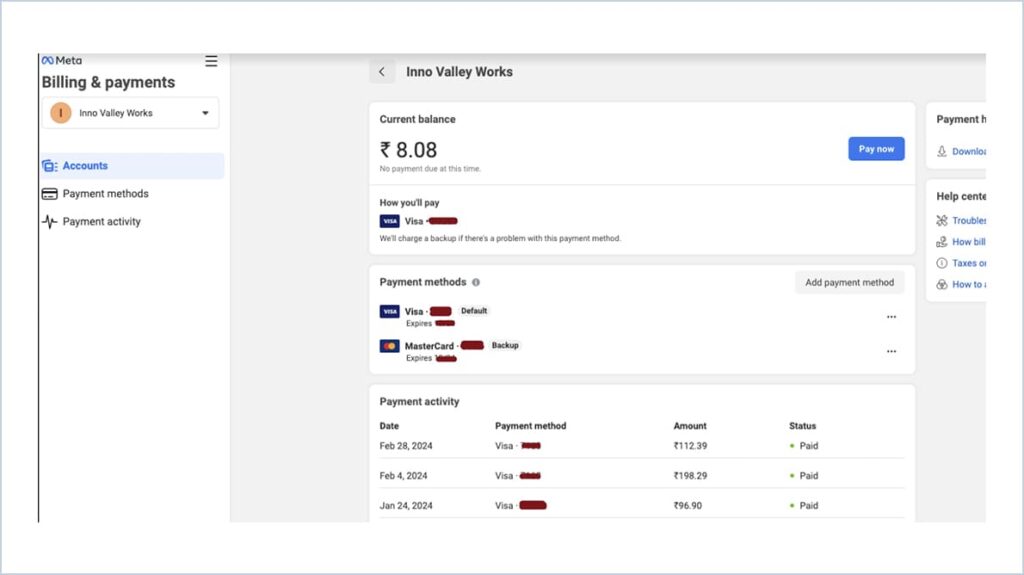
Next is adding the payment method
-
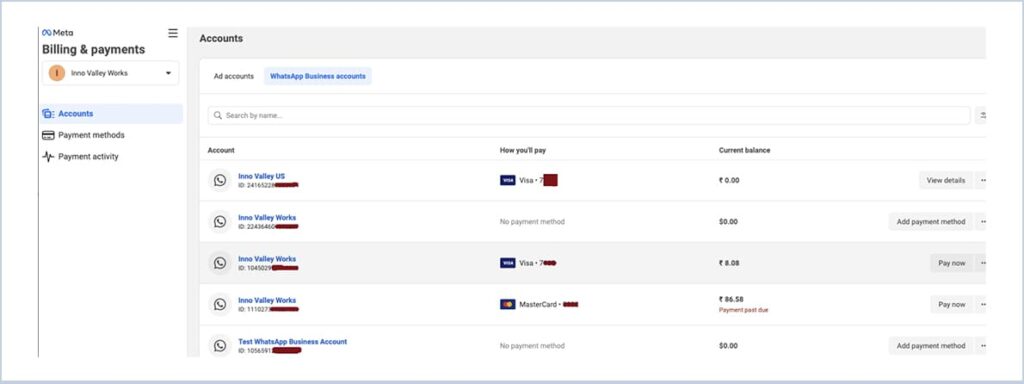
Click Add Payment Method. It will redirect you to the below page
-
You can click on a specific record to view/edit it.
-
After generating the access token, click ‘Configuration’ under ‘WhatsApp.’ You will be redirected to the following page:
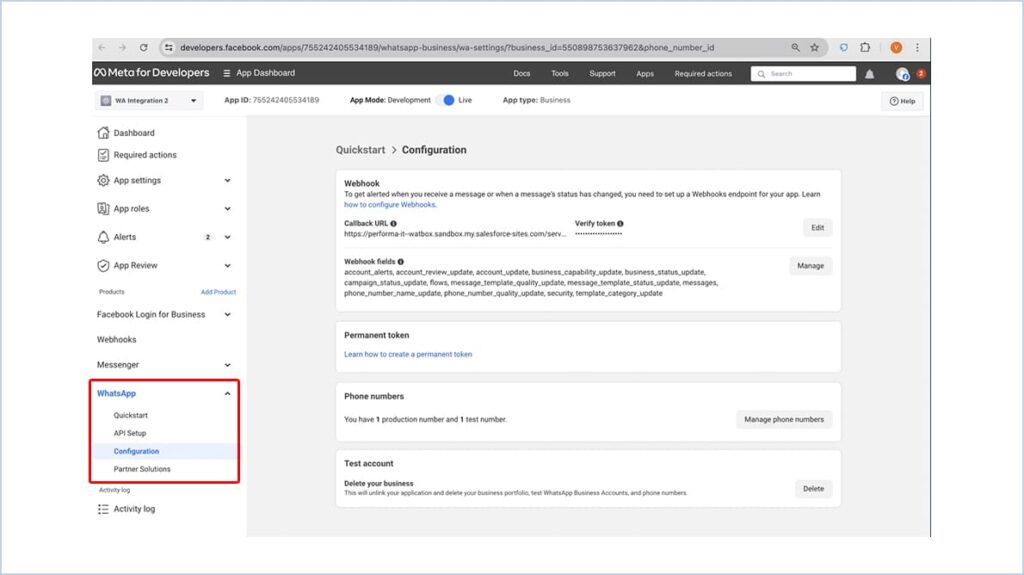
-
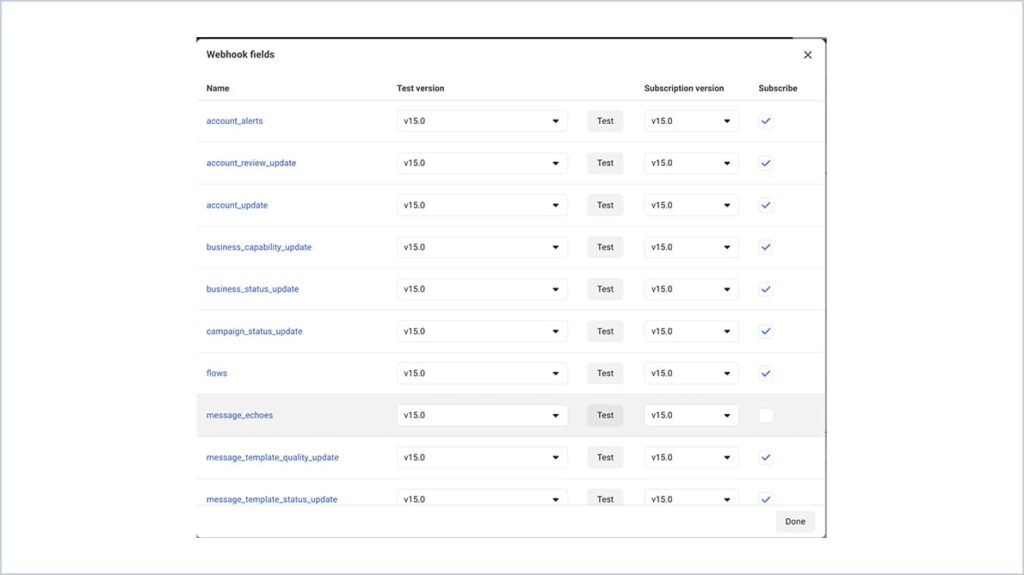
Now Click ‘Manage’ and ensure that ‘messages, message_template_Quality_update’ are ticked, but do not untick any other option.
Creating Templates in Meta :
- Click Quickstart under WhatsApp
- Click on Message Templates
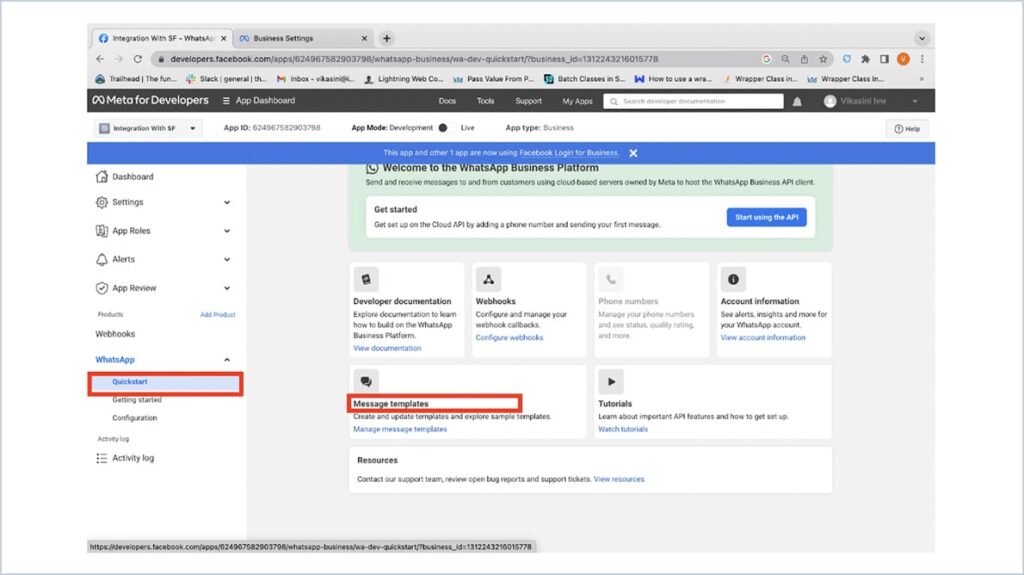
- Click Create Template button
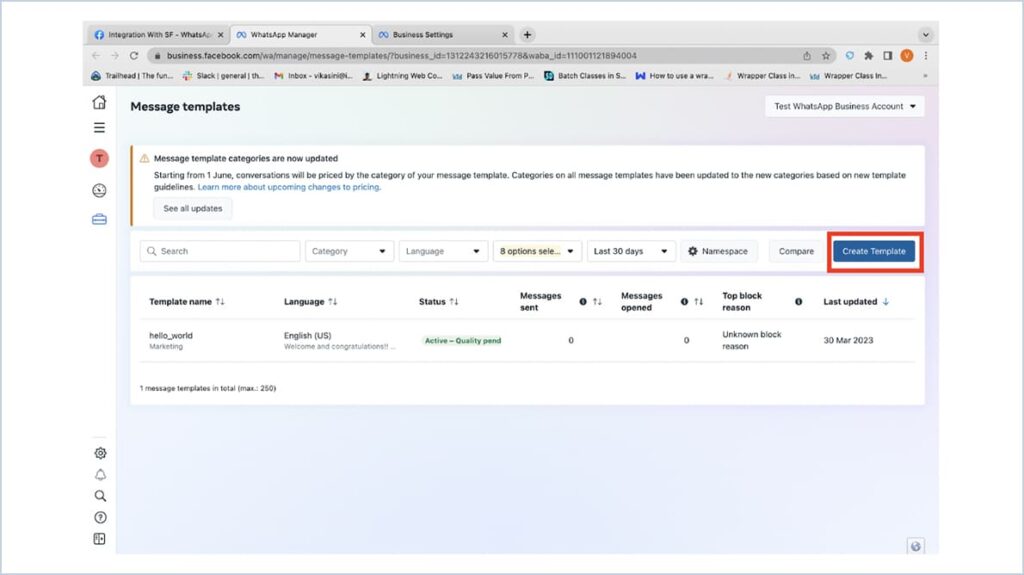
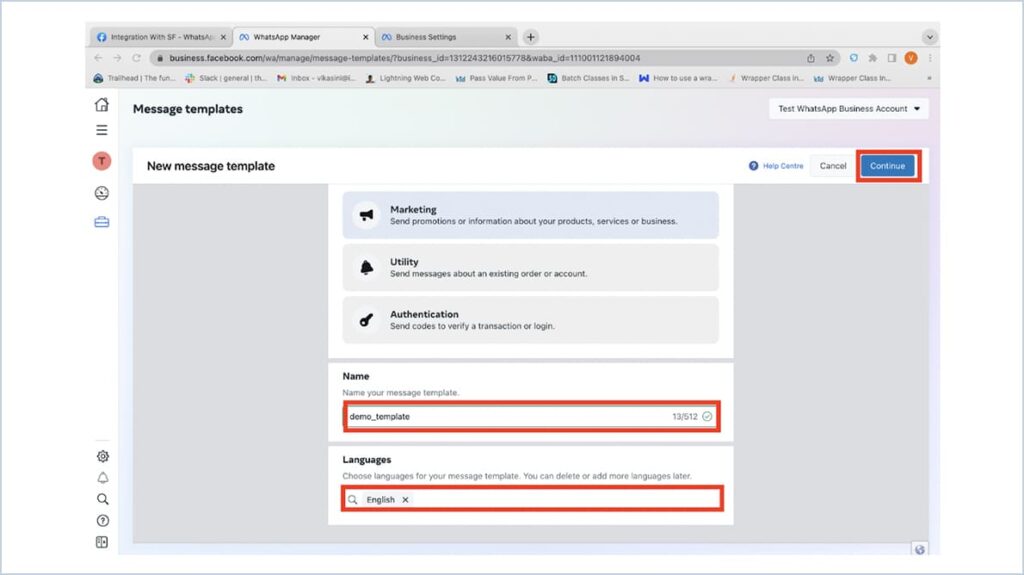
- Choose the category of the template and give name and select a language in which the template should be available. Click Continue
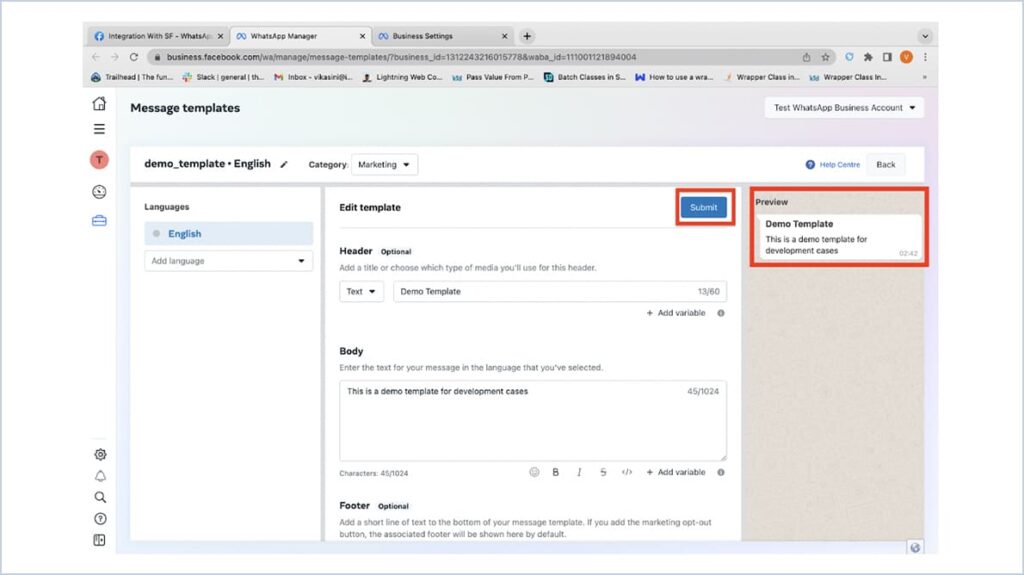
- You need to enter the content of the template
- You can see the preview on the right side. Click submit
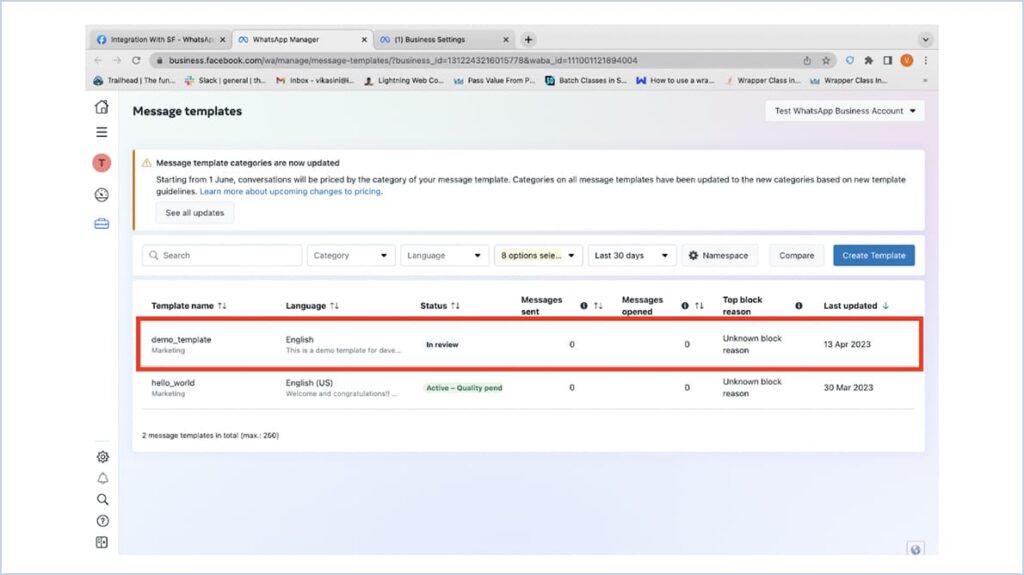
- The template has been created. It needs to be verified by Meta. Once the template is verified status changes to Active.
Guidelines for Message templates :
Template Record Creation in Salesforce :
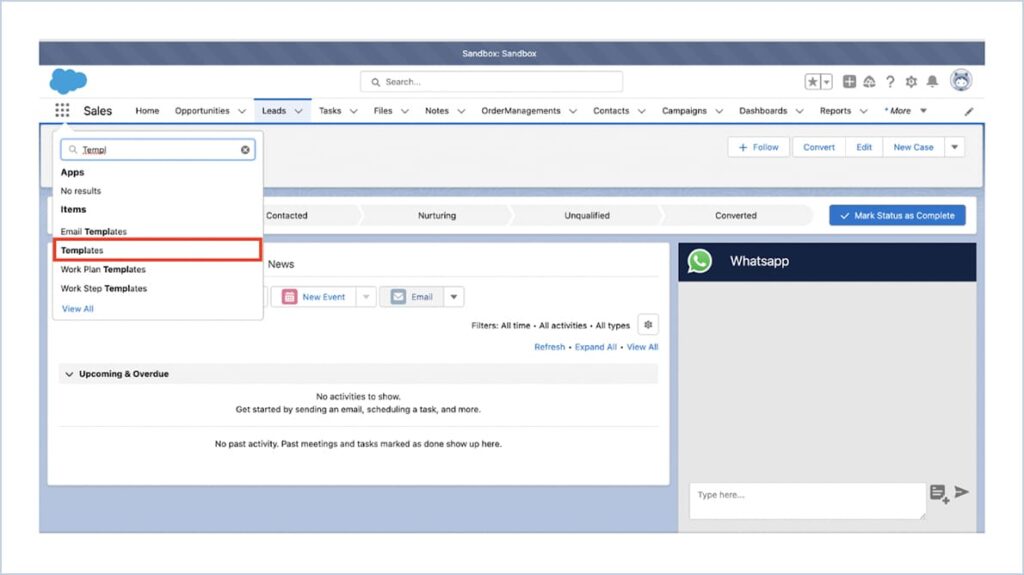
- To Create WA Templates
- Search templates
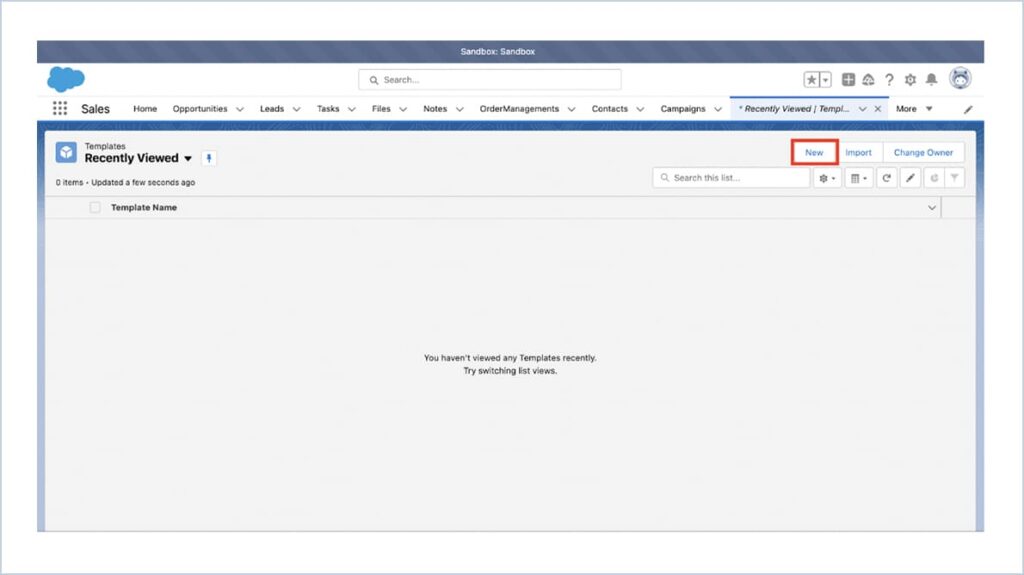
- Click New
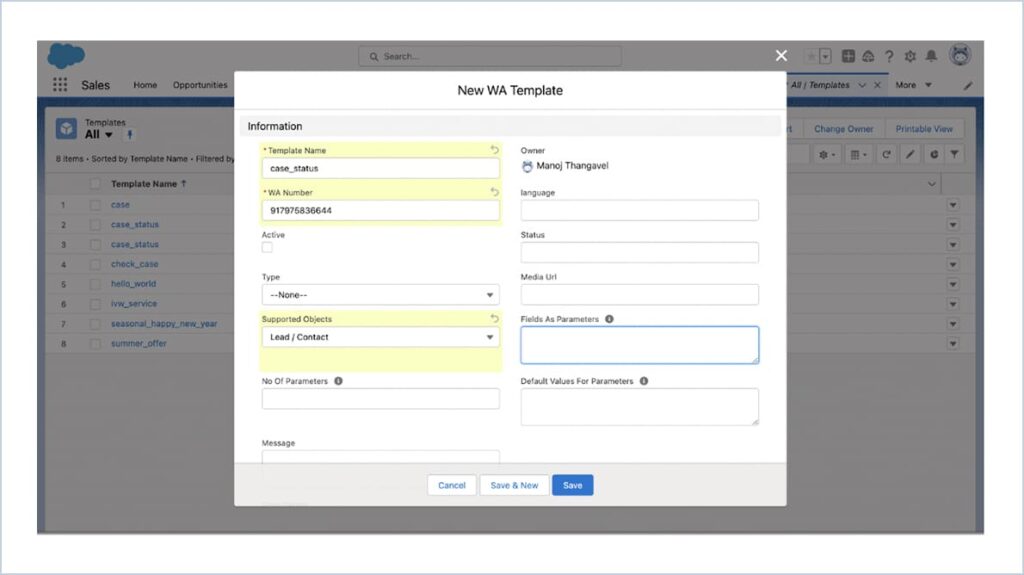
- Enter the template name which you created in Meta
- WA Number – WhatsApp number with country extension (Eg : 919876543210)
- Supported Objects – Choose the object type
Note :
- If the template contains any image in header, Give the image URL in Media URL field
- If the template is a dynamic template,
- Field API Names of field values to be sent as parameter should be given in Fields As Parameters field.
- Give the default values for the template in Default Values For Parameters field.


 .
.