Objective :
Second-generation managed packaging (2GP) users in a new way for AppExchange partners to develop, distribute, and manage their apps and metadata. You can use 2GP to organize your source, build small modular packages, integrate with your version control system, and better utilize your custom Apex code.
Here we can see how to do that practically,
Step 1 – Create a Namespace :
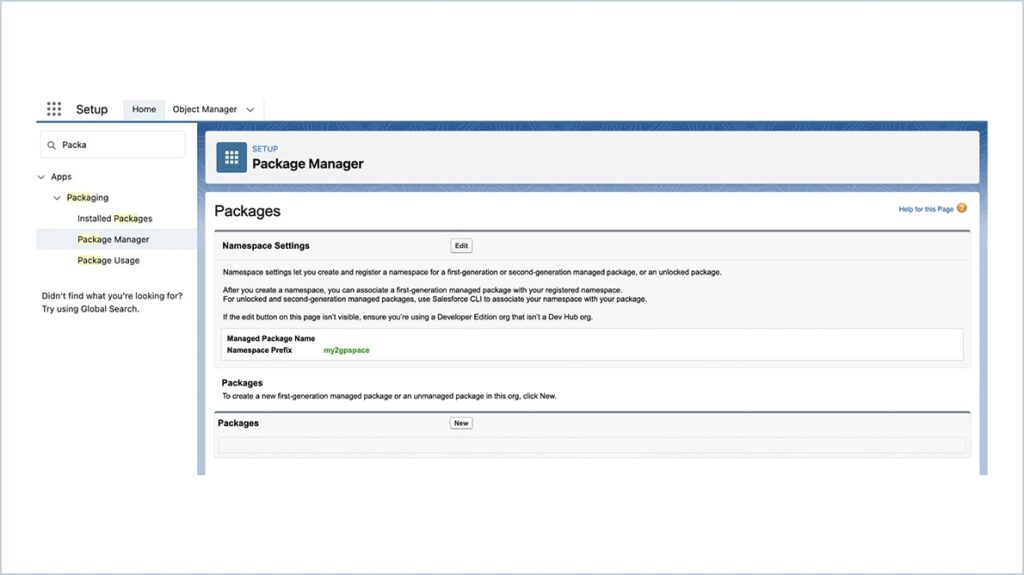
- Go to Setup, enter Package Manager in the Quick Find box, and select Package Manager.
- In Developer Settings, click Edit. Under Change Developer Settings, click Continue.
- In Namespace Prefix enter a namespace and select Check Availability.
- For Package to be managed, select None, then click Review My Selections.
- Review your selections and then click Save.
Step 2 – Link Namespace :
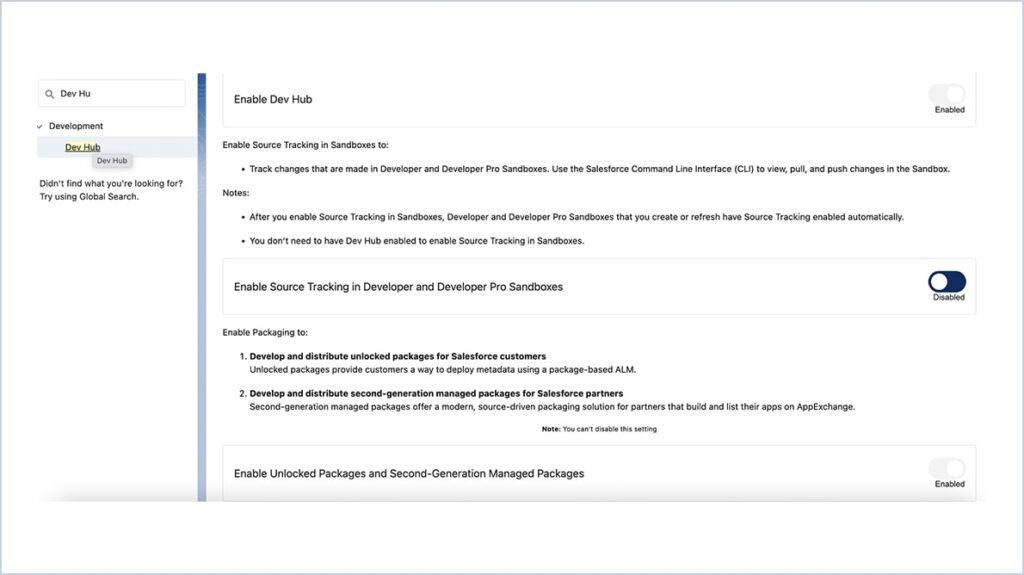
- Go to Setup, enter Dev Hub in the Quick Find box and select Dev Hub.
- Enable Dev Hub and Enable Unlocked Packages and Second Generation Managed Package.
- From the App Launcher menu, select Namespace Registries.
- Click Link Namespace.
- Log in to the Developer Edition org in which your namespace is registered using the org’s System Administrator’s credentials.
- Give Allow Access
Step 3 – Package Create and Installation
- Authorize with Org credentials in VS Code
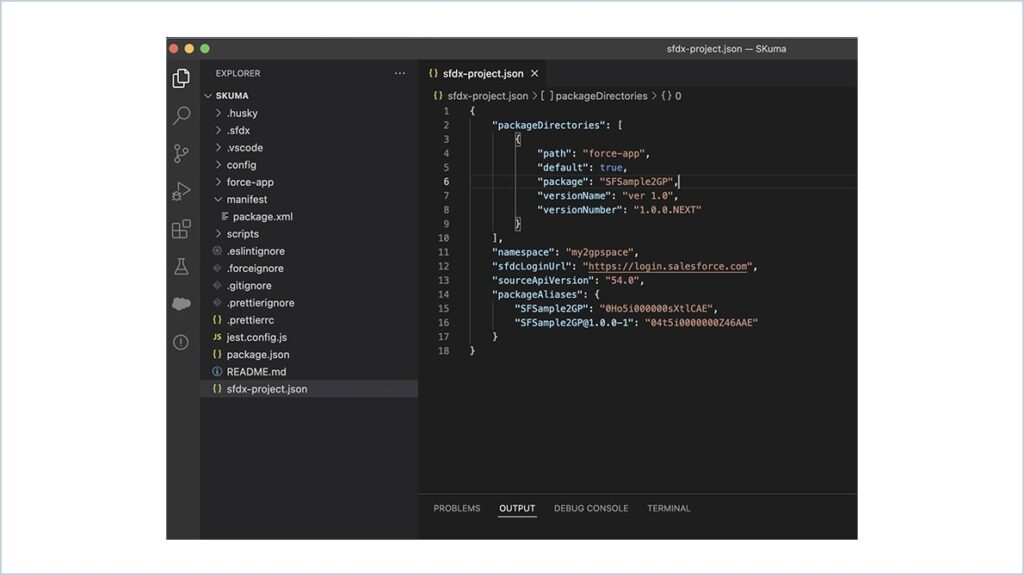
- Open the sfdx-project.json file in VS Code
Authenticate :
sfdx force:auth:web:login -d -a devhuborgalias
Login to Developer org and Give Allow access
Provide your namespace in the sfdx-project.json file below. Which one you have created in step one.
Create a Package :
sfdx force:package:create –name “SFSample2GP” –path force-app –packagetype Managed –targetdevhubusername devhuborgalias
You can change the version name and version number in the below sfdx-project.json file.
Create Version :
sfdx force:package:version:create –package “SFSample2GP” –installationkey 1234 –wait 10 -v devhuborgalias –skipvalidation
Iterate package development more efficiently by skipping validation of dependencies, package ancestors, and metadata during package version creation. Skipping validation reduces the time it takes to create a new package version, but you can promote only validated package versions to the released state.
You can’t specify both skip validation and code coverage, because code coverage is calculated during validation.
Promote the Package :
sfdx force:package:version:promote -p SFSample2GP@1.0.0-1 -v devhuborgalias
System will ask Are you sure you want to be promoted ? y / n => Enter y
Now your package will be ready for release.
Install the Package :
sfdx force:package:install –package “SFSample2GP@1.0.0-1” –targetusername installationorgalias –installationkey 1234 –wait 10 –publishwait 10
Or You can install the package directly from the below link
login.salesforce.com/packaging/installPackage.apexp?p0=04t5i0000000Z46AAE
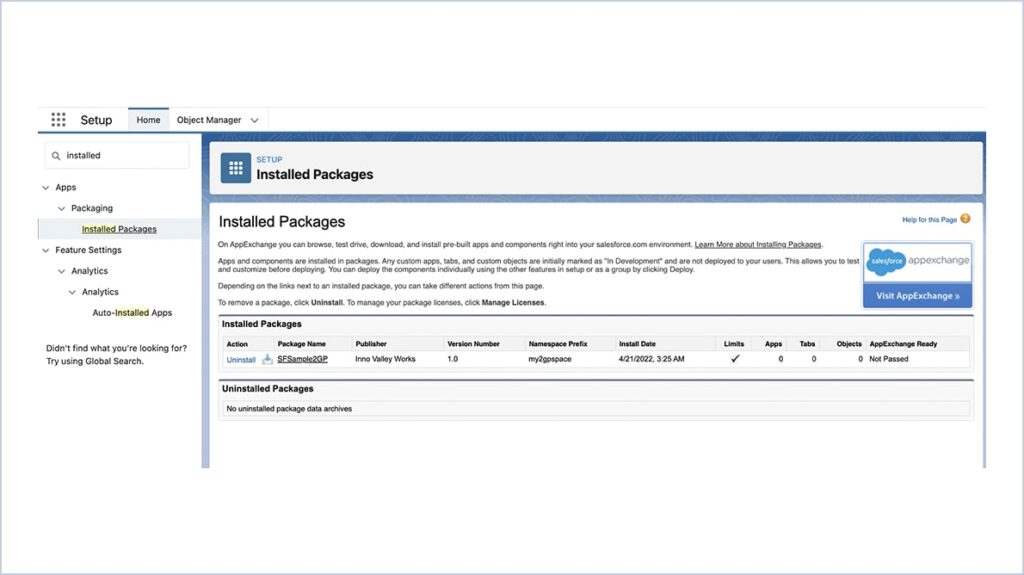
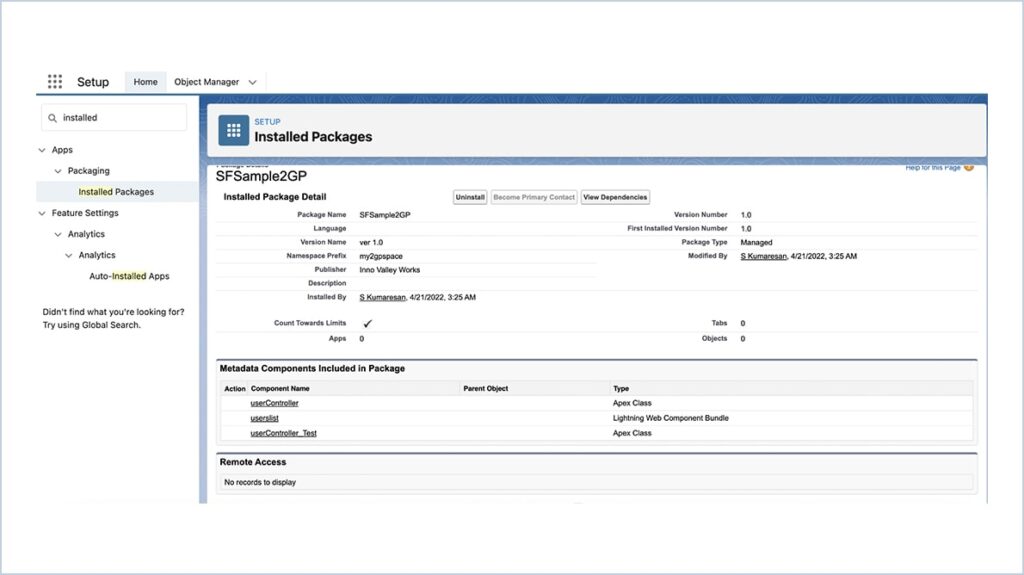
You can view the components in the below screenshot.
We are Inno Valley Works, We are a passionate team of developers, best thinkers and consultants who can solve anything and everything.
With our highly engaging team, you can easily bring the vision to all your business ventures come true.
We have team, put your problem, get your solution
🎥 Check Out Our YouTube Channel
Explore helpful tutorials, product updates, and feature walkthroughs from the team at Innovalley Works.
👉 Visit Our Channel


 .
.