Normally, we generate access tokens by setting the header with grant type, username, password, client ID, and client secret, which can introduce security risks. Thus, we tend to continue with the JWT bearer flow.
OAuth 2.0 JWT bearer flow
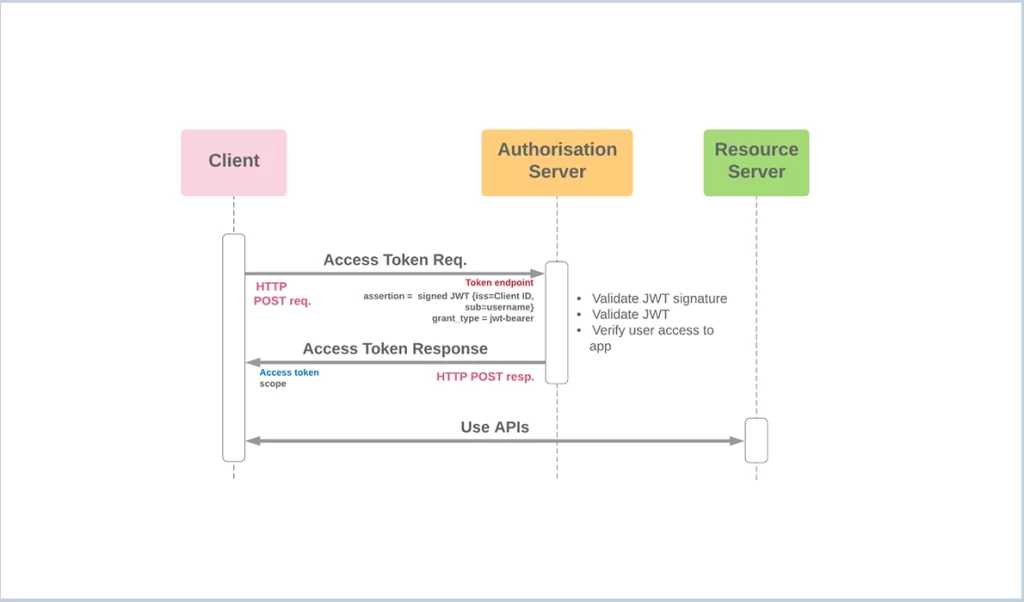
- The OAuth 2.0 JSON Web Token (JWT) bearer flow is a method for server-to-server integration that does not require real-time user interaction.
- In this flow, a server uses a JWT signed with a certificate to request and obtain access tokens.
- This eliminates the need for explicit user involvement during authentication, allowing secure and automated communication between servers.
Basic structure
There are three parts in the JWT structure :
- Header
- Payload
- Signature
Structure of header
{
  "alg": "RS256"
  "typ": "JWT",
}| Header Claim | Description |
| alg (algorithm) | The RS256 algorithm is a method used to sign the access token in a way that ensures its security and prevents tampering. In Salesforce, only the RS256 algorithm is supported. |
| typ (type) | It is used to specify the token type. The JWT-based access token will have the same value as JWT. |
Structure of payload
{
"iss": "3MVG99OxTyEMCQ3gNp2PjkqeZKxnmAiG1xV4oHh9AKL_rSK.BoSVPGZHQ
ukXnVjzRgSuQqGn75NL7yfkQcyy7",
"sub": "my@email.com",
"aud": "https://login.salesforce.com",
"exp”: "1333685628"
}| Payload Claim | Description |
| iss(issuer) | The issuer is nothing but the OAuth client ID of your application |
| aud (audience) | The audience claim in the JWT identifies the authorization server as the intended recipient. For Salesforce, the audience can be any one of the following: https://login.salesforce.com https://test.salesforce.com |
| sub | The subject should contain the user’s username |
| exp (expiration time) | The token’s expiration is defined by the date and time, measured in seconds since January 1, 1970, at 00:00:00 UTC. Salesforce allows a 3-minute buffer for clock skew, ensuring that the token remains valid for an extra 3 minutes after the specified expiration time. For instance, if the expiration time is set to 1735743600 seconds, corresponding to January 1, 2025, at 15:00:00 UTC, the token will remain valid until 15:03:00 UTC on that particular date. |
The final structure of JWT :
<headerbase64encodedurl>.<claimsbase64encodedclaims>.<signature(uses algorithm like RS 256)>
Flow diagram :
Let’s generate the access token
1. Creating a private key and X.509 certificate
1.1. Download OpenSSL :
- The initial step in using the OAuth JWT Bearer Token flow is to generate a certificate.
- To create the certificate, you will need to download and install OpenSSL.
Link to download OpenSSL: OpenSSL
After downloading the OpenSSL check for the version present in your system using the command.
C:\Users\path name>openssl version
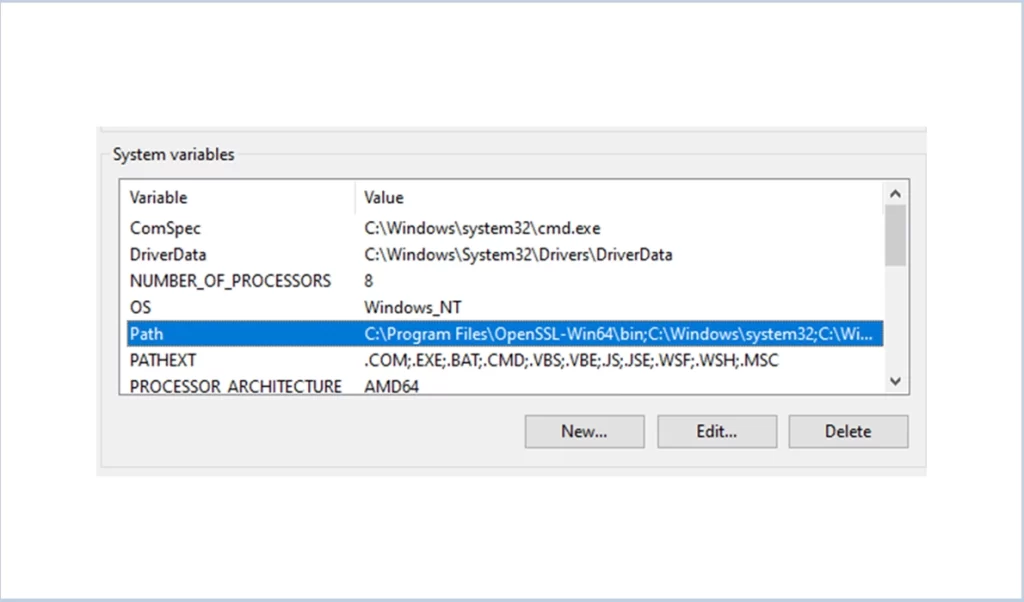
If the OpenSSL version is not present after downloading then set the path of the openssl.exe in a system environment variable.
1.2.Generate an RSA private key
Create a directory to generate the files using the below commands in the command prompt.
C:\Users\path name>cd Desktop
C:\Users\path name\Desktop>mkdir JWT
C:\Users\Ipath name\Desktop>cd JWT
Use the below command to generate the RSA private pass key.
openssl genrsa -des3 -passout pass:x -out server.pass.key 2048
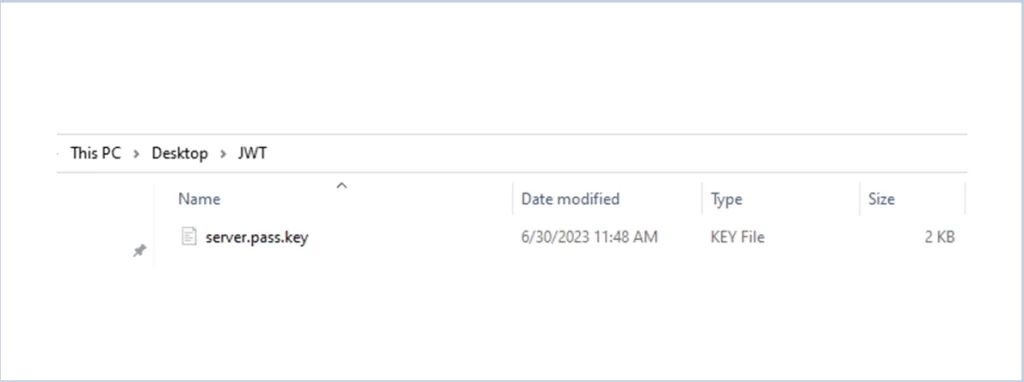
The server. pass.key file gets downloaded in the directory :
1.3 Generate key file from the server. pass.key file
Use the below command to generate the private key.
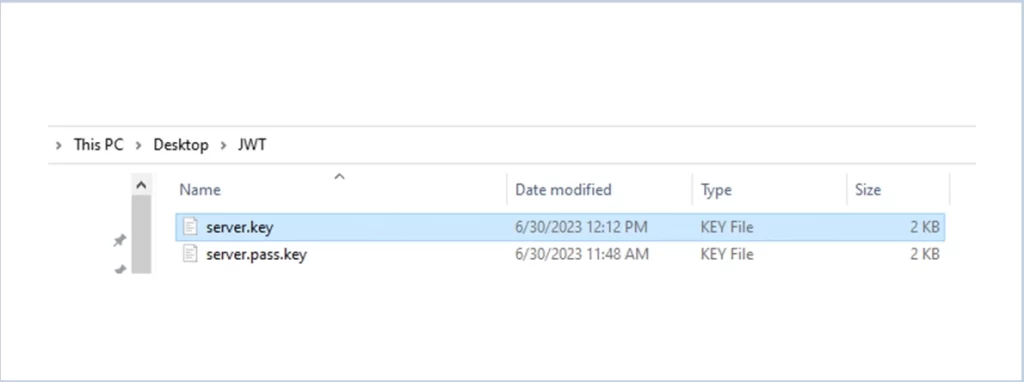
openssl rsa -passin pass:x -in server.pass.Key -out server.key
Here the input will be server.pass.key and the output will be server.key
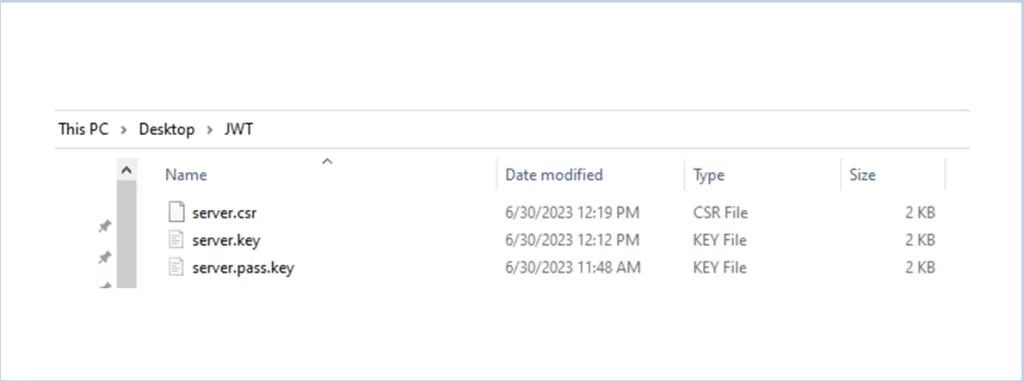
1.4 Request for generating the csr file
Use the below command to generate the csr file
openssl req -new -key server.key -out server.csr
Here the input will be the server.key and the output will be the server.csr
Once you execute the above command it will ask you some questions and information fill in the basic info like Country Name, State or province Name, and Organization Name.
After this, the csr file will be generated
1.5 Request for generating the certificate
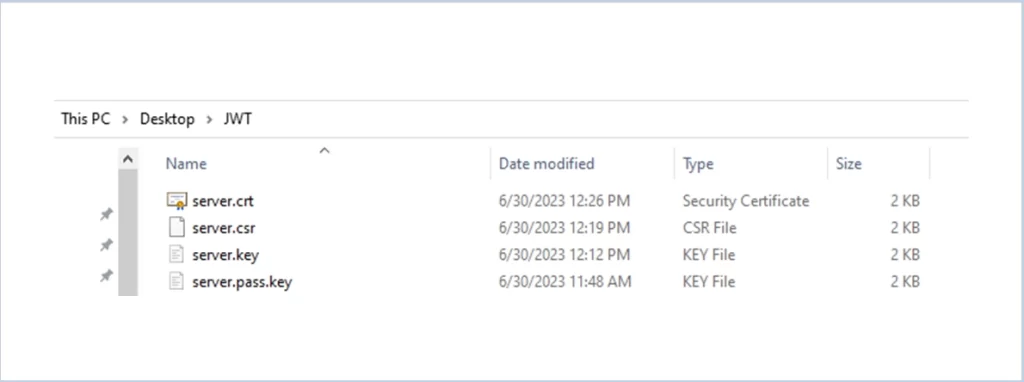
Use the below command to generate the certificate
openssl x509 -req -sha256 -days 365 -in server.csr -signkey server.key -out server.crt
2. Create JWT connected app in Salesforce
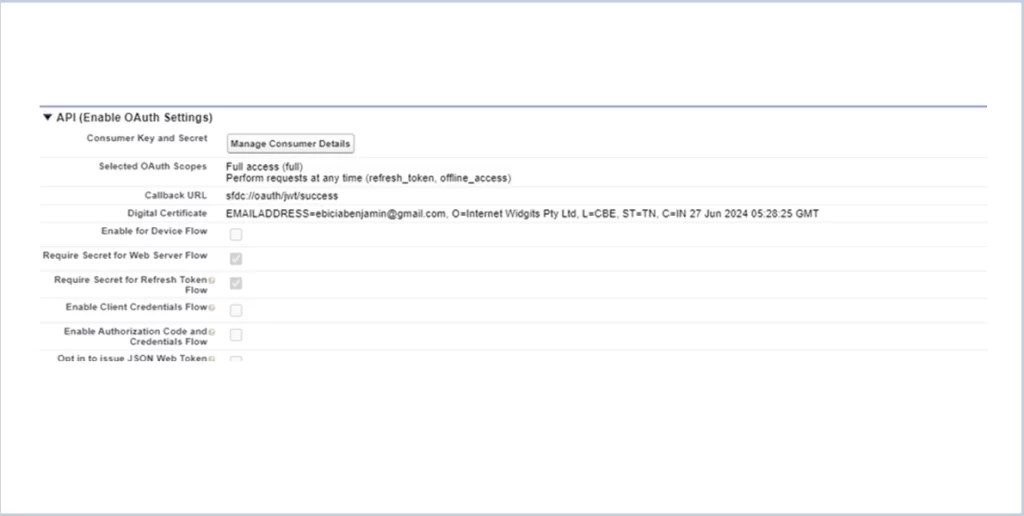
Go to setup => search for connected app => then click on new (connected app) => then provide below details.
1. Fill name and email
2. Click on “Enable OAuth Setting”
3. Call back URL “sfdc://oauth/jwt/success”(It doesn’t need any call back url just for
validation give a url).
4. Click on “Use Digital Signature” and upload the certificate we created
using the commands.
5. Select the following OAuth scopes
- Full access
- Perform requests at any time (refresh_token, offline_access)
6. Click on save
3. Prior approval of the client app
- Go to Setup -> search for Manage Connected Apps.
- Click ‘Edit Policies’ against your app.
- Click on Permitted Users, select “Admin approved users are pre-authorized“ and then save the changes made.
- Now it’s time to provide access to the profile or permission set. Go to setup => Search for Manage Connected Apps => Scroll down to check for profiles.
- Select the profile which you want to access for example System Administrator.
4. Create a JWT token
You can use JWT.io to construct a token on your own.
Webpage link: JWT.io
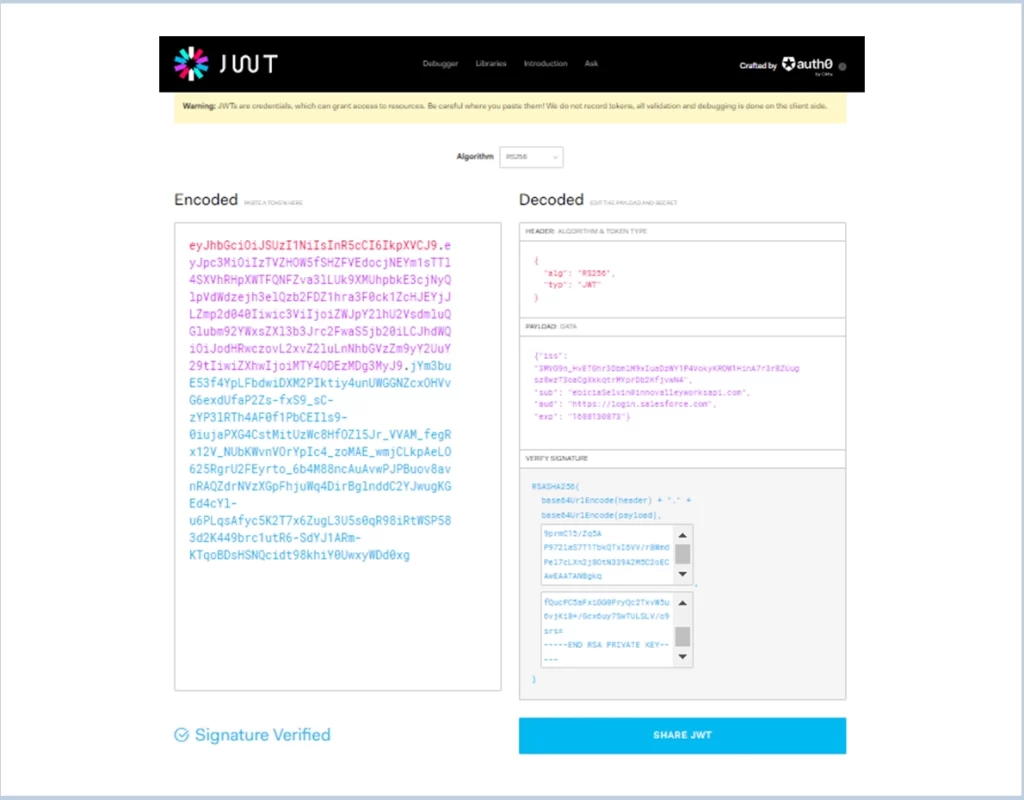
- Set the header as algorithm (RS256),
- Then, give the necessary details for the payload as mentioned in the structure of the payload.
- You can use Unix timestamp to create an expiration date in Unix time format. Just pick your current date/time + 2 hours to ensure the JWT is still valid.
- Copy the content of your server.key and server.crt of the certificate by opening it in any editor and paste it into the signature of the JWT.io
- Once all look good you will see the signature verified at the bottom of the screen with JWT token.
- The encoded value on the left of the jwt.io will be the token of the jwt (the token which is used as an assertion in the header of Postman).
The screenshot of JWT.io after the giving necessary information is added below.
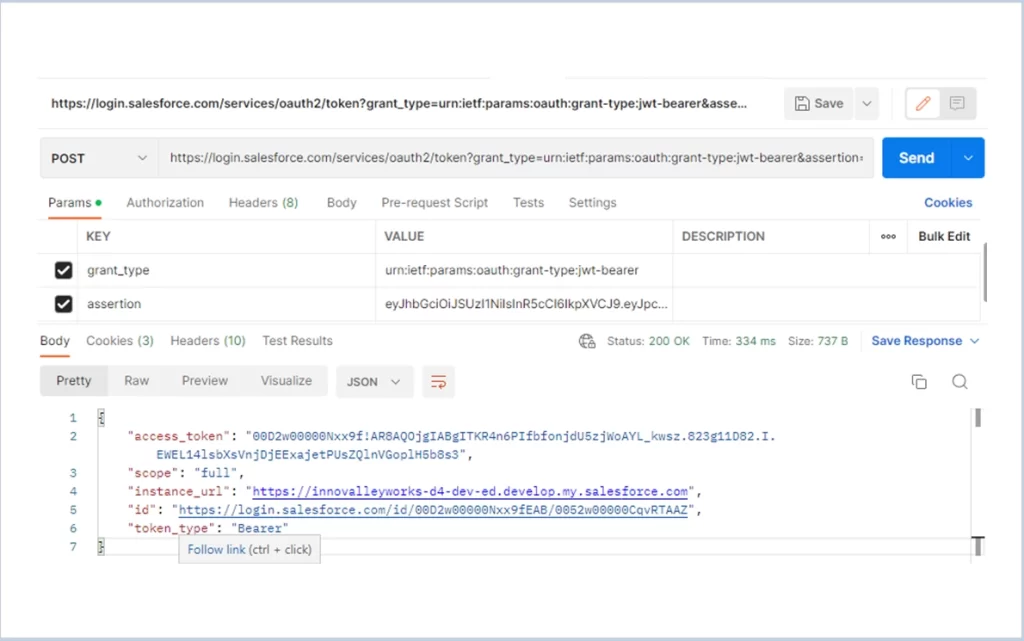
5. Get access token using JWT in POSTMAN
Method: POST
URL: https://login.salesforce.com/services/oauth2/token
Header Param:
grand_type: urn:ietf:params:oauth:grant-type:jwt-bearer
assertion: Use JWT TOKEN created in STEP 4 using jwt.io.
Header:https://login.salesforce.com/services/oauth2/token?grant_type=urn:ietf:params:oauth:grant-type:jwt-bearer&assertion=eyJhbGciOiJSUzI1NiIsInR5cCI6IkpXVCJ9.MyJ9.9Rm-KTqoBDsHSNQcidt98khiY0UwxyWDd0xg
Success response of the header :
{
    "access_token": "00D2w00000HocwF!AQoAQF0jRyMKTDtlaJQp4zYc6_U4s9WB58xJNebThanRWj723gdcPani6bKfK5SzzmFAQHO9AYwtEbLSZtMmw6cQ0Rrk0vWp",
    "scope": "full",
    "instance_url": "https://innovalleyworks57-dev-ed.develop.my.salesforce.com",
    "id": "https://login.salesforce.com/id/00D2w00000HocwFEAR/0052w000009qrqvAAA",
    "token_type": "Bearer"
}
The success response screenshot is given below :
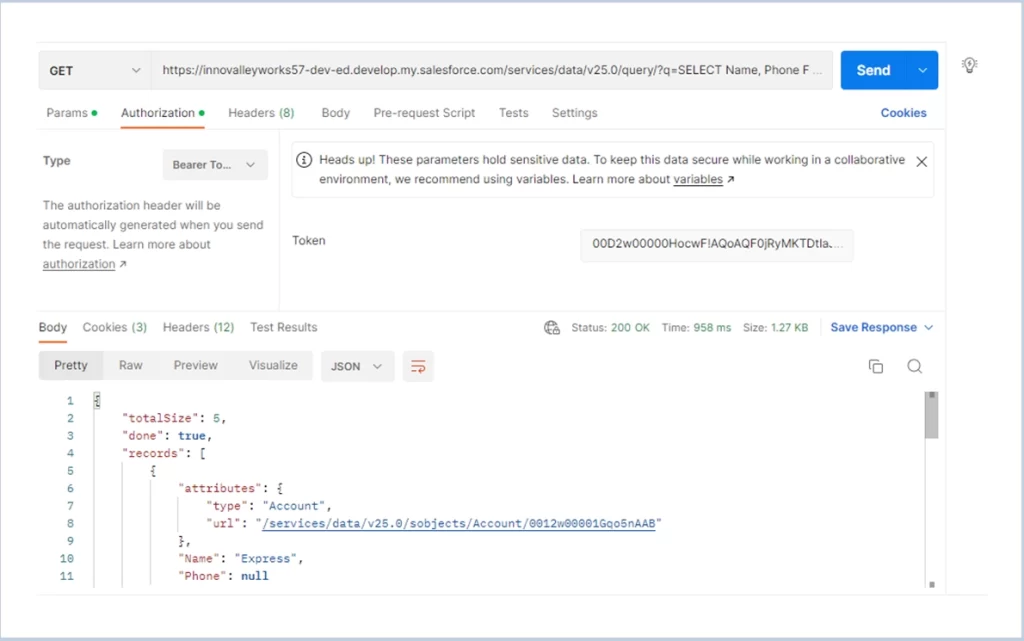
Getting data’s using the access token generated from the JWT token :


 .
.